
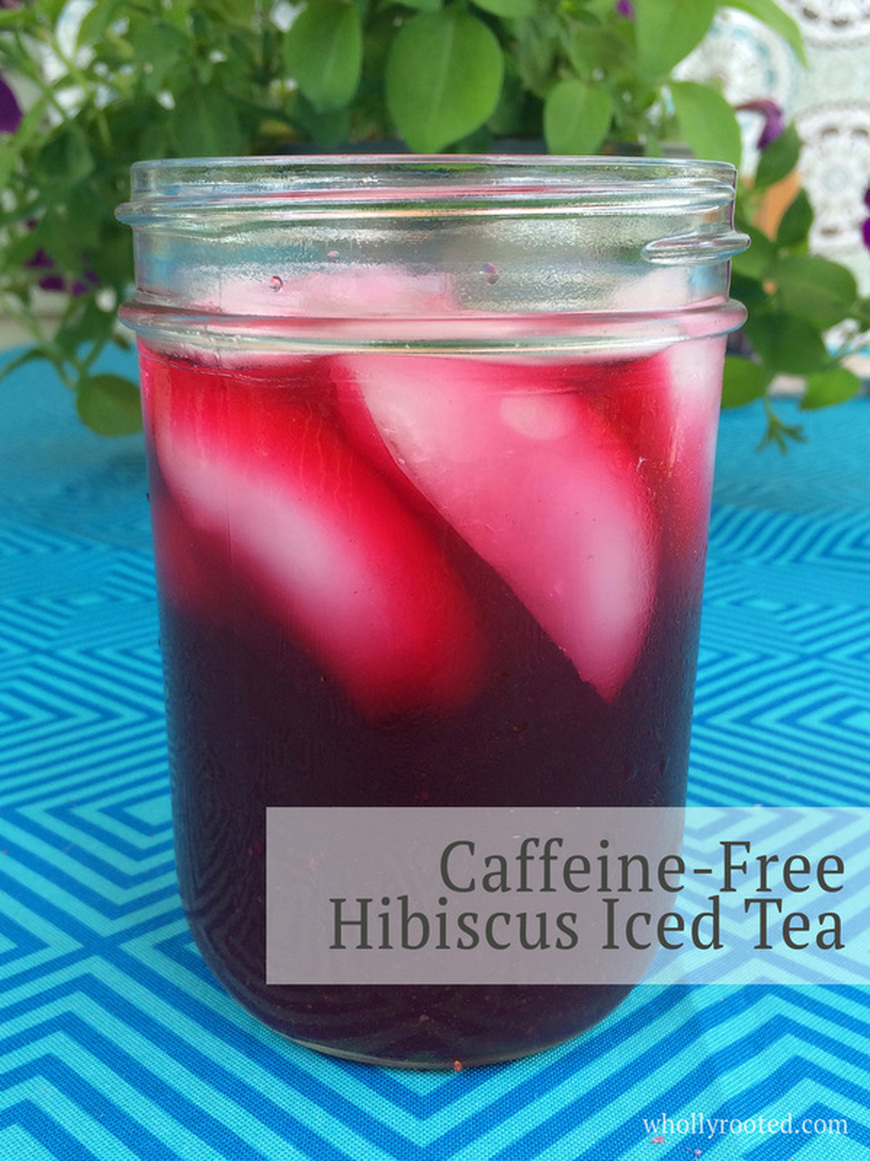
I have always been happy drinking water all day. My husband, however, likes having iced beverages with many flavors, and isn't much of a water drinker. So these days I make shrubs, switchels, fruit syrups to use with carbonated water, and of course iced teas. I prefer mixing some herbal goodness with my drinks, so this recipe combines the great properties of turmeric, ginger, hibiscus, citrus and rooibos with some fresh local honey to make an extremely delicious tea. This has so much flavor and is so refreshing - and with no caffeine we can drink it in the evening as we sit on the deck admiring the sunset.

Caffeine-Free Hibiscus Iced TeaPrint |
{wholly rooted}Iced tea is a summer staple and this recipe combines a wonderful rich colour of hibiscus with a healthy boost of turmeric and ginger. This is has a rich twangy flavor, perfect for hot summer days or steamy evenings. Green rooibos is a caffeine-free herb that has a mild green-tea like flavour and contains antioxidants as well as minerals and flavonoids. I like using green rooibos because caffeine-free means we can drink iced tea into the evening! {ingredients}
Using a half gallon canning jar or heat safe pitcher add your hibiscus, ginger, turmeric, citrus peel, and rooibos. 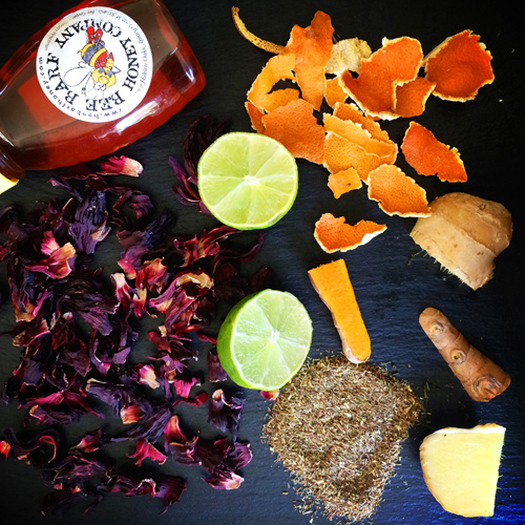
I love drinks that are not too sweet and that are very refreshing. Today is going to get into the 80's and I have already been outside watering the garden, opening up the greenhouses and watering all of the seedlings. The first thing I wanted when I came inside was a cold glass of iced tea. Yum. This is one of my favorite cold drink recipes and the smell and taste of it just feel like summer to me! More about these ingredients: Green Rooibos Tea Benefits and Use Health Benefits of Hibiscus The Amazing and Mighty Ginger 6 Health Benefits of Turmeric 8 Healthy Lime Facts
5 Comments
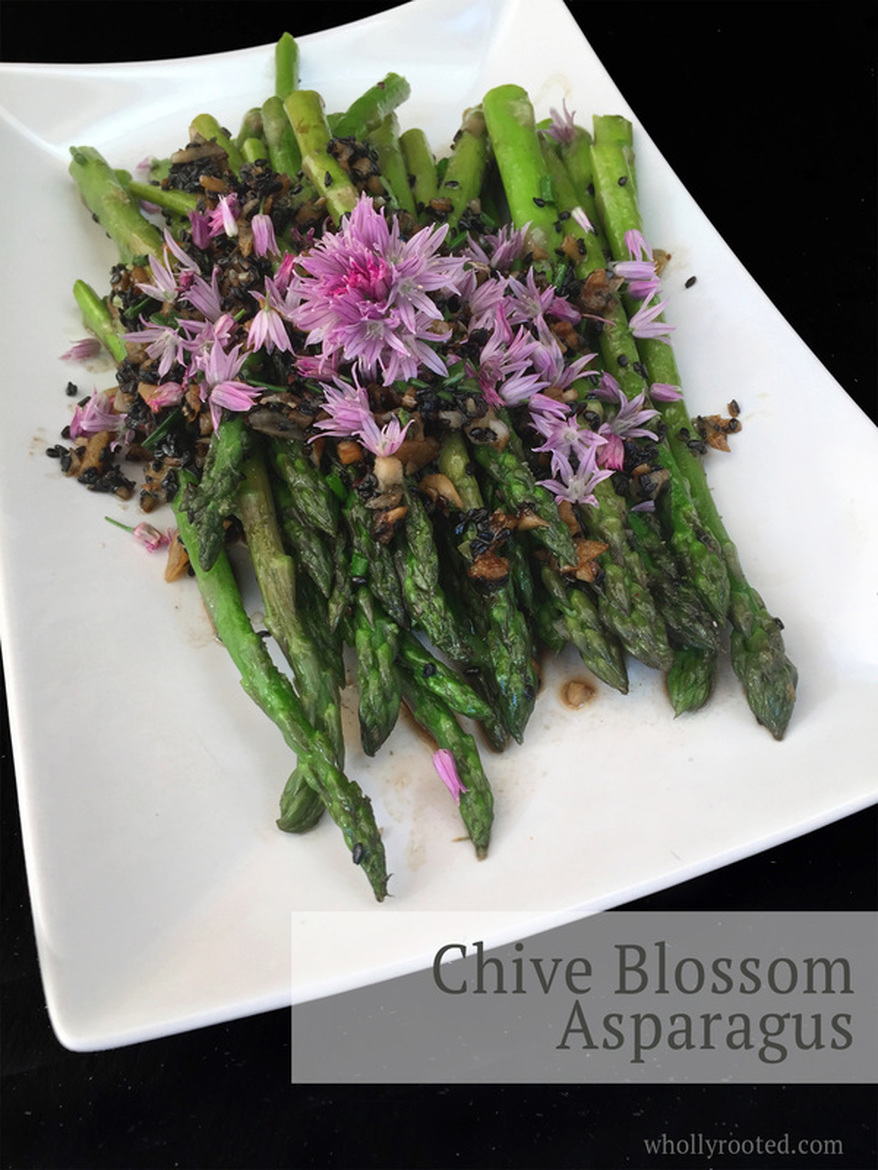
We have long winters here in Wisconsin, so when things start to grow, it is exciting. We also don't have long seasons of items once they do appear. Asparagus, rhubarb, strawberries - all are in and out quickly, so we tend to do as much as we can while they are here. I love asparagus. My husband didn't used to like it so much, but it has grown on him as I experiment and find more flavors it blends with. Asparagus and chives are amazing together. And the smoky richness of sesame oil, the salty flavor of soy, and the crunchy bite of black sesame all meld together to make an awesome asparagus dish. I usually make this as a side dish, but it is also fantastic over a bed of lettuce (or arugula!) with a little soy/sesame oil dressing drizzled over the top.
Chive Blossom AsparagusPrint |
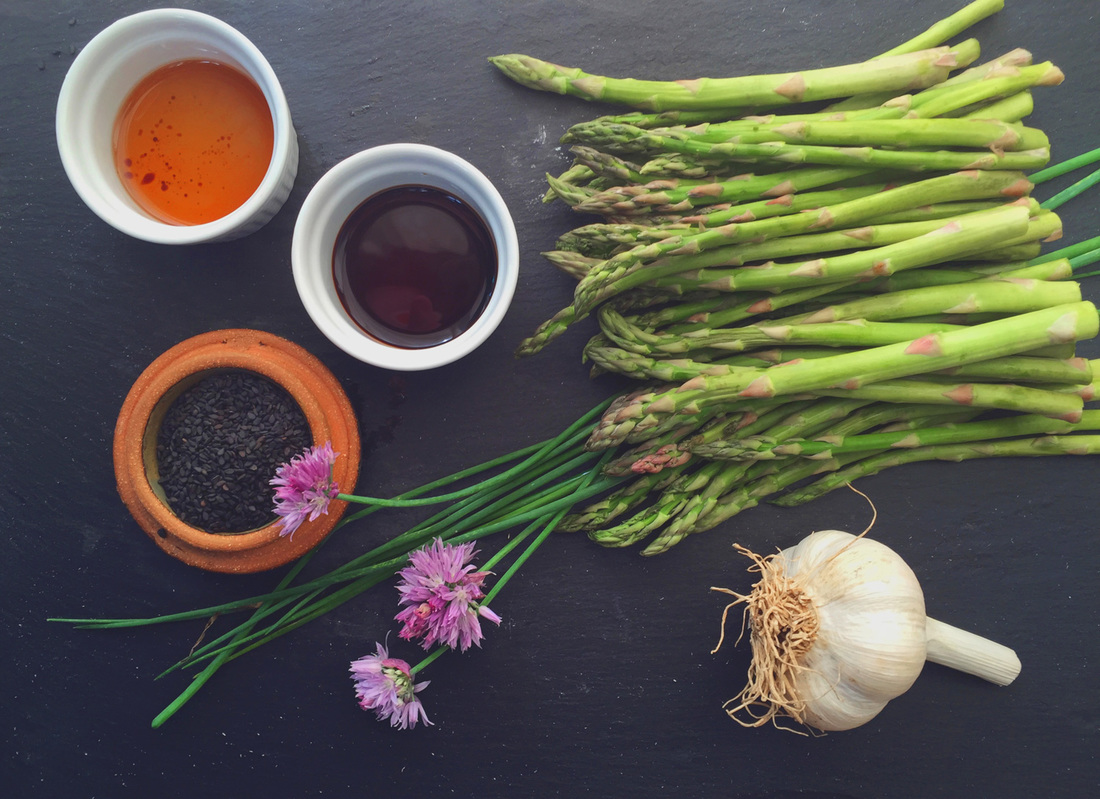
{wholly rooted}Bright green spears of asparagus are among the earliest of garden harvests. The thin, delicate spears work well with many different flavours, and are delicious steamed, grilled, as soup, pickled, and as a side dish. This recipe combines early season asparagus alongside another spring visitor – chive blossoms. {ingredients}
Blanch your asparagus for about 2 minutes in boiling water.
This recipe is quick and easy, but has a lot of flavor. A great way to combine the ingredients of spring into one fantastic dish. Chive Blossom Infused Vinegar Chives are a mid to late spring herb that are often overlooked. Chives are delicious in salads, egg dishes, sprinkled over soups, and more. Don’t forget the blossoms either. The delicate pinkish purple flower heads have a lovely onion/garlic flavor. Chive vinegar is a quick, simple way to capture some of that. 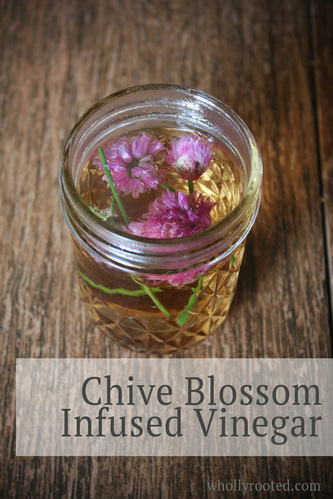
Directions:
Pack a ½ pint jar with (clean) chive blossoms, along with a few chive stems. Pour over any type of mild white vinegar you like – you can pour over room temperature vinegar, but warm the vinegar first for best results. Make sure all blossoms are fully covered. Let sit for a few days in your fridge until the blossoms have turned the vinegar a lovely shade of pink. Strain out the old chive flowers (add a few fresh ones for decoration if you wish), store in the fridge, and use in salad dressings!
Spring may seem slow to start some years, but when the first greens, herbs and veggies appear we can't get enough. Here is to spring, and fresh food from the garden!
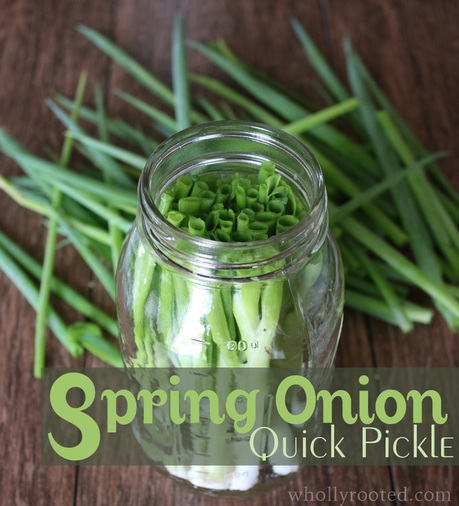
I like quick pickles. I don't have a ton of time to make dozens of jars of the same thing endlessly, and quite honestly I get bored with flavors and really like mixing it up, using what is fresh on hand, and having small batches of a variety of quick pickles to liven up meals, crudités, salads, and of course for snacks. At any given moment year-round I have a few jars of something in my fridge. Right now I have pickled cucumbers and garlic in a slightly sweet brine, and pickled daikon which are amazingly peppery and crunchy. Spring onions are one of the first things in spring that we can find here in Wisconsin, and I like pickling them so that I can spread them out throughout the summer. I like the small green brilliance of their flavor in a pickle and they work on salads, burgers, or with a plate of hummus and tomatoes. 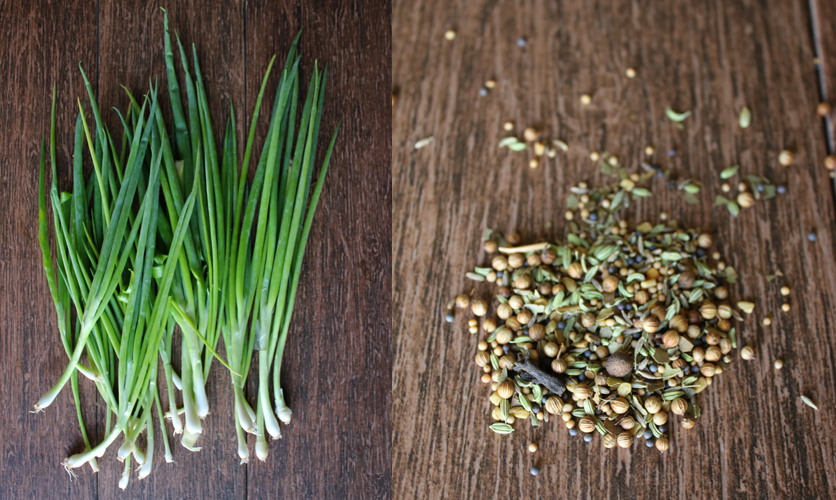
Spring Onion Quick PicklePrint |
{wholly rooted}Quick pickles are a delicious way to use the bounty of the season to create a variety of flavours and textures. This recipe uses one of the gardens earliest arrivals – spring onions, or scallions. {ingredients}
Heat water/vinegar/sugar/salt/garlic in a pot until dissolved. Let cool to room temp.
Or try this: Add some additional zesty flavor by reducing the white vinegar in the recipe above to 1 cup and add 1/2 cup umeboshi plum vinegar.
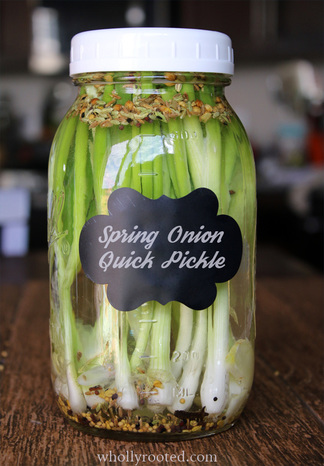
Another bonus of having a fresh pickling brine is when all of your salad greens start coming in full blast you not only have some pickled scallions to put on your salad, but you have a tasty brine to use for salad dressings. Simply mix a little pickle brine with extra virgin olive oil, s&p, and a tiny bit of grainy mustard. Stir and boom. Delicious dressing.
I know most of us have the image of a farm woman in her hot kitchen with 422 pounds of one kind of cucumber frantically pickling and canning until 3AM. But these days we can get such a wide variety of seeds and can easily grow such a diversity of herbs, fruit, and vegetables, that we don't need to mono-pickle. Small batch pickling is a quick, easy, and delicious way to preserve the extras, the favorites, and the flavors of the season! Spring comes so slowly after a long winter, but jumping back into the garden and kitchen to start preserving again feels good. After a long winter it feels pretty much like a big TA-DAAAAA!  Holidays that involve food are always a challenge with allergy kids. Even with the wonderful abundance of (insert your allergen) free treats in stores, it is still a juggle when kids without allergies want things that the other cannot have. The same goes for the spring egg hunt type of activities. We cannot go to any public events, as they have every allergen known to man-kind in little plastic eggs or goodie bags. I like making spring baskets for the kids, which are pre-filled, so everyone gets what they like, and it is safe and not disappointing for the allergy kid. He isn't left out, doesn't have to give anything up after he finds it, and can safely eat everything he has in his basket. For groups or parties, finding fun foods to add to a table can be a challenge. The chocolate spoons are fun and creative and look festive. You can make these with white chocolate or milk chocolate if you don't have allergies, but I make them using enjoy life vegan chips. For sprinkles, I use vegan sprinkles, coconut, colored sugar crystals, or anything else that is colorful and tasty. 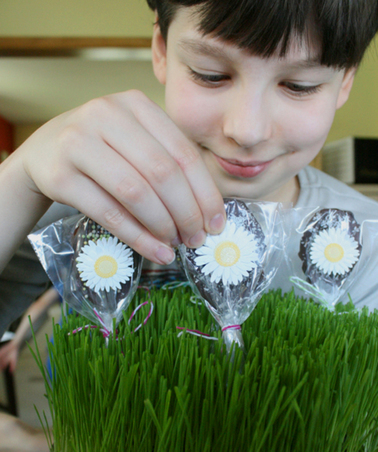 Chocolate Dipped Spoons{GF, DF, NF} Ingredients: 150 g/ 5 oz. chocolate chips (For allergy friendly find organic vegan or carob chips sweetened with a natural sweetener. The packaging will say dairy free/nut free. I like Enjoy Life brand.) 6-8 tablespoons (or about double if teaspoons). If this is for your own family, you can just use your own tablespoons or teaspoons. If you are having guests, visit a thrift store for cute mismatched spoons or buy recycled plastic or bamboo disposables! Toppings: Good toppings include unsweetened coconut flakes, vegan gluten-free sprinkles, chopped dried cherries, or even dried lavender buds. Pick the toppings that are allergy and/or age appropriate. For older teens or adults, try sprinkling things like Celtic sea salt, wasabi powder, or crushed raw cacao nibs. Directions: 1. Place your spoons in the freezer. Line a tray that will fit into your fridge or freezer with parchment paper. 2. Melt your chips in a double boiler or in a microwave safe bowl in the microwave. 3. Pull the spoons out of the freezer and when the chocolate is melted and smooth, dip each spoon quickly into the chocolate, fully coating the back and filling up the spoon. Place on the parchment paper lined pan, and sprinkle your topping of choice over the top. Working quickly, fill all of your spoons. 4. Place the tray in the fridge and chill until hard. You can easily double or triple the recipe, but it is easier to work in small batches, so make a set, chill, and repeat. Once the spoons are chilled it is time to wrap them! Have cellophane covers ready for the chocolate spoons. You can find various sizes of lollipop covers at your local hobby or baking wares shop. Insert the chilled chocolate spoons into the bags, tie off with a cute ribbon or string, and put a flower sticker right over the center. The chocolate will not melt easily after it sets, but it should stay chilled until the party if you are heading outside or into the sunshine. To eat pop that spoon into your mouth like a lollipop or stir into a hot cocoa! 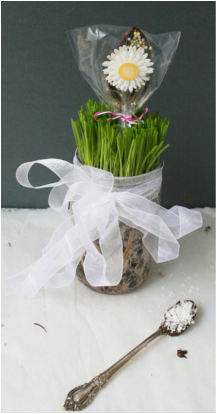 Presentation: There are a few fun ways to hold the spoons. You can stick the spoons into a little pot of catgrass or wheatgrass to look like flowers blooming in a field. You can also put some floral foam in the bottom of a basket and cover with green shredded raffia or the easter basket "grass" you can find at stores, and push the spoons through it into the foam below, and they look like flowers blooming! You can use your basket full of spoons right on your holiday or party table and kids can pluck the flower they want. Or, put the spoons into each persons basket like flowers and then add eggs and safe treats all around to look like a spring lawn ready for the hunt. Having an allergy friendly holiday doesn’t have to mean going without. With some planning and creativity everyone can have something delicious, festive, and fun.  This recipe originally appeared in the Spring 2014 issue of Tend Magazine.

I have never been a breakfast person. For years I was more of a cup of coffee and run kind of person. But with the advent of autoimmune disease, I have a schedule for my supplements and medications, and eating before I take anything is critical. We also cannot eat gluten, so that eradicates a whole bunch of possibilities. So what is left is eggs, GF toast, GF oats...meh. I'm not a big sweets or bread person. I'm also not a huge fan of repetition. I spend a lot of time cooking dinners every day, so I don't want to spend a ton of time on breakfast or lunch. Amaranth is a nice alternative for breakfast. It is a seed, not a grain, and it is a complete protein packed with all of the essential amino acids, iron, magnesium, fiber, and even calcium. You can cook it, bake it, boil it, or even pop it. This breakfast is quick and easy and has a lot of flavor. And you can add different toppings to change it up - fresh blueberries, sliced bananas, toasted coconut, hemp seeds, warm apples pan-sautéed with a little maple syrup and molasses...the possibilities are endless! 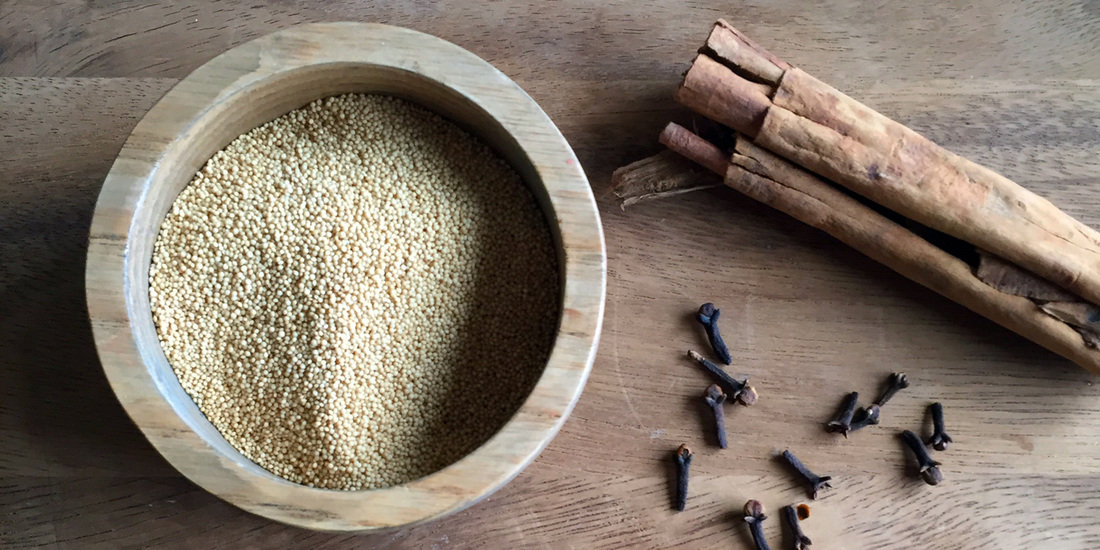
Amaranth Breakfast PorridgePrint |
{wholly rooted}This is a healthy warm breakfast - a great GF alternative to creamy hot cereal. This version is dairy-free! {ingredients}
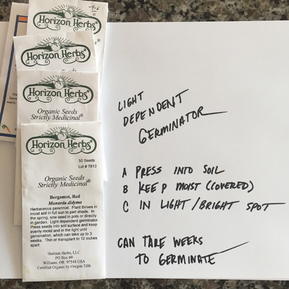
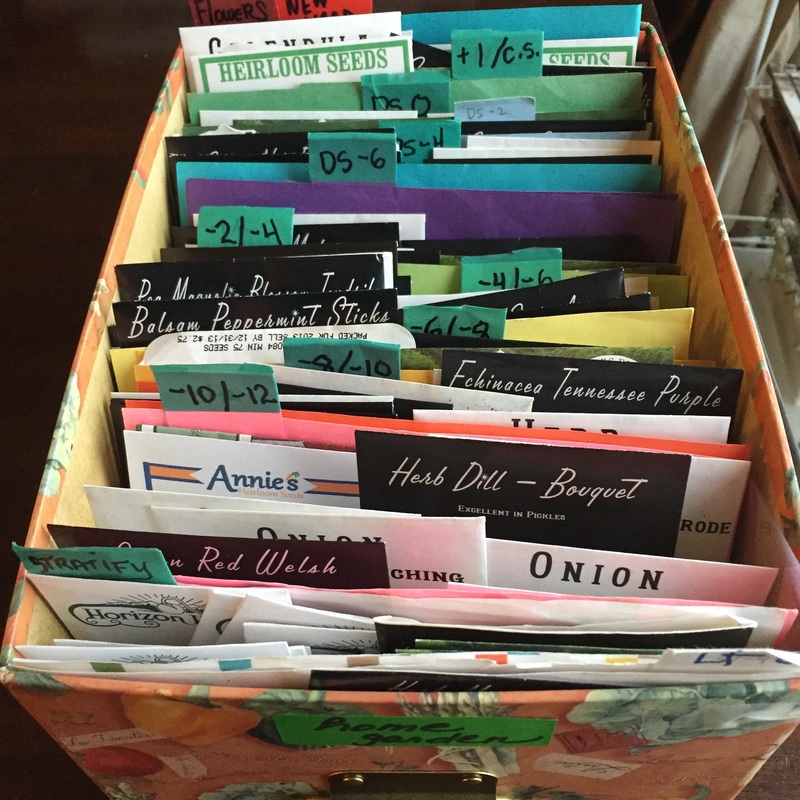
Soak the amaranth grains in 2 cups of water overnight. A bowl of amaranth porridge is perfect for spring mornings - it warms you up, fills you up, and gives you energy to get moving on busy spring days. Kids love it too, and everyone can have their favorite toppings! 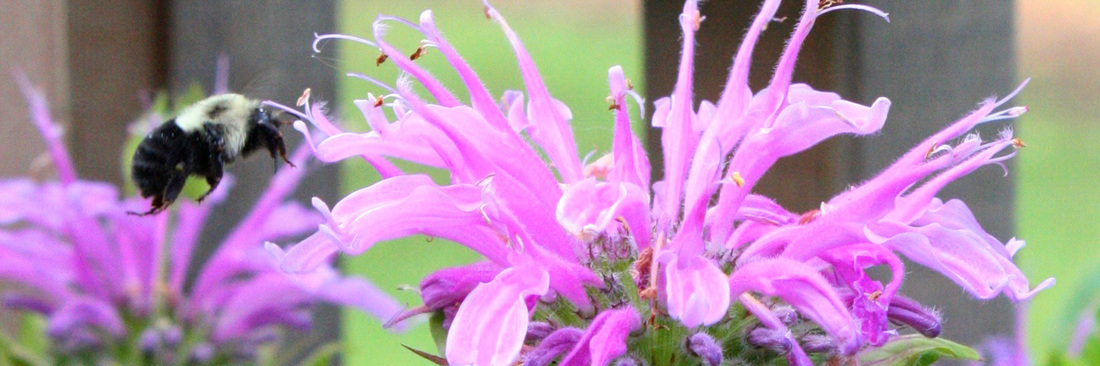 The flu has occupied most of my time for the past few weeks. It worked its way though much of the household, leaving me little time to focus on seedlings or garden planning. Luckily, while an exacting schedule is important for commercial growers, for the home grower we have a lot of flexibility. I appreciate my box system when I don't have a lot of time - I go to the envelope, grab a pre-filled seed tray, and go go go. 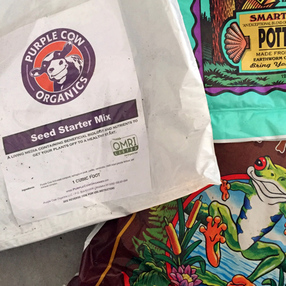 Speaking of pre-filled. I like to make my own seed starting mix from local organic seed starting blend, a potting mix with kelp and compost, worm castings, and a sterile type of renewable coir mix. It is important to me that our potting soils, composts, and seed starting mixes don't contain certain our allergens. I am happy that when I can't find the methods or ingredients on a package or website that my local garden/hydroponics store is always happy to call and ask for me. Because of that, I tend to stick with only a few brands that I know have good practices, pay close attention to all that goes into their mix and their sources, and use hot composting methods where things are fully broken down where applicable. I also like local when possible. Because of that I tend to buy all of my soil/compost/fertilizer from just one or two local places where I know exactly what I am getting. You can find recipes for seed starting mixes online that will best suit your climate and seedlings. I start with a large storage bin and mix all of my seed starting medium in that right in my garage. I can store it there and it is easy to step out and fill another tray. To keep everything streamlined I really like pre-filling a bunch of trays so I can grab and go. Less mess and less time. As my big bin of seed starting mix gets low, I make another batch. Right up into plant out time where I use a little different blend to fill my pots and containers. Most people who garden know how easy it is to start tomatoes, cucumbers, basil, and peas. They have been cultivated to where we can rely on good germination and pretty easy starting. Where I see people get unsure is often when you go into medicinal herbs, prairie or native plants, and more exotic or uncommon flowers and herbs. The packets talk about scarifying, stratification, scarification, and cold dormancy or extended germination. It used to seem confusing, but when I started categorizing my seeds in my box system, categorizing them into the basic types of germination wasn't too hard. I don't like to go overboard, I just like things that work well, simply. These methods may seem picky and delicate and time-consuming, but if you break it down it is pretty simple. And the bonus is you can grow some pretty cool plants you would never find in a garden center. These native plants, herbs, and flowers are also often those which are great for pollinators, attracting beneficials to your garden.
Most general seed packets will tell you to when to plant in ground, or how many weeks before last frost to start your seedlings and when to plant out. Natives, medicinal, prairie, and many more exotic plants may often require a bit more care to get them going. These seeds also often come in packets with very few seeds, meaning you want a high germination rate/success rate. There are a few common techniques specified on these seed packets, and while they may seem like a lot, it really only takes a few minutes to get things rolling. 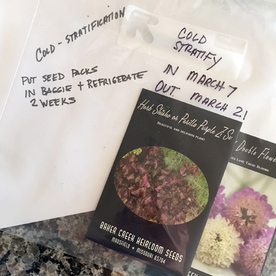 Cold stratification means the seeds like a feeling of winter before they are ready to go. Putting the seed packs into the refrigerator for a few week gives them a kickstart. The easiest way to do this is by putting them in a baggie and labeling in/out dates for your fridge. 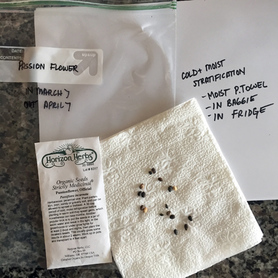 Another cold stratification is the moist type. I put these in a baggie in my fridge for a few weeks as well, but in a moist paper towel in the baggie, not in the packet. Be sure to note the in/out date on the bag. Some of these seeds like to get a scratch on the sandpaper first too.  Some seeds, like lavender, like cold stratification in a medium such as sand or soil. For these, I put them in a baggie in the fridge at the same time as the rest, I just put them in some potting soil in the baggie and note in/out date.
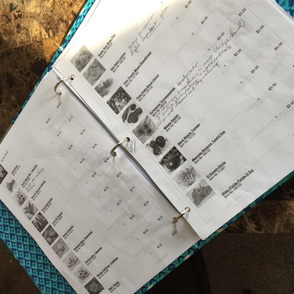
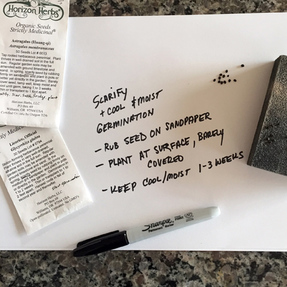 Scarification is when a seed needs to be scratched or penetrated a bit to begin the germination. A cool and moist scarification germination just means rub the seed on sandpaper, plant at the surface and lightly cover with soil, and keep cool and moist for 1-3 weeks until it germinates. Then treat it as you do the other seedlings until planting out. 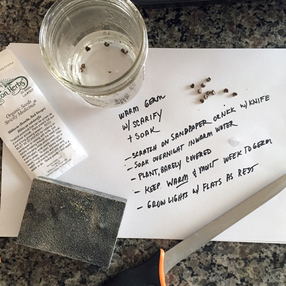 There can also be warm germinators which needs soaking and scarification to germinate. For these, give a quick nick or rub with sandpaper, soak in warm water overnight, and plant, lightly covered in soil. Keep warm and moist until germination occurs, and then treat as you do other seedlings.  That may seem like a lot to do, but in reality each type only takes a few minutes. The rest of the time is watering or waiting. I like to print out blank monthly calendars from March through June and keep it in my seed box. I note how each week by week number until last frost date, so it coordinates with all of the folders with seeds. I also can easily write down when to pull the baggies out of the fridge and plant them, etc. It makes it pretty foolproof. I like that I have basically a noted calendar of each year that I can look back on next year too.  I'm feeling the effects of March. It is windy and cold, we are cooped up (with one kid after another sick). Everything is muddy over frozen so no hiking or garden work can be done yet. I am definitely stir-crazy. I know seed starting and planning the garden is one of the things that actually gets me through to spring here in Wisconsin. On the one hand I'm starting seeds!!!! On the other hand we still have 3 MONTHS before our CSA even begins. Each little tray of soil and seeds is a lifeline to warm sunny days and green grass and hours spent outside. So even though some of the seeds require a little more care and attention to get going than some of the more common vegetables and herbs, they are worth every moment in potential. I can see bees buzzing, hummingbirds swooping, smell the fragrance as the sun sets and my kids rock in the hammock. It is all good.
Speaking of good, we are picking up our mason bees and beneficial insects this week. Spring really is coming! More seed starting and greenhouse assembling to come. :) 
I also like to keep any printouts about the plants in my garden notebook. Since I grow more uncommon medicinal and tea herbs, it helps me to have detailed information on their planting, growing, and harvesting requirements. Heirloom Organics has growing guides for many medicinal and culinary herbs, vegetables, and fruit. I use their guides every year.
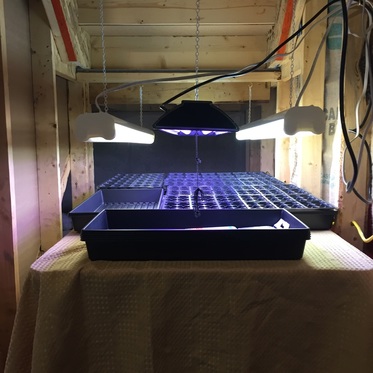 Over the past few weeks we have also been working on getting the seed starting setup going. We have our growing setup in the basement. It is an unfinished space, but we have my art studio, a few couches, craft & art supplies, a treadmill, rugs, a trampoline, and an office down there. With kids running around and a lot of foot traffic, I wanted to tuck the seed starting under the stairs so that it is away from the action but easy to access. We use standard shop lights for our seed starting. I have several types of bulbs, and use warm, cool, and full spectrum grow bulbs so that seedlings get a healthy dose of everything. The nice thing about under the stairs is that it is easy to install hooks to securely hang the lighting, and we have room to put the light timer, a fan, and keep supplies stored safely. We don't have anything fancy, but I can fit over 500 seedlings at a time in here (and I still have several shop lights left over at this point, so plenty of opportunity to expand). I will also have some flats on trays in sunny windows upstairs as we go along, but most seedlings will easily transition from basement to our popup outdoor greenhouses this spring. We have two small popup greenhouses, and then I added a 6'x6'x4' walk in which can hold another 2 dozen or more trays. I should be able to grow a LOT of seedlings in a pretty small amount of space. And my neighbors will only see peeks of the backyard greenhouses for a month and a half or so, before the bigger ones go back in storage.
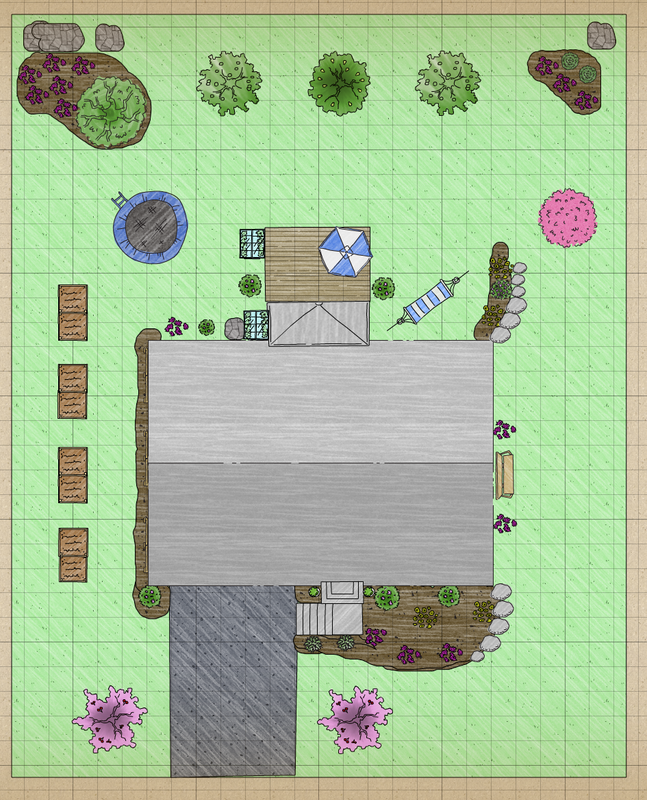
Growing from seed takes more attention and care than buying plants at a nursery, but you can get SO MUCH MORE variety, grow organic end to end, and save a lot of money when you look at the final output. Seed starting isn't HARD, it just requires organization and a little bit of time and attention. You could easily have just two shop lights with warm and cool bulbs over a few seed trays in your basement or closet and have enough plants for your garden. So I have my garden notebook setup and ready, my seeds are in their folders, the lights are setup, and I have all of my seed starting medium ready to mix and start. NEXT...seed starting (really)!  I find myself often attempting to describe garden planning from a purely logical DIY perspective, and failing. As much as I like to approach design with an overall organized and cohesive whole, it really is an emotionally driven thing. In our last house it took years, but I achieved the feeling I was searching for in the garden. It was private, lush, green, and vibrant. It felt like walking through a secret garden, dusk was a magical in-between time of twinkly lights and exotic floral fragrance. It was filled with a palette of colors, buzzing with bees and every kind of pollinator. Birds bathed in the the bath, hummingbirds swooped by our heads, mourning doves nested in hanging baskets. Kids played and ran and hid behind bushes or under the hammock, hands full of sticky raspberries. It was like a secret magical wonderland bursting with warm soil, sticky sweet fruit, and climbing vines. So to this garden, where do you begin. We let it sit last summer other than some basic plantings to get the feel. It isn’t a tucked in moist rich secret garden up here. It is wide open, big sky, windswept, prairie grasses, bald eagles, stunning sunsets, starry nights. It is the singing of toads, the buzzing of grasshoppers. It is views for miles of pines, oaks, corn fields, silos and Epic. It is dry, sunny, windy, and alive. Yet I also know as more homes are built it will morph to more closely resemble mowed lawns, fences and afternoon shadows. So the big plan this year is to get a basic outline into which everything will be planted into over the years. We want rain barrels to help with watering up on this dry windy hilltop. We want fruit trees in the ground so that in a few years they will be there to not only give us apples and cherries, but also to give us some privacy and shade. We want some annuals to fill in all of the areas where the landscape plantings are still small and immature. We want to espalier more caning and vining fruit along the south side of the house. We want raised beds for some easy to water or cover spots for strawberries, greens, and delicate water lovers. We want some shade trees that will rustle and sway in the breeze. In our last house we had some flowers, but without a lot of full sun, we really didn’t have a huge selection, not to mention our space was very limited. In this house we not only want fruiting trees, bushes and canes - we want herbs that can return every year. And I want a riot of color, fragrance, and color. I want mason bees and native pollinators buzzing. And as the sun goes down, I want my kids in the hammock inhaling the rich, exotic fragrances of thousands of flowers. I want bouquets on all of my tables. Annual flowers, and a LOT of them, is going to fill in the gaps until our garden is more established, giving us a magical, enchanting garden, somewhere to sit and walk and lie and enjoy. So with that in mind, we have a few plans.  Planning, outlining, seed starting. The plan Home Garden 2016: 2-4 fruit trees, mason bees, an espalier infrastructure for the grapes/blackberries, 4-5 raised beds on south facing wall (medicinal herbs, tea herbs, cutting flower bed, greens), fruiting shade tree up front, flowering fruit bushes for future privacy as more homes built around us, a larger greenhouse for growing a lot more seedlings (got it last week - will put it together in spring!), 3-4 rain barrels, paths around raised beds, and possibly starting the integrated beds throughout yard for additional herb plantings. An attractive yet functional good sized composting system. This may not all be done this summer, but we have a master plan. 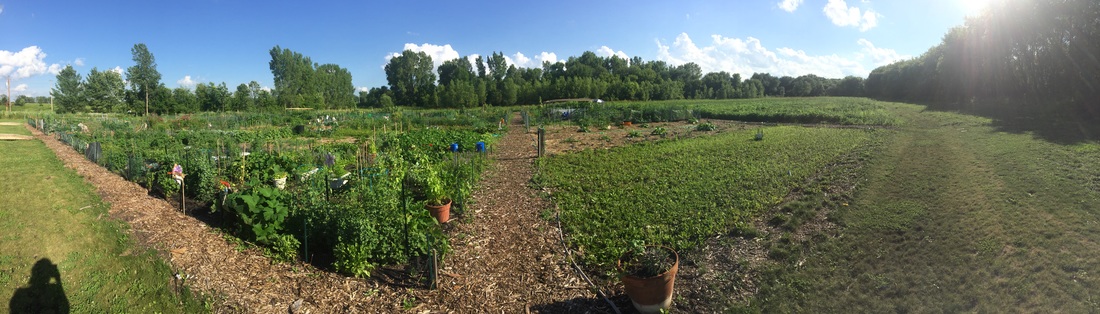 Community Garden Plot - last summer. The plan Community Garden 2016: a greater variety of medicinal and tea herbs, bigger variety of flowers for cutting, remove all the duplicates from our CSA, add more unique vegetables to supplement CSA share. The community garden plot is just 20x20, so it is small enough to not be overwhelming, and big enough to grow a good variety of things intensively. It is very sunny and dry, so plants that don't need as much attention can go there, where the plants needing more water or care will be at home. 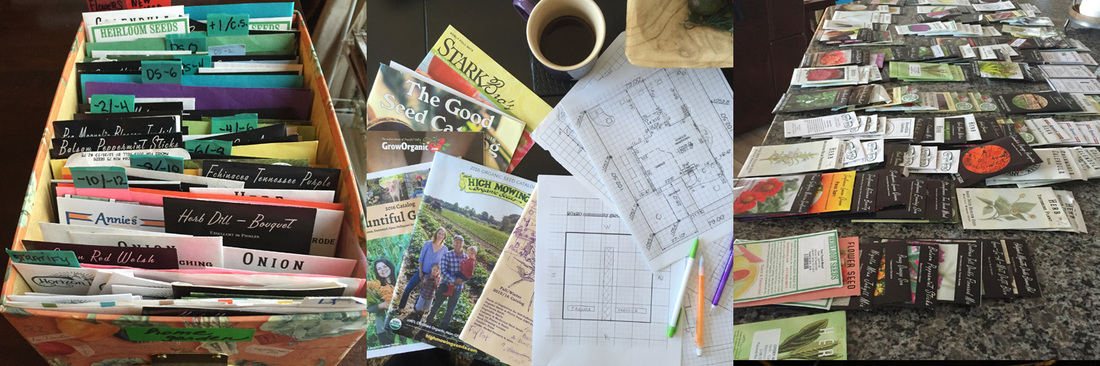 My seed starting method, planning, planning, planning. The big seed list. I decided to grow a nice big variety of cutting flowers, medicinal and tea herbs, culinary herbs, fruit, vegetables and greens this year. With more space in this house I can now grow more seedlings (and I now have 3 popup greenhouses). I figure if I start a lot of everything and have extra, I can sell my extras - it will be more rare or uncommon plants that won't be found at local nurseries, so the time/cost/effort of growing extras will be worth it and that way I know I will have enough for my own needs. I prefer to plant in integrated permaculture beds, and will have a lot of these integrated throughout the yard, but will also have a few raised beds where I can more easily control the climate and soil. Here is my list of seeds that I am growing this year. 2016 Seed List:
We have a CSA share with a local organic farm in the summer, so we don't need the more common vegetables. So for us, we plant the unusual varieties or things we always are short of. Plus of course extensive selection of tea, herbs, and flowers. And I am *excited* to have a big cutting garden this year so we can have bouquets inside and outside all summer long. With fragrance! I also plan to photograph all of the flowers and herbs this summer so that I can make prints. Big plans, I tell ya. 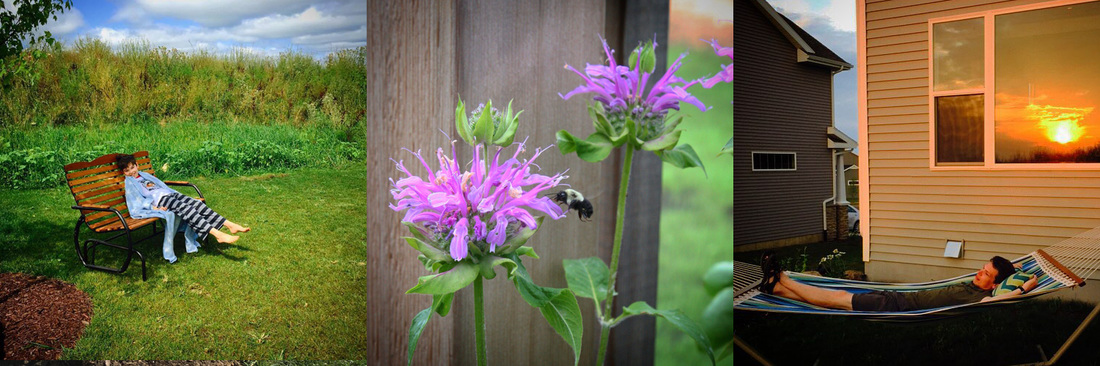 So this is my step 2. It sounds like a lot. So when I say the important thing about planning a garden is to go in small steps, adding a bit at a time, but into an overall grand design scheme, it may seem comical. But a lot of this list is to make the outline and base structure to get it going - and we will likely end up breaking some of that up over more than one season, depending on how it progresses. But this year we will have color, movement, beauty, fragrance, the buzzing of bees, a hammock surrounded by a riot of blooms, and places to walk through and experience, or sit and enjoy. One step at a time.
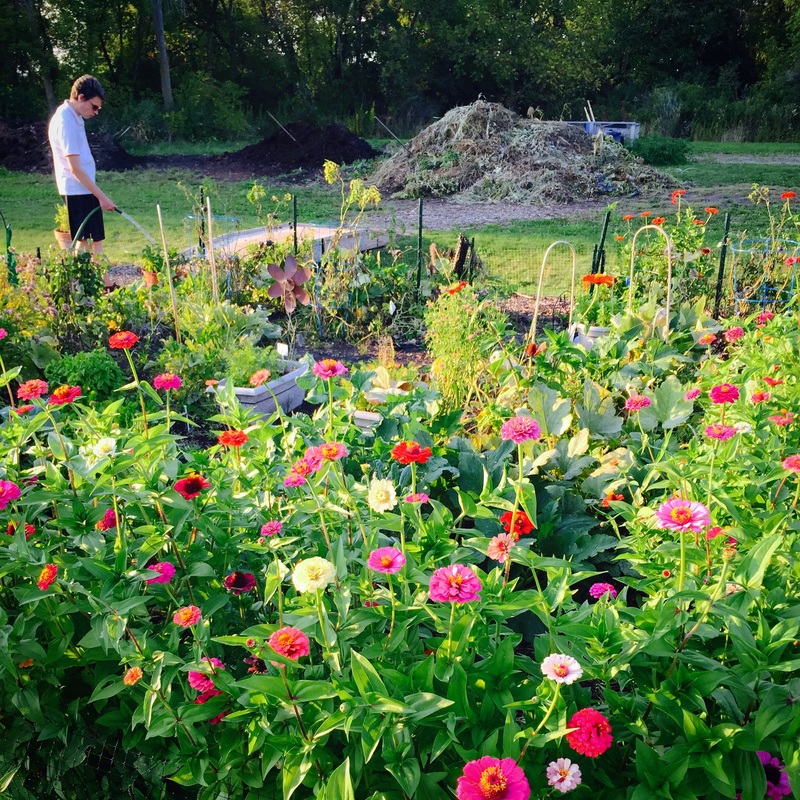
Next...seed starting time!  Sunset from the new house. I've spent a lot of time over this winter planning the garden and community garden plot for 2016. So I want to write about going from blank slate to the big plan. I'm going to split this into a few posts and end up with the big plan - what I'm planting this year, garden architecture, and seed starting! If you have known me for awhile, you know that I spent over 10 years working on the garden in our last home. It went from a tiny urban grass plot to a dense and lush integrated urban permaculture garden packed with fruit, vegetables, flowers, herbs, and kids. We outgrew that house years ago, but the garden plus the difficulty of showing a house we all live/work in 24/7 means we stayed and stayed. Last year we finally made the jump and moved into a new green built home about 20 miles from where we used to live. We went from a tiny bowling alley urban garden flanked by 2 houses tucked in at the bottom of a hill to a more suburban garden at one of the highest points in the area, atop a hill, next to prairie and fields. Our "new" yard is still likely smaller than average but we wanted more usable gardening space without really having massive expanses of HOA regulated grass. So, it is about 3 times the size of our previous garden. Woot! We are now in a smaller outlying community with views that seemingly go on forever, a sky full of stars, and never ending amazing sunsets. 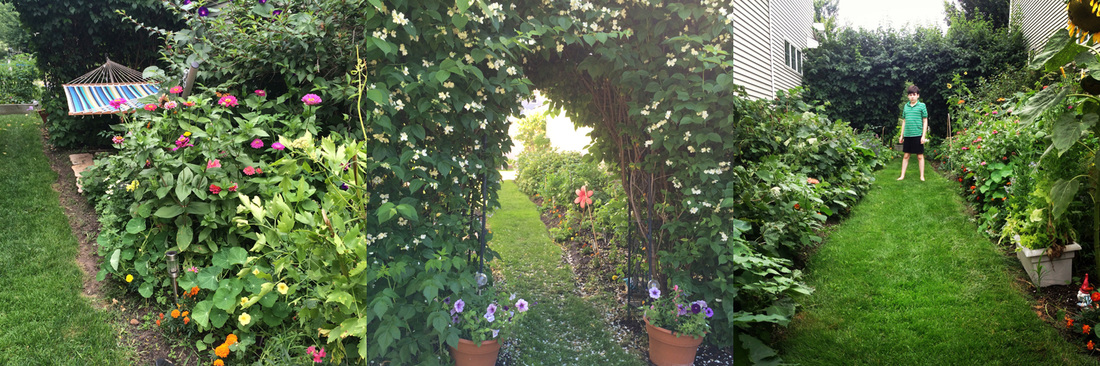 The garden at our last home. We moved in last spring, but it took a few months after that to have concrete poured and have grading/topsoil/initial landscaping done. I wanted to take the "wait and see' approach to see how different the soil, the light, the wind, and the insects are here before I went too far. I'm glad I waited. We may have moved only 19 miles, but the soil here is red and sandy. Atop our hill the winds are very (very!) strong. And after the exciting burst of hundreds of toads into the yard in summer, fall came with thousands of grasshoppers (we are next to prairie and corn fields). We also saw many voles, field mice, bald eagles (squee!), crows, and hawks. I know now where we need shade, where the sunny spots are, what kind of organic controls we will need, and what plants will work best where.  Our new yard last June. What we focused on last year was our community garden plot and initial yard plantings. We were so happy to find that there is an organic community garden only a few miles from the house. That is where we can plant the bigger more rambling things, install the not-so-attractive cages and trellises and nettings. And it gives us a few hundred extra square feet of space. So last summer most of my seed starting was for the community garden, and then mostly pots here. With that, I started many hundreds of seedlings that we planted out from pots to yard in August when we finally had grass and some initial landscaping beds. 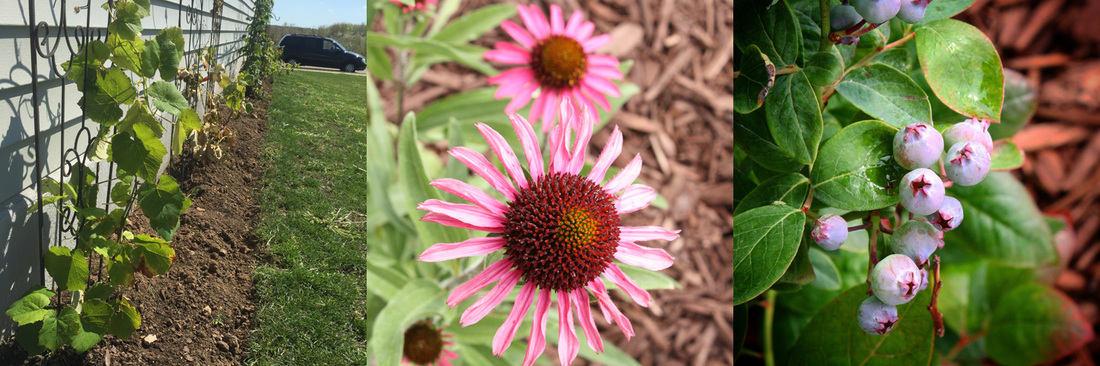 Some plantings from 2015. What we planted Summer 2015 yard: a few blueberries, a few blackberries, 2 varieties of grapes, echinacea, lilacs along the deck, a weigela atop a boulder wall, yarrow, hydrangeas, creeping thyme and purslane in rock walls, red maple, some raspberries we brought from the old house, and a bed of mixed herbs for pollinators including bee balm, anise hyssop, mint, and moldavian dragonhead balm. We also planted a lot of sunflowers right along the line of our yard and the field, and we tossed a bunch of prairie flower seeds where the skidsteers ripped up the prairie grading our yard, so we had a bunch of extra flowers along the edge which brought birds all summer and winter. 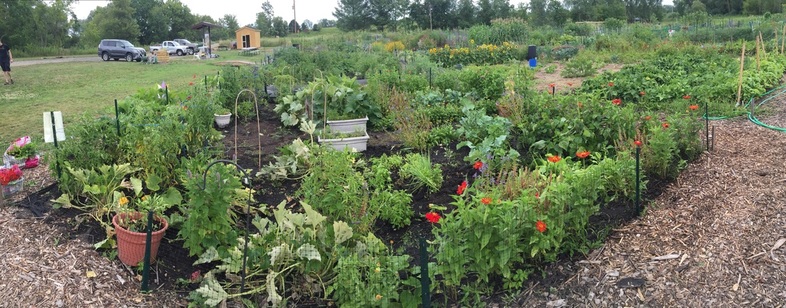 Community Garden Plot 2015. The 2015 community garden plan was mostly to get all of my seedlings into the ground and see how the soil is in the plot. We built up the soil with compost and worked hard to keep the most insane weeds I've ever seen at bay. It worked, but we have a better idea of what the soil and plot need for next year!
Next ... the big plan for 2016 for both yard and community garden, plotting a grid, and organizing the seed starting calendar!  This is the time of year that no matter how much water I drink or how much humidity I add to the house, my skin still feels dry. I know that -25 windchills and days with a high of -2 means the humidity drops, but wow. One way to keep my skin from cracking is to moisturize. I have a favorite fragrance free/allergy safe version for us, but I do love the warm heady aroma and skin feel of a moisturizing body oil. This works best when just out of the shower. Or, it is a great massage oil. The fragrance isn't too strong, but is warm and exotic, reminding me of warm humid places. And my skin loves it. It absorbs quickly without a greasy feeling, and it leaves skin feeling soft. Body oils are nice to make, as they give instant gratification for not too much work. A body or massage oil is simply an infused blend of oils, or a blend of base oils with essential oils. These luxurious concoctions are great for a romantic massage, as a body moisturizer after getting out of a warm shower, or to add to a warm bath. This oil would also make a great Valentine's Day gift. This basic blend combines essential oils, which give a warm and earthy fragrance, while also softening and supporting our skin. Apricot kernel oil is good for sensitive or dry skin, and is light and emollient. Avocado oil is a healing oil good for dry and sensitive skin. While it is thicker and creamier than some other oils, it absorbs quickly, so there is no greasy skin feel. Both are great for dry winter skin. The essential oils in this blend are not only warm and fragrant, but are nice on the skin. 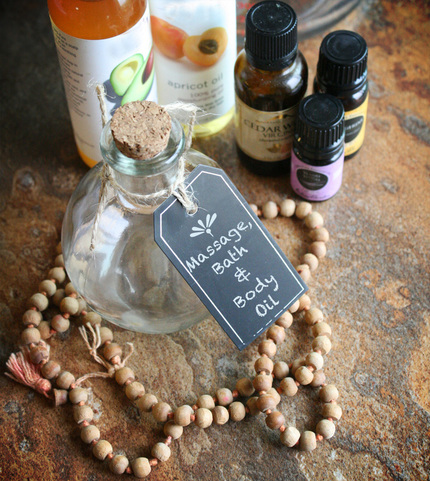 Bath-Body-Massage Oil 2 ounces/60 mL apricot kernel oil 2 ounces/60 mL avocado oil 13 drops of sweet orange essential oil* 7 drops of cedarwood essential oil 4 drops of ylang ylang 4+ ounce bottle to store the oil {24 drops in 4 ounces is about a 1% dilution, perfect for a leave-on body oil or massage} Blend your ingredients and pour into a nice bottle. Be sure to label! Shake before each use. Pour a little into your hand and rub over your arms, legs, and body as you would a lotion, or use as a massage oil. If you can warm it a little in a bowl of hot water before use, it will feel extra wonderful. I like recipes that take only a few minutes to make and are not too finicky. It means that I can make small batches often and change things around or use the base oils I already have in my herb cabinet. Quick and easy! *Some citrus essential oils can cause photosensitivity. If you swap out sweet orange essential oil for another type of citrus oil, be careful to ensure you are substituting a safe/non-phototoxic type, or avoid sun exposure for 12 hours after use.
Reference: http://www.aromaweb.com/articles/phototoxicity-essential-oils.asp 
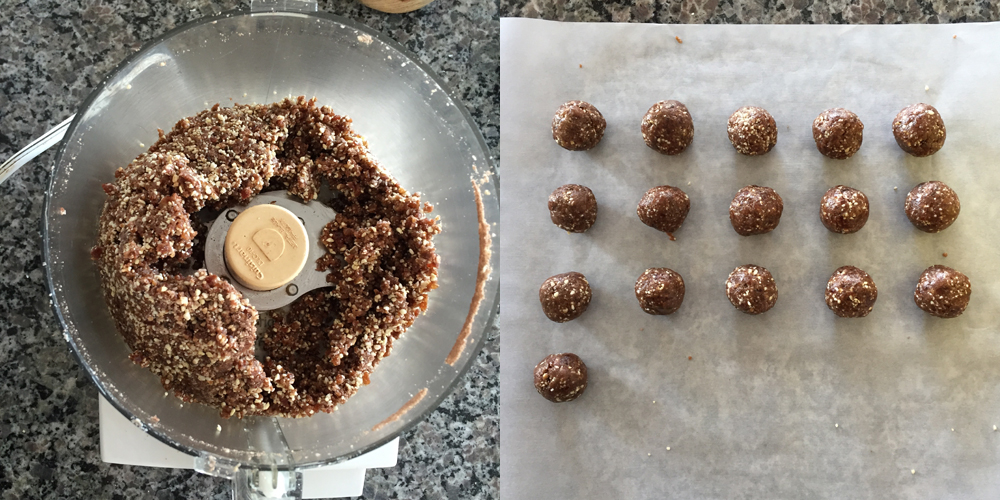
I love making truffles. I tend to go in spurts, most often in winter, when I want something small and sweet, but allergy-free and not too much. Truffle bites are perfect. I like that I can go from pulling out the ingredients to popping them in the fridge to set in under 15 minutes. The only thing that is heated is the chocolate!
These are great quick and easy sweet treats for yourself, or they can be packed up into little boxes and gifted for Valentine's Day. 
Peppermint Mocha TrufflesPrint |
{wholly rooted}These peppermint mocha truffles are easy to make, vegan, gluten-free, dairy-free, and take only a few minutes to prepare. These are sweet treats, but as they contain dates and maple syrup, it is not a guilty pleasure. Make a batch to gift on Valentine's Day, or keep them all for yourself. {ingredients}
In a food processor: 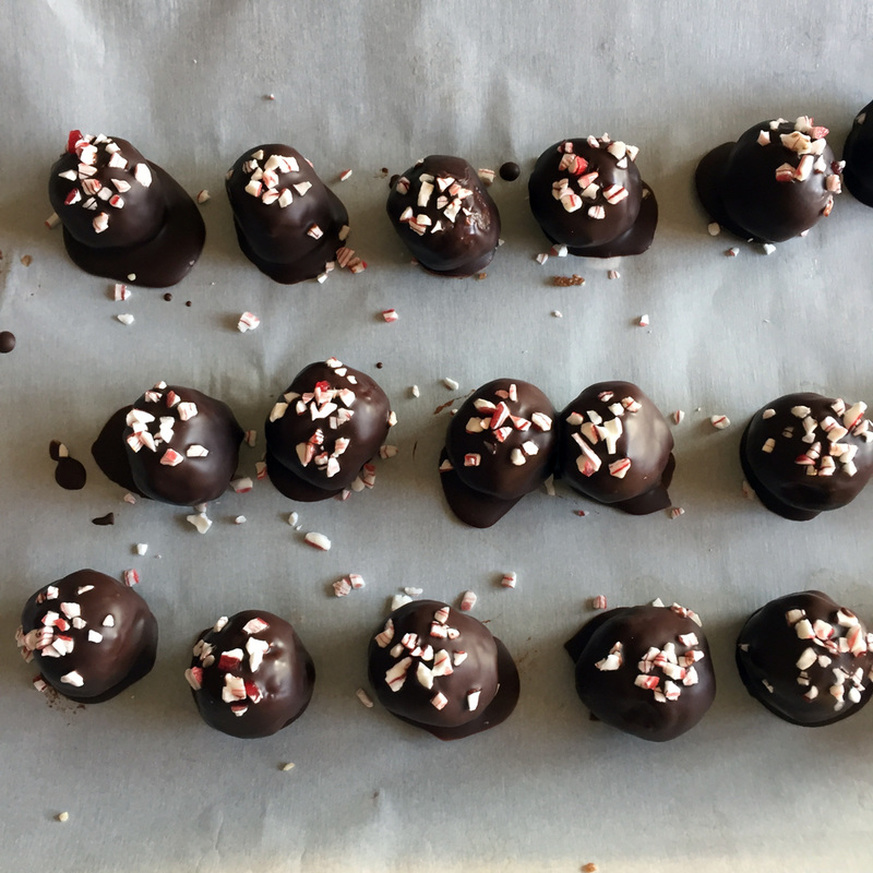
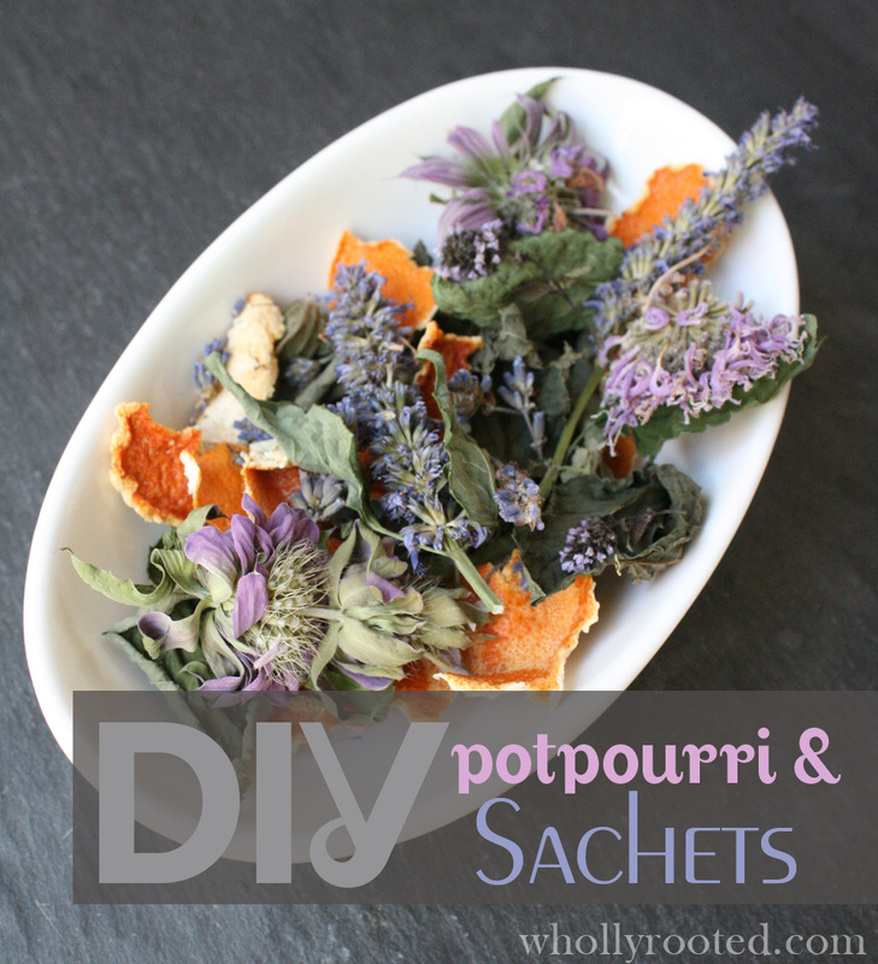 Potpourri Stop right there, don't think homemade potpourri is anything like the chemical laden store bought over fragranced stuff. Making your own is not kitschy; it is a good way to have on-going odor absorption and a light fragrance in areas such as bathrooms and kitchens. Making it is simple. Choose your container, add your base items, and then enhance with a few drops of essential oils. You can stick with base dried herbs, flowers, and spices, but things like pinecones and pine branches also hold oils nicely and add bulk. Be sure not to buy the pre-scented chemically treated pinecones from the craft store. You can find untreated pinecones from online suppliers, or if you collect your own, be sure to clean thoroughly and place in your oven on the lowest setting for an hour or so to dry and de-pest before using. I dry herbs from my gardens all summer long, so I always have plenty of dried fragrant herbs and flowers to use in sachets, teas, and potpourri. I grow things like bee balm, anise hyssop, lemon verbena, lemon balm, different kinds of mint, rosemary, lavender, and more. I dry them in my dehydrator all summer long and store in airtight containers in my herb cabinet. I also like to dry citrus peels and rounds for use in tea, and those items also work well in sachets.  To make potpourri, fill a container with your dried herbs and flowers of choice. Good herbs to dry for this include lemon verbena, mint, lemon balm, anise hyssop, lavender, rose petals, bergamot heads, rosemary, and any type of dried citrus. This blend looks lovely when you combine the peels and flowers and leaves. For some additional fragrance, add a few drops of essential oils to the mix. Lemon, lemongrass, lavender, sweet orange, and spearmint all are wonderful. Experiment to find your own favorite blend. I tend to make different blends for the guys in the family which have more of the pine, fir, rosemary, juniper, and citrus, while I enjoy lavender, citrus, patchouli, cedarwood, etc. myself. 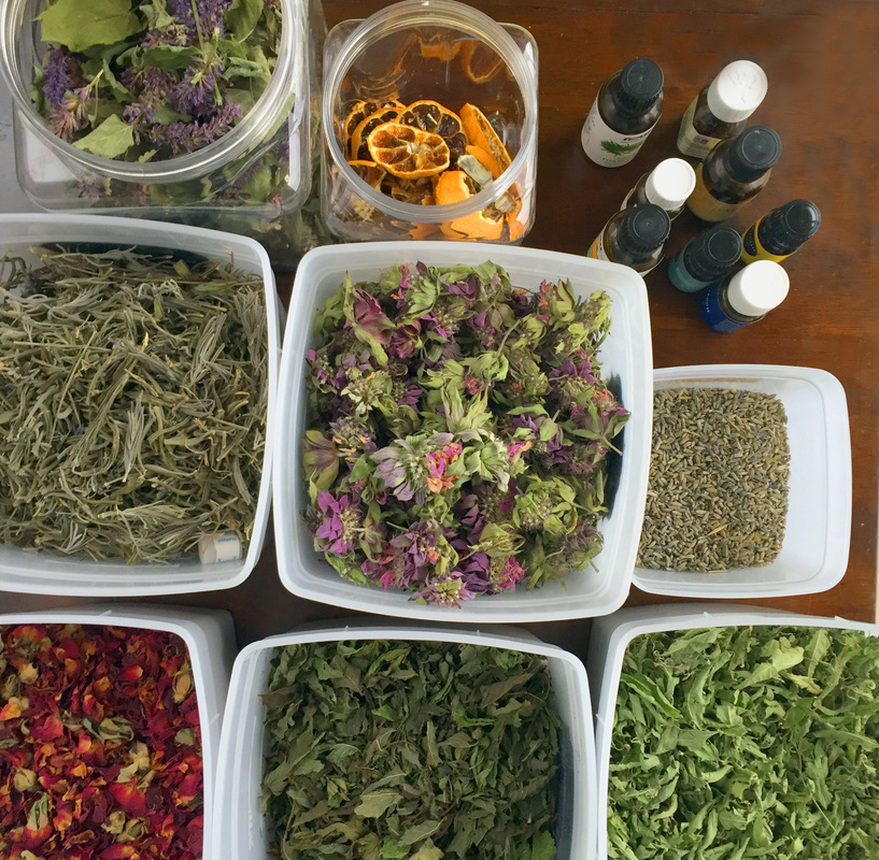 Another use for your essential oil enhanced dried herbs is sachets. Gently crush your herbs of choice in a clean bowl, mix in your essential oils (a binder can help retain fragrance longer, so if you have it, try adding a small spoonful of ground orris root into the mix, although I have even used frankincense powder), and spoon into pre-sewn rectangles of fabric (leave one end open to fit the herbs). Stitch closed and use in your drawers, shoes, or closet. Refresh with a few drops of essential oils as needed. 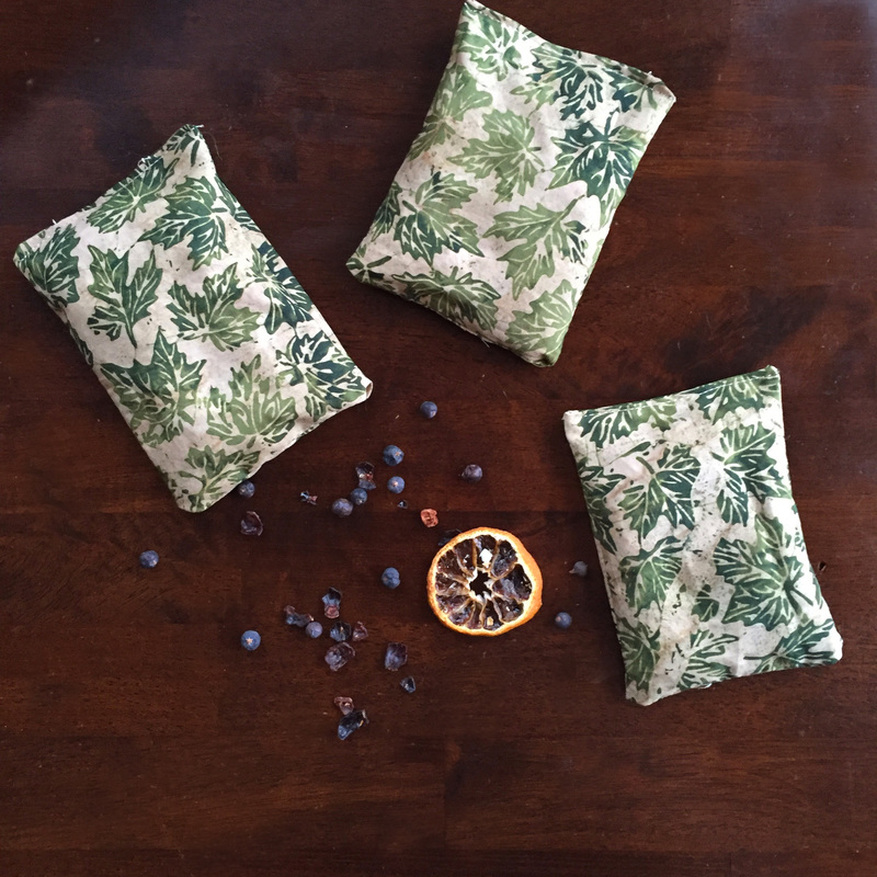 I made sachets with herbs from my garden for holiday gifts, but made sure to make a few for our own house. They are tucked into the master closet, the mud room by all the shoes and boots, and in the front coat closet. They help keep things smelling fresh. I may insert them into my pre-teen sons boots once or twice too. Ahem.

Turmeric has been used traditionally not only as a flavorful spice/seasoning, but also for its health benefits. Turmeric contains curcumin, which has antioxidant and anti-inflammatory properties. The addition of ginger gives this drink a warm spicy flavor, and is good for digestion and also an anti-inflammatory. I consciously add anti-inflammatory foods to my diet as much as I can to help support anti-inflammatory processes in my body, and having a drink with both ginger and turmeric is an added bonus. The taste is rich and creamy with a hint of a musky chai-like undertone. It is delicious. This rich golden milk is great during seasonal transitions when it can go from warm to cold in one day or when you get inside after a cold day in the snow, and a steaming mug of spicy milk tastes and feels wonderful. 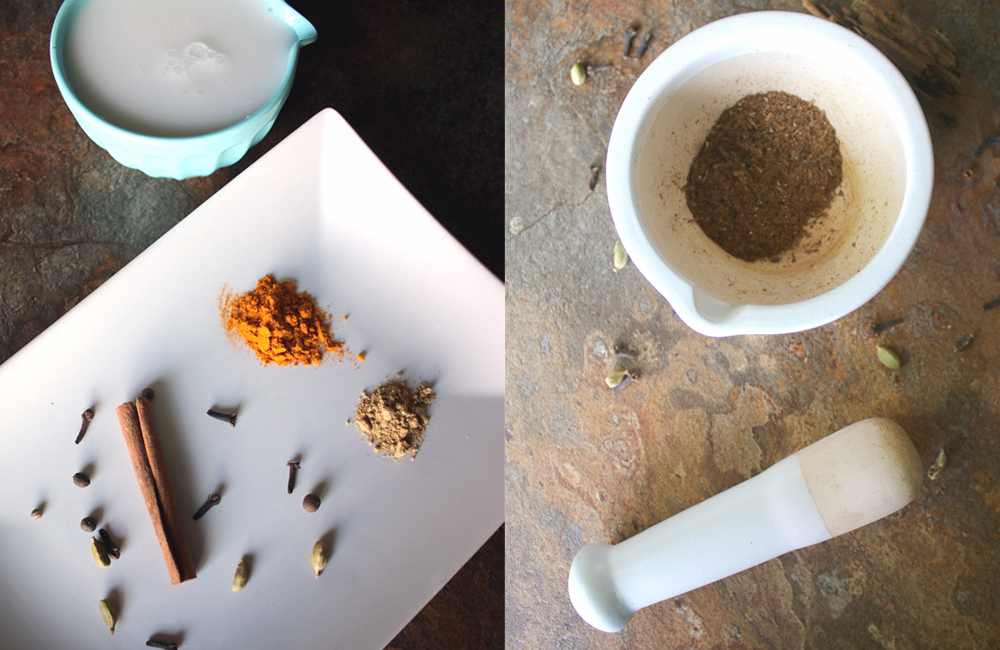
Spiced Turmeric MilkPrint |
{wholly rooted}While using fresh turmeric is best, it can be hard to find at the market during certain times of year, so this recipe uses powdered. This is delicious on a cold winter day. {ingredients}
Warm the coconut milk in a saucepan on the stove. 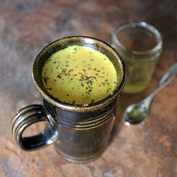
I love using turmeric and ginger as much as I can, and this drink is so delicious and rich and spicy. I do like coffee (we roast our own beans) and I love herbal tea (I grow and dry my own herbs all summer long to make herbal tea blends), but I also like having a hot drink that has a different flavor in my winter mug rotation! 
Most of us are not lucky enough to live where citrus grows locally. And while eating close to the source is ideal, in this day and age not everything we consume will be from the corner farm. Salt, pepper, olive oil, coffee, tea…we can make conscious decisions to support fair trade and organic for as much as we can, while still working towards finding local for those things which are available. So for me, citrus is a part of our winter and holiday experience, no matter our climate. I love that sharp blast of citrus as my fingers break the peel on these dark, gloomy days of winter. Citrus in winter is like the sun - fleeting, delicious, and memorable. One way to balance our distance with citrus is to use everything. Waste nothing. When we find it in season in the winter, use it all, enjoy it all. We use the peels and candy them, make garland, and dry for tea blends. This recipe is simple to make, but quite a show stopper dessert. It is made in a spiced, fragrant syrup, but it isn't overly sweet. It is nice because it can be made ahead and stored in the fridge for a day or so before serving, so it is perfect for the holiday table. 
Poached MandarinsPrint |
{wholly rooted}Poached mandarins have a delicate flavour and add a great flair to the end of a holiday meal. This is simple to make, and tastes great. And don't forget to save the rind to make candied or dried citrus peel. {ingredients}
First prep your citrus; gently cut off the ends, peel the citrus whole, and remove any extra pith. Citrus is a winter treat, to be enjoyed on these dark winter days. We boost our mood as well as our vitamins (A, B-6, C, folate), fiber, and minerals (potassium, calcium, iron). By using the whole fruit, we don’t waste a thing, and get the most from these sunny, fragrant orbs. Yum. 
Most DIY bath/body/personal care recipes out there are she focused. While scent has no gender, generally products made for men have more of an earthy, musky fragrance. This aftershave can be used by anyone, but it is particularly great as a facial toner and aftershave. This contains none of the alcohol, preservatives, or artificial fragrance of store bought brands. Instead, this is a refreshing mix that can help soothe and tone freshly shaved skin, soften and moisturize, and also leave a wonderful fragrance behind that is natural, earthy, and not overpowering. My husband loves how this makes his skin feel soft and yet supple (with no overdrying) and that the aroma is warm and musky without being overpowering. I even sneak a spray of it on my scarf sometimes because I love the smell. 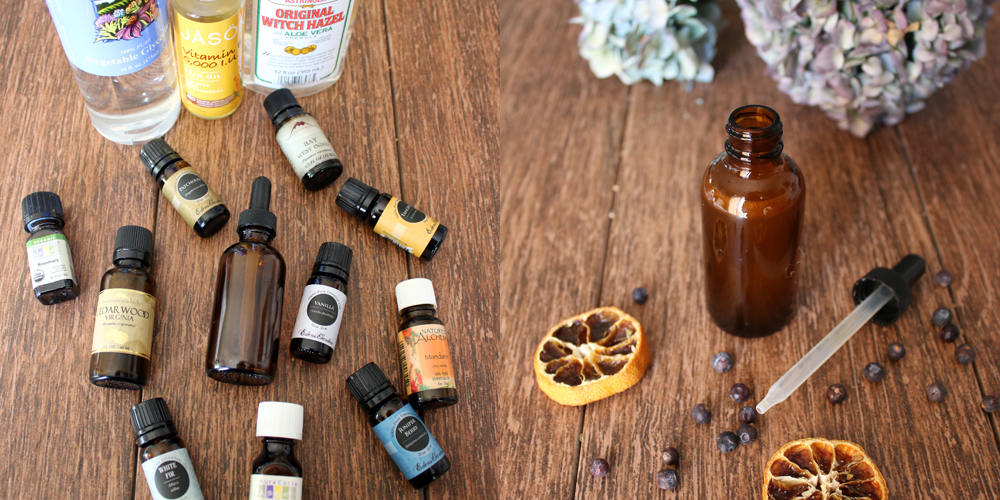
DIY: Alcohol-Free AftershavePrint |
{wholly rooted}This recipe uses witch hazel instead of alcohol, which has been used for ages as an astringent, and to smooth skin without drying. Be sure to find a witch hazel brand that is fragrance and alcohol-free, so that you get the full benefit of the plant without the sting. Vegetable glycerin assists in retaining moistures, and acts as an emollient to soften skin. Vitamin E acts as an antioxidant and anti-inflammatory. These ingredients combined with the essential oils make a wonderful gentle aftershave for even sensitive skin. {ingredients}
Instructions: 
It isn't always easy to find handmade and homemade gift ideas for the men in your life - and this recipe makes a great gift! 
I have been working with some of my sunset photos for some projects, and decided to make a few desktop images each month for free download. Just for fun. :) I have posted the sunset above with a November calendar overlay using a few sizes for the most common HD screen ratio as well as a common laptop ratio. Should work for most desktop image sizes! I also posted a square image for your tablet or phone lockscreen. Click here for a page where you can download any of them. Enjoy! 
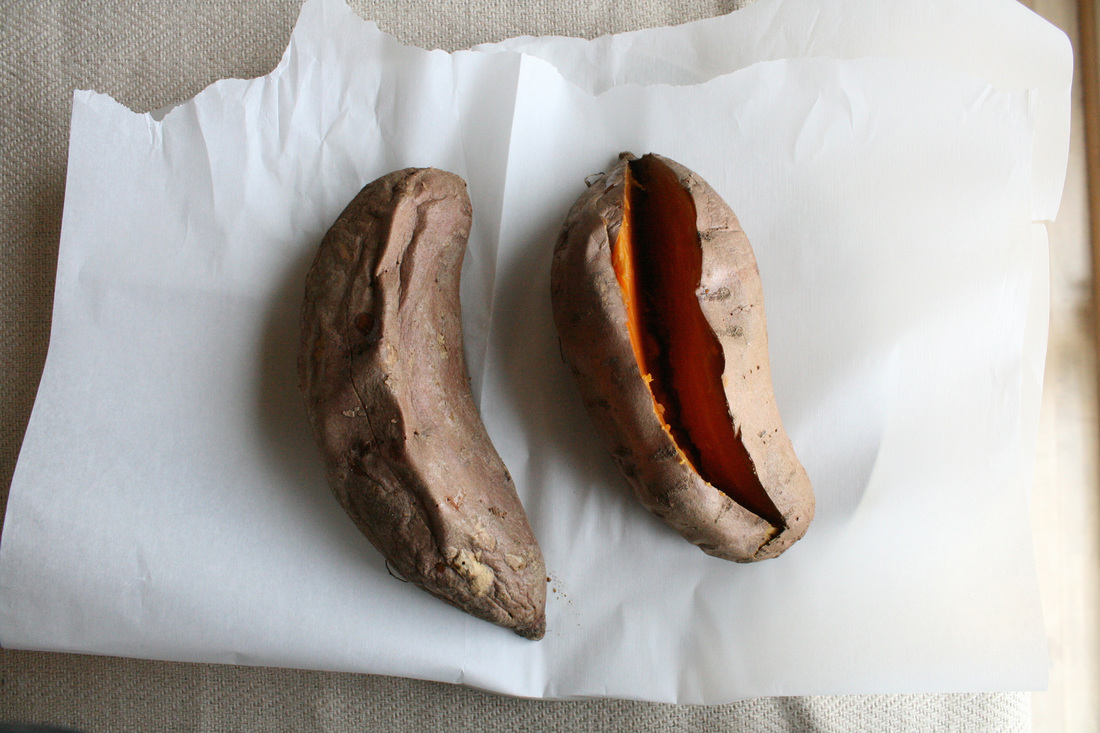
A favorite staple in our fall CSA share each week is sweet potatoes. Sweet potatoes are a fantastic fall and winter food. They are packed with vitamin A, vitamin C, manganese, B vitamins, potassium, fiber, and more. They are healthy, delicious, and can be dressed hundreds of ways. They can be baked, boiled, added to stews, stuffed, and used in savory or sweet dishes. A simple yet delicious way to enjoy sweet potatoes is baked with a filling in the middle. This recipe is simple and the taste is warming and rich. I often bake a bunch of sweet potatoes at once over the weekend, and then keep them in the refrigerator for daily lunches. It is easy to re-heat and top with whatever you like. Perfect "fast food" ~ yum. 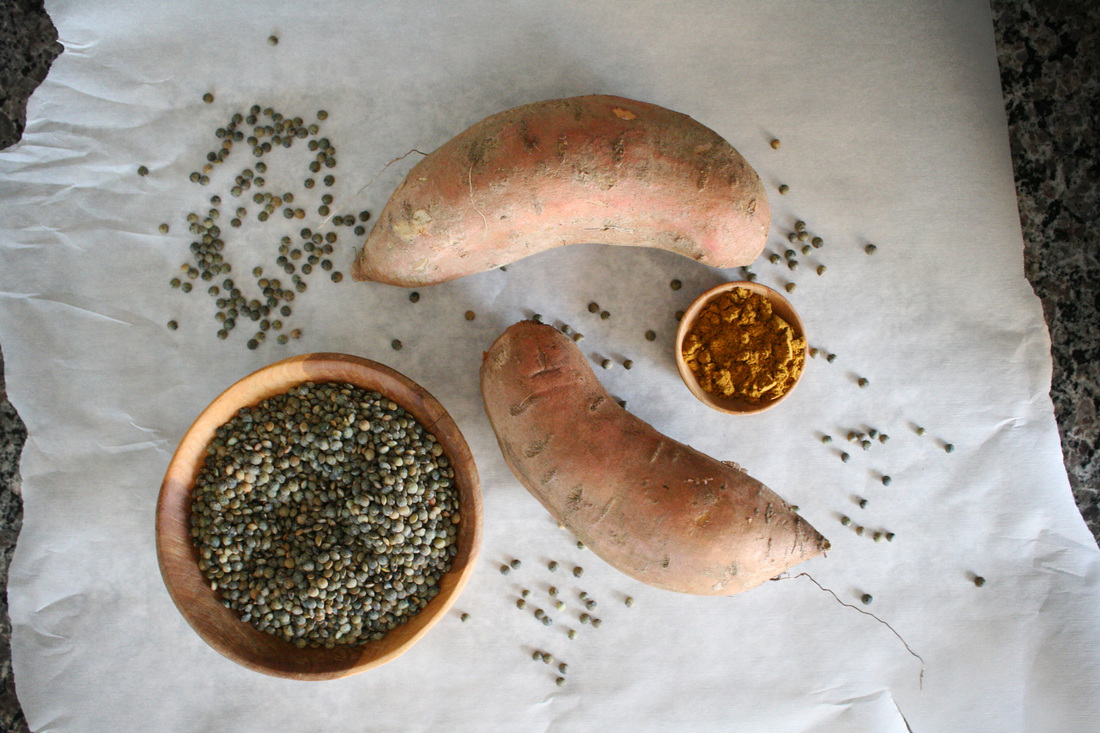
Sweet Potatoes with Curried LentilsPrint |
{wholly rooted}This recipe takes advantage of the smoky sweetness of sweet potatoes by combining with lentils and curry. This is a rich and warming meal, perfect on a chilly day. {ingredients}
Sweet Potatoes: 
Sweet potatoes are great for autumn and winter potlucks. Try setting up a create-your-own-sweet potato bar. Roast the sweet potatoes and serve them next to an assortment of toppings and let everyone make their own. I use sweet potatoes a few times a week in fall and then worry I won't have enough to last all winter long. I know we have a few more fall CSA shares before our season is over, so I plan to stock up!
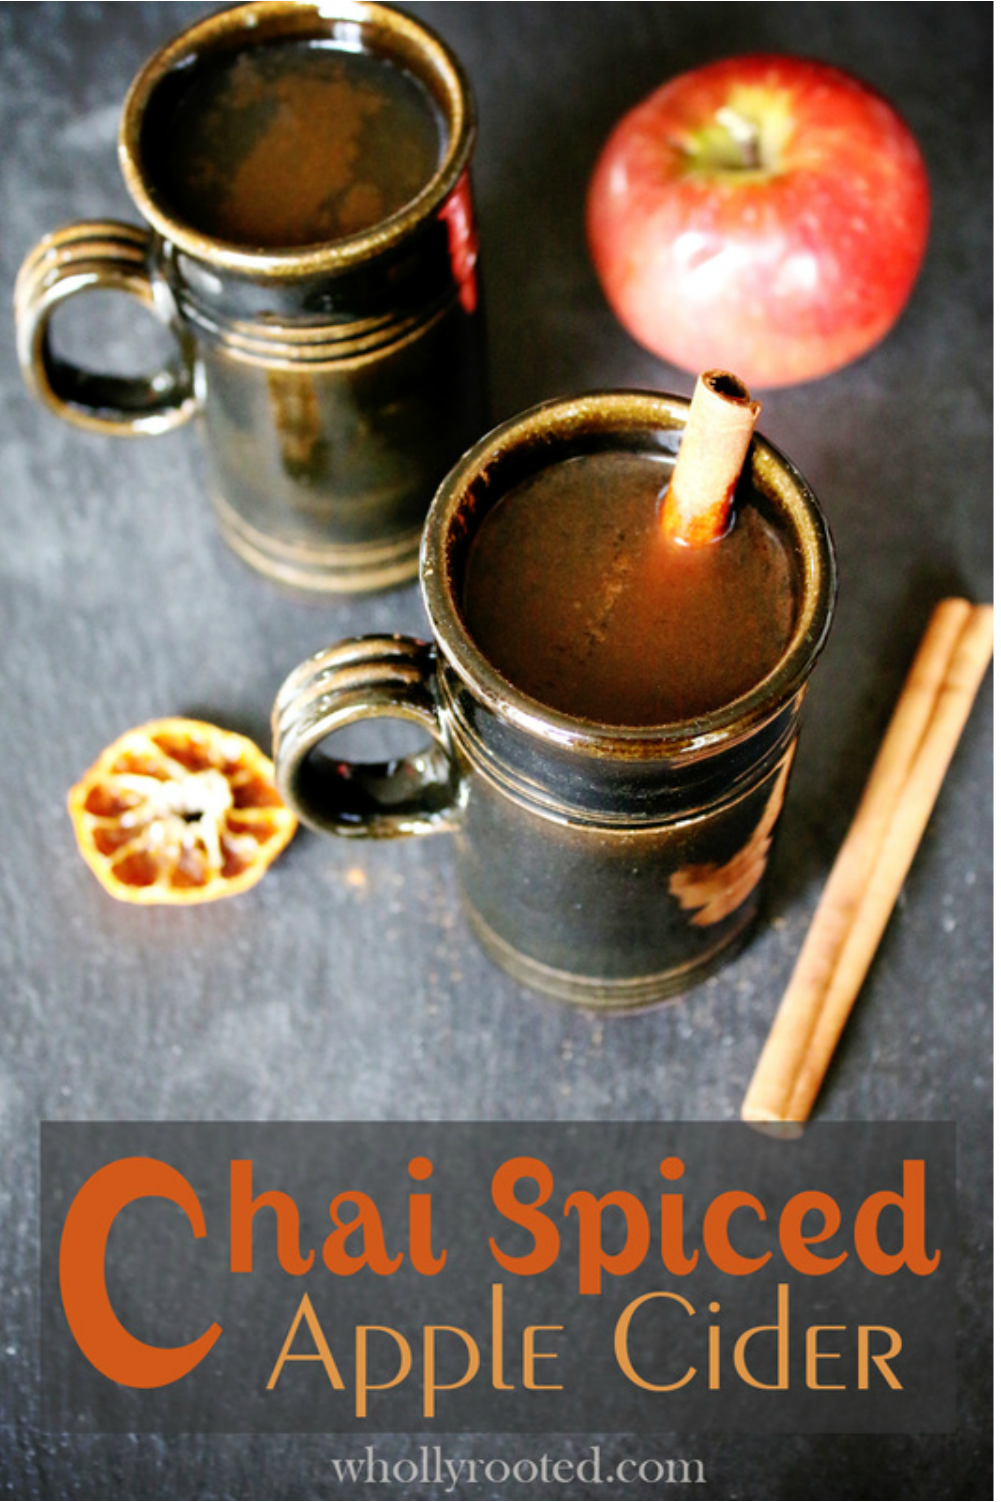
This is the time of year for apple orchards, cool autumn days, and falling leaves. It is also the time for simmering pots of cider on the stove, infused with spices to warm the body and make the whole house smell amazing. We are lucky to live near many apple orchards - the closest is just 4.5 miles away. Just about every weekend from late September until November we are picking up gallons of freshly pressed cider and bushels of apples to make and bake with. As it gets dark earlier and earlier, we tuck in more in the evenings and play board games, cards, and even poker together. It is a family ritual to have a cup of steaming cider while we play and I make this almost daily. 
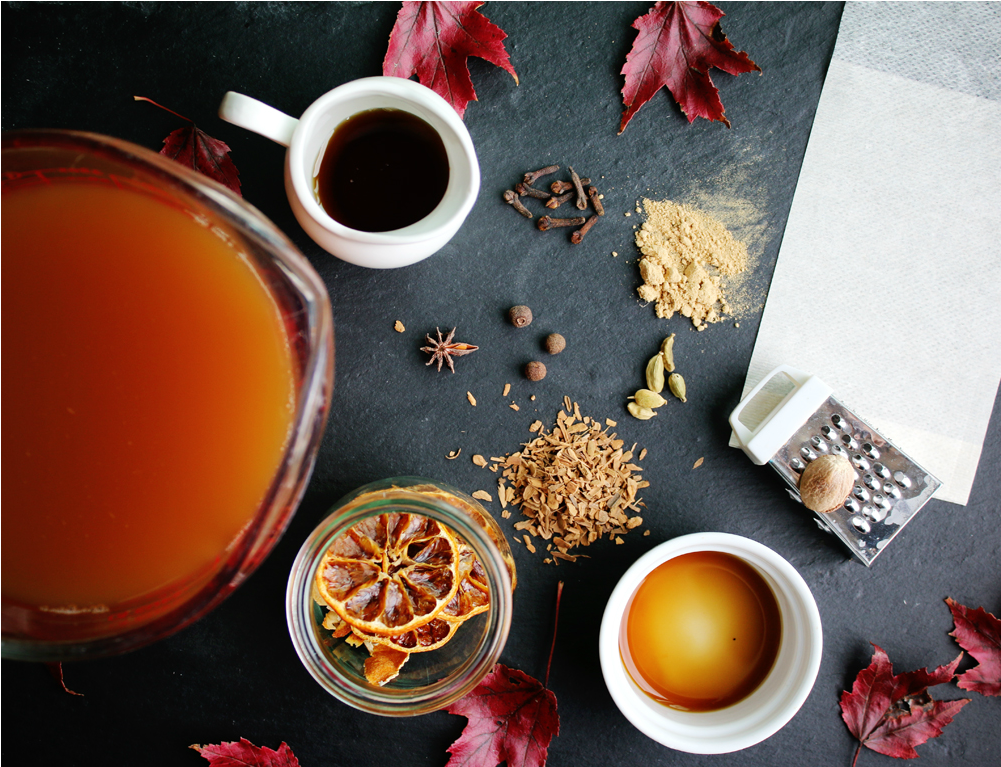
Chai Spiced CiderPrint |
{wholly rooted}This mulling spice blend is based on aromatic chai. These spices are wonderful with cider, and add even more depth and flavor to your hot cider recipe. Double or triple the recipe and put it in a crockpot on low or pour warm into a punch bowl - perfect for parties! {ingredients}
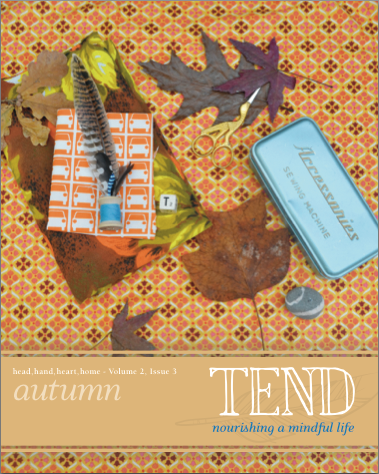
Pour your fresh apple cider into a pot. Cider in the fall is one of those family rituals that makes the season feel complete to us. The house fills with the amazing aroma of apples, cinnamon, and other spices. It warms us after an evening walk on a chilly night. It simply means fall is here. Enjoy! Another season has arrived, another autumn with Tend Magazine. Saying Time Flies may seem glib, but it is true. This issue has a lot about home, finding your sense of place, celebrating autumn, and gathering all fall has to offer and storing it for winter. My section, of course, is all about food and herbs. Elke found a few game experts who wow us with their recipes for partridge, rabbit, and pheasant. Learn all about mushrooms! Kirsten shares how to ferment mushrooms, and I show you how to grow your own, preserve them, and cook with them! Debbie shares her recipe for elderberry syrup, which is perfect for this time of year. Kim tells us many ways to preserve the autumn harvest - she even shares her secret "Kim"chi recipe. There is also a homemade granola 101, and blending your own tub teas. And that is just my section! Throughout the magazine there are articles about building an off-grid village, going off grid, creating a home. There is autumn reading, and of course there are patterns. Make a tweed cowl, build an indoor campfire craft with the littles, and make some felt stuffies. 124 pages of great things to take us into autumn.  I love our contributors. Have I told you that recently? Everyone is so passionate about what they do, what they make, and they love to share with others. We are lucky to have so many creative, dynamic writers/makers/doers. They are fabulous! 
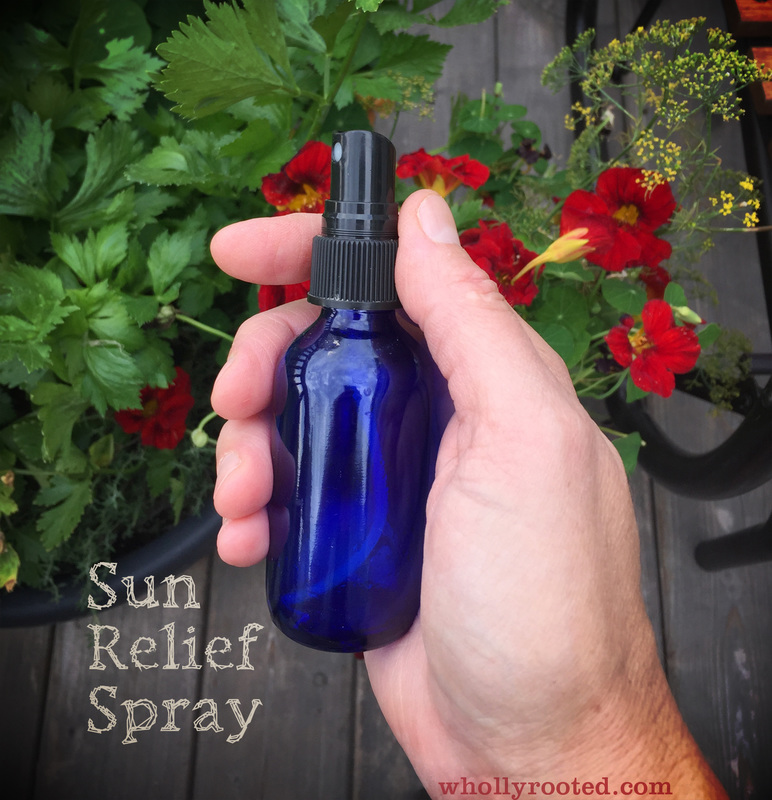 Summer means a lot of sunshine and even when careful, sometimes we get a bit too much sun. I am super careful about the sun - I spend a lot of time outside with the kids, in the garden, at the community garden, and at the CSA picking during the summer. I am also taking medication for my RA which makes me photosensitive, so I can burn easily. Aaaand there is the whole hot flashes business. So needless to say I find myself sometimes feeling like my skin is just on fire, even when we are careful about when and where and how much sun we get. This offers a cool refreshing immediate feeling of relief. I carry it in the cooler sometimes when I know we will be out for awhile, and I always have a bottle in the door of my fridge. This spray combines several gentle ingredients that have properties which can help reduce inflammation, soothe the skin, and promote healing. Supplies: One 4 oz. glass spray bottle or two 2 oz. bottles 3 oz. distilled water 2 tsp. organic apple cider vinegar 3 Tbsp. fresh aloe vera gel (use a plant or a good quality gel, not the neon green fragrance added goo from the pharmacy) 20-25 drops of lavender essential oil First, remove the gel from your aloe. Aloe is such a great plant everyone should have one at home! Simply remove one or two stems (depending on how large they are). On a cutting board make a slice down the entire length of one side and peel the stem open into one flat piece. Using a butter knife, gently scrape down along the stem from end to end, removing the liquid material, leaving the green outer shell. Once you have 3 Tbsp. of fresh gel, break up any thicker bits using the back of a fork, and then put all of your aloe in the spray bottle. Next, add the distilled water and apple cider vinegar, close the lid, and shake well for a minute. Finally, add your essential oils, screw on the top again, and shake well one last time. Clearly label your bottle and store in a refrigerator. This should keep in the refrigerator for at least a month. Shake well before using. Don’t spray directly on your face, spray onto your hands first and then apply to your cheeks/forehead/nose. When I feel like I'm burning up I often spray the mist into the air and walk into it, or spray my chest/neck. 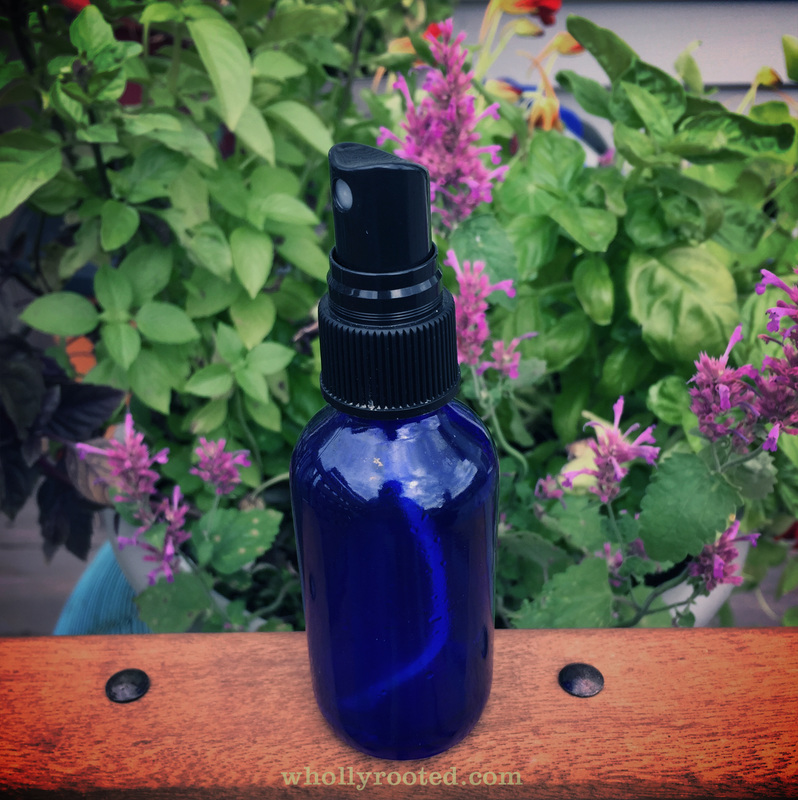 A chilly refreshing healing spray feels SO good on hot skin. While it is best to not get burned, sometimes in the summer we get a little too much sun or just feel overheated (not to mention hormonal overheated) and this refreshing herbal spray can help provide quick relief. Optional :: Try reducing the distilled water to 2.5 ounces, and adding .5 ounces of a good quality organic witch hazel in the recipe. I prefer alcohol-free spray, but the really good quality witch hazel can give additional relief for those times you have too much sun. 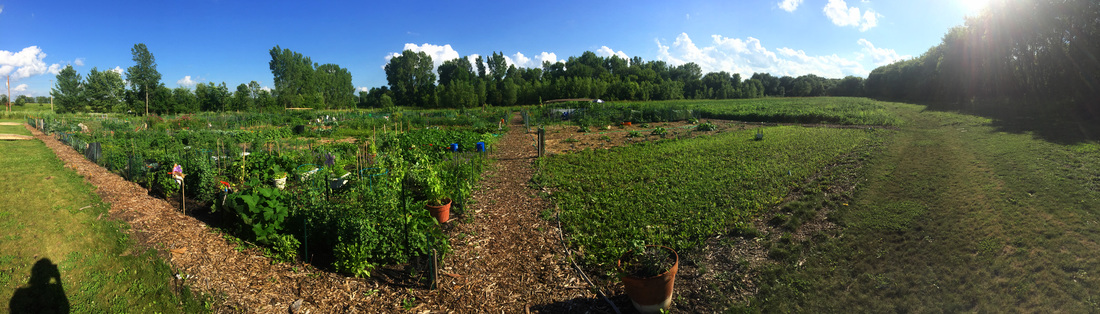 One of the hardest things about leaving our old (way too small) house was leaving the garden. But we split and collected transplants of several things that could be worked in April, and thought they would be happy enough in pots until they can go in ground. For a full greenhouse of seedlings, we searched for a community garden plot near the new home so we could plant in ground right away, even as the new house had to wait for grading and driveway and landscaping before we could plant a single thing. I was so thrilled to find an organic community garden just 2 miles from home. We reserved our plot when we were still packing boxes at the old house. We went on weekends to hand till and weed and prep before we even moved. In the early days we didn't know anything about the new garden. The people, the soil, the weeds, the sun, the animals. We just knew we needed a plot since we would not have any garden beds until who knows when. 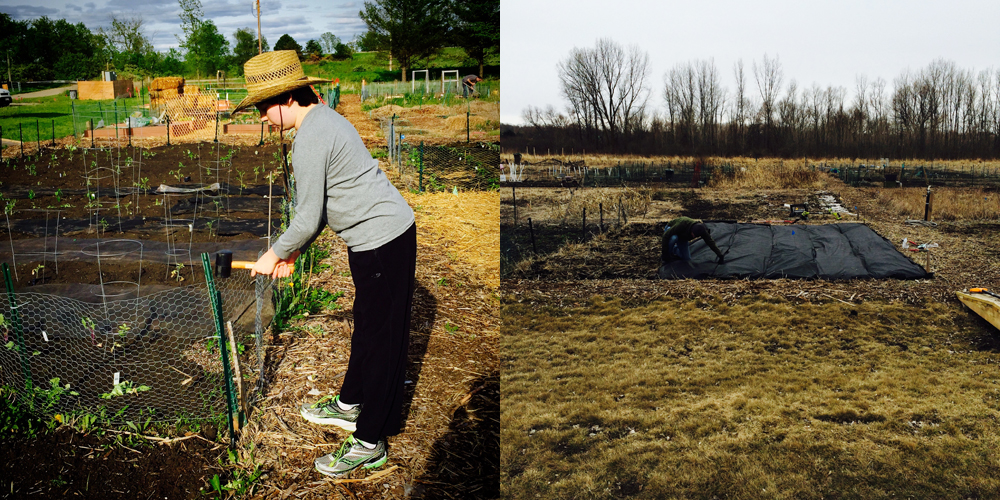 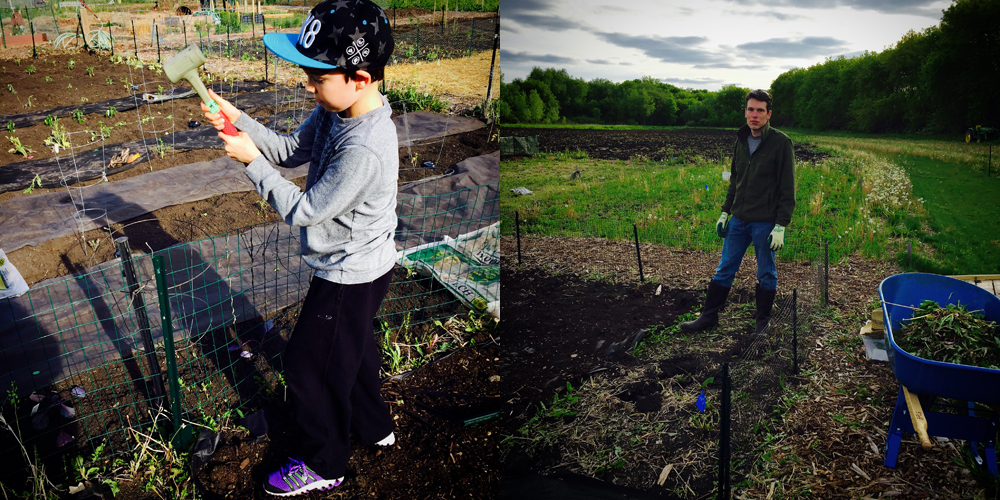 The new house had come together so suddenly that every seedling already started was planned for the old house. I had flats and flats of plants which were primarily for part sun, dense rich soil, and high moisture - we had worked so long on the old garden to get the soil to produce so heavily in a small space. We planted anyway. We discovered early on that the new soil was dense and compact. Not very high in nitrogen. And the weeds!!! The first month or two we went to the community garden the weeds were the conversation starters. Every person would stop, introduce themselves, and talk about the weeds. Last year they almost gave up. Last year they did give up. The weeds and thistles explained all of the interesting contraptions in other plots, the haybales, the large sheets of plastic, and the expensive raised beds. We re-worked half of the plot to cover it in weed barrier and added as much compost as we could. As things came in very yellow, people would stop to chat and tell us all about how this used to be a pond bed, then corn fields, and then just grass and weeds. About the river. About the deer whose tracks we found in all of the holes torn into the weed barrier. 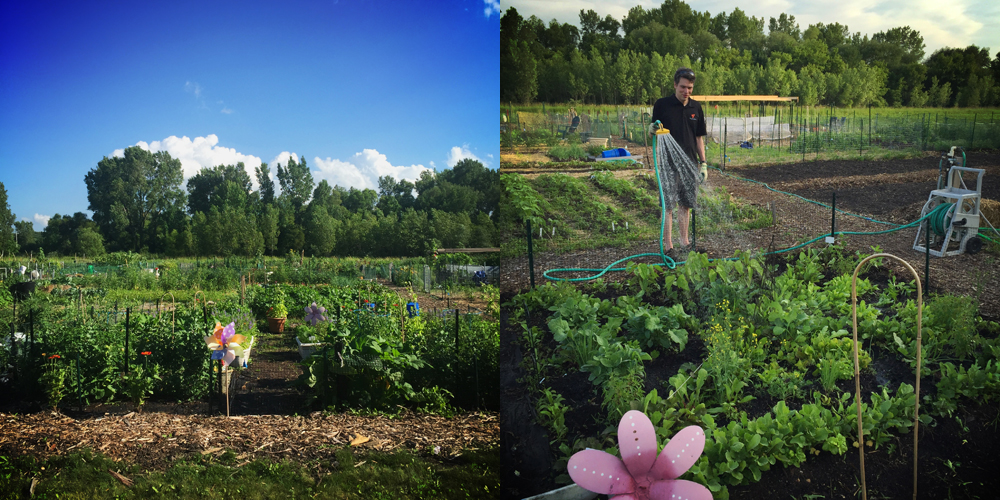 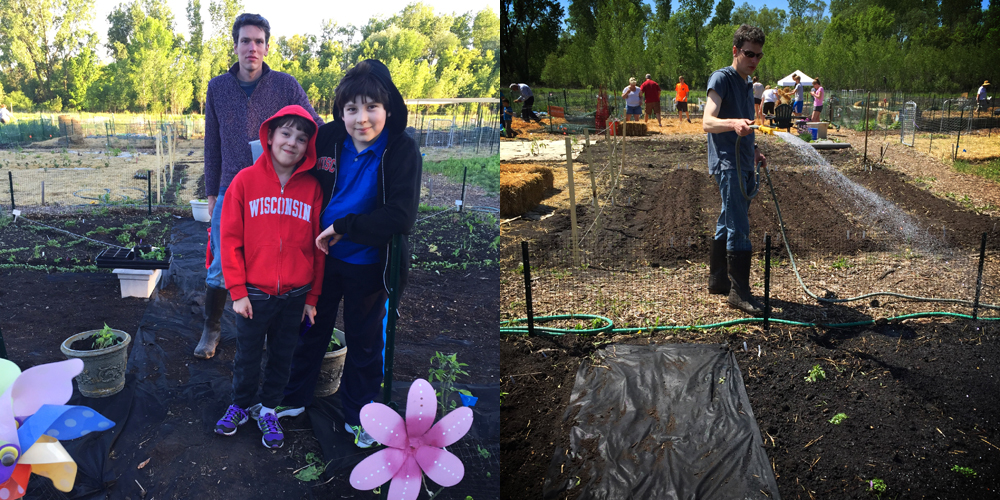 As things were tweaked and supplemented and new things planted, people would stop to chat about different plants and ask what is this, what is that. Gardeners at the next plot over would sit and weed and chat while we watered. We weeded the paths, added more mulch, filled out our sheets for garden hours. We found a turtle nest in the compost and another gardener got a marker while we found a plot marker and string to rope it off so nobody would dig there. Everyone has avoided that spot since then, and the turtle eggs are carefully covered back up after any rain. For months there were spots with stakes and neon pink tape to protect the killdeer nests that were nestled in along the paths. 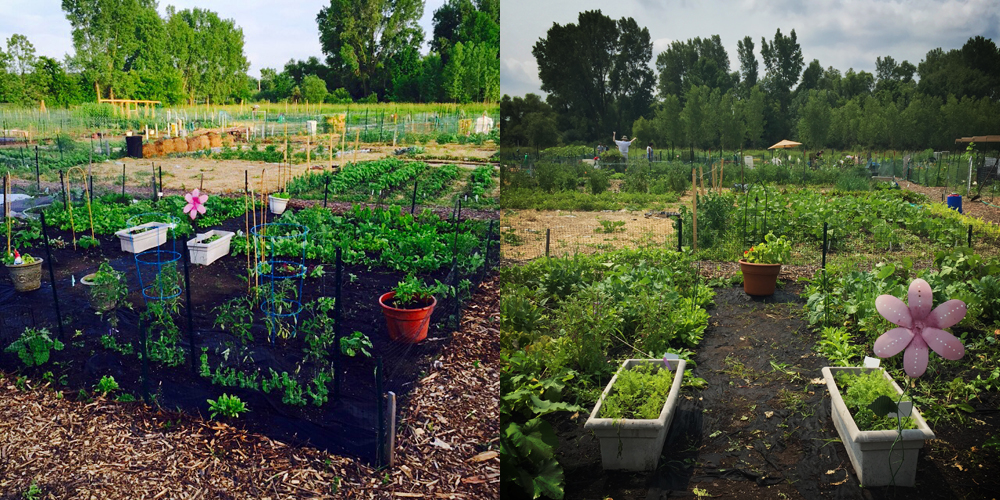 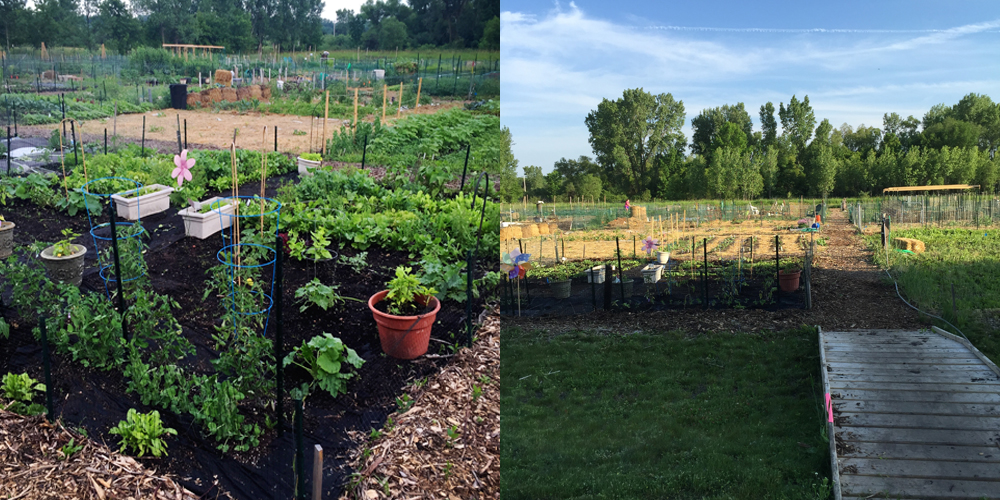 As the garden has grown we have kept weeding and watering. And every time we are there someone stops to chat. About those purple tomatoes. About how big the squash are. In that time we have organized some tools, re-wrapped hoses, weeded and mulched the paths some more, there has been a shed built, a vegetable washing station was installed, people have weeded and watered plots for people out of town or with health problems. Every time we are there, someone comes up with another gardener we have not met yet, and introduces them. The garden has young families, kids, dinks, chefs, retirees, school groups, volunteer groups, and the local food pantry has raised beds. We are next to a bike path so often cyclists will stop and walk over, read the signs, and walk through the gardens. Sometimes people stop in cars or RVs and walk through, asking questions, chatting about what we are growing. They are from Illinois or Iowa, and are curious. 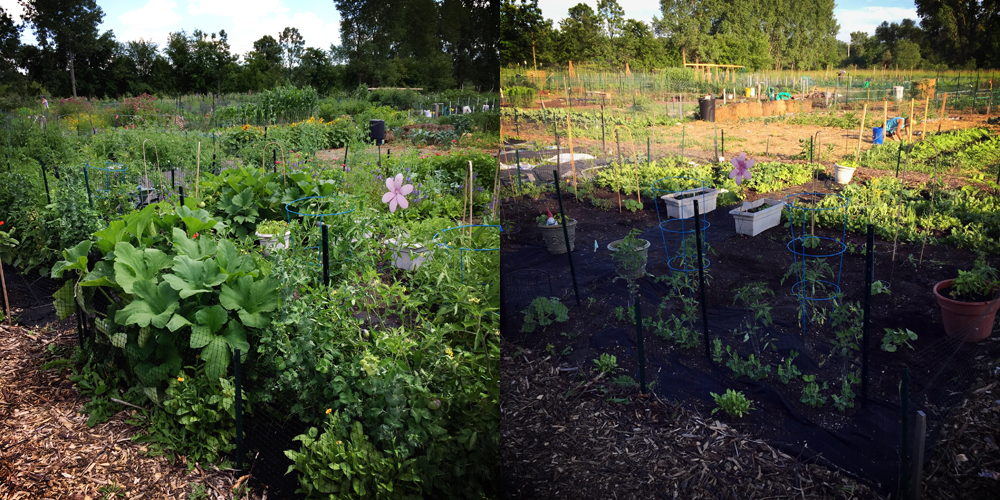 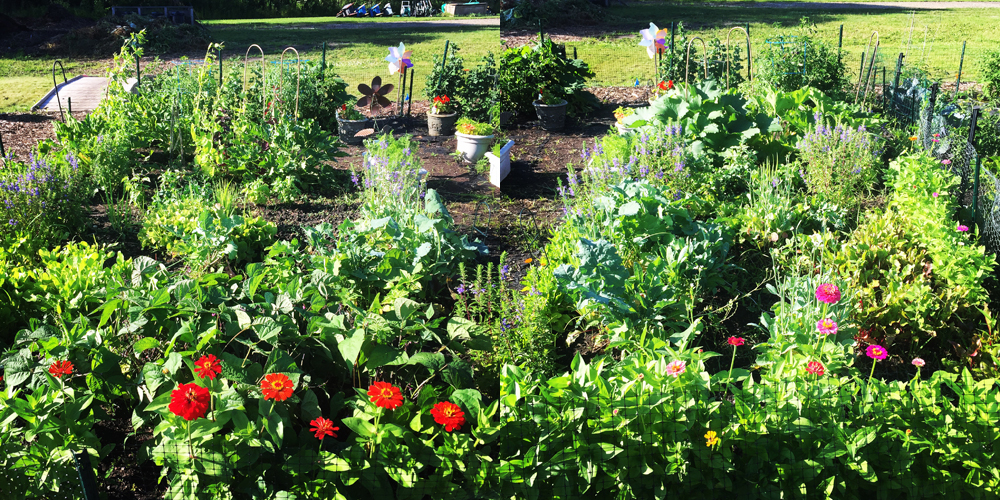 There will be a picnic for the garden, and I donated a book for a raffle - and a lovely lady came by to the house to pick it up. She has now come over to the plot to chat every time we are there. And we talked about all of the great recipes in the local cookbook and the chefs that created them (she knows most of them). Every time we go to the garden (2-3 times per week) there are many people there. It is never empty. And it is always friendly. There are hellos and compliments and chat about the weather. There are those who know each other well now who heckle each other loudly in good humor over who has the most weeds, or who has the biggest tomatoes. We may not have met the people way over on the other far corner yet. But I assure you they have waved and yelled hi on their way down their path. 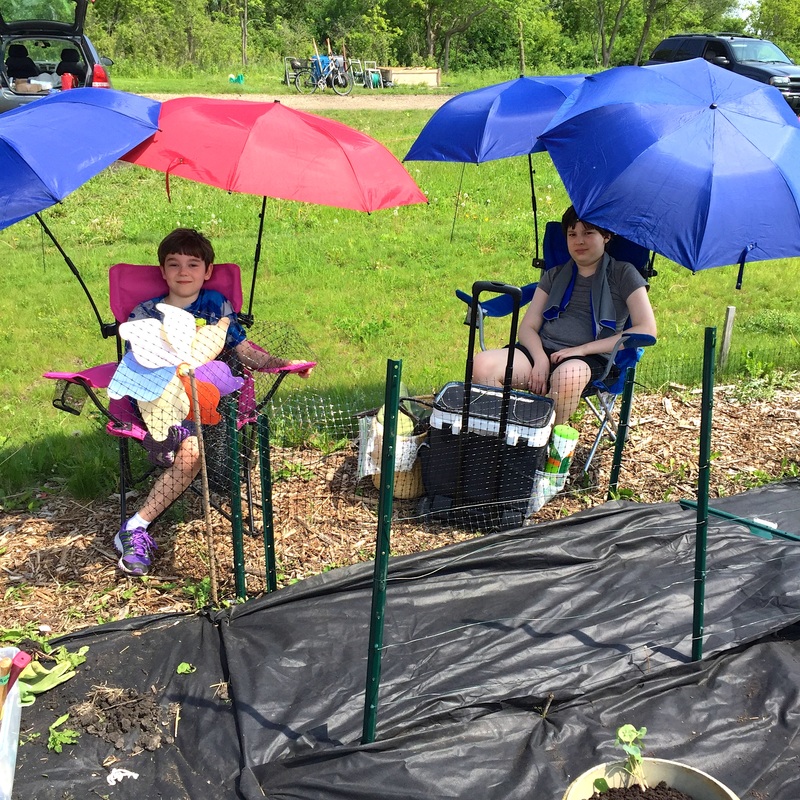 This new town we live in is pretty much a suburb of Madison. But it is tucked off on its own a bit and so it has a small town feel. 10,000 people live here. And people are friendly. We have had a community garden before. But it just wasn't a community. I have realized over the past few months that is what this new garden plot is. It is a community. It is our community that we will now be a part of for years to come. Our new house has 3 times the yard size, and we will have room for many integrated plantings, fruiting bushes, canes and trees. But I am now certain that we will keep this community garden plot. Because it is a community garden. And this is our community. 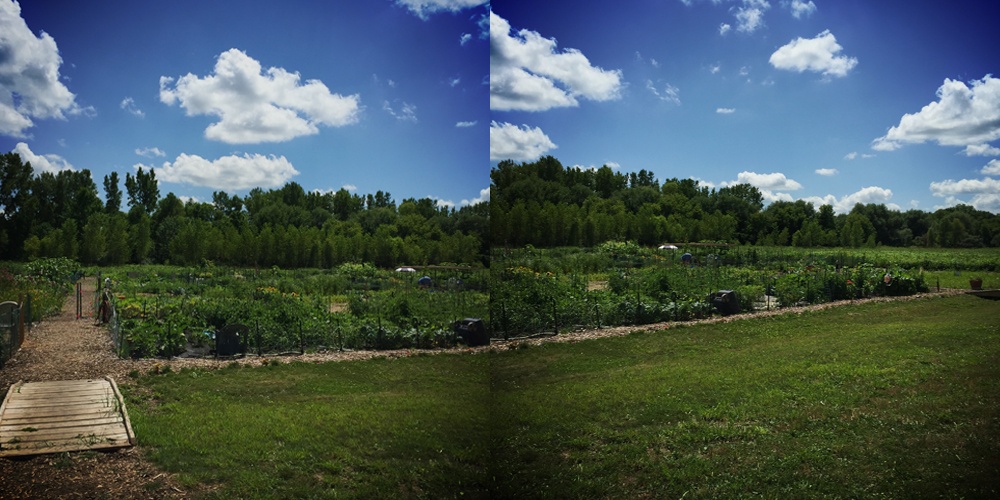 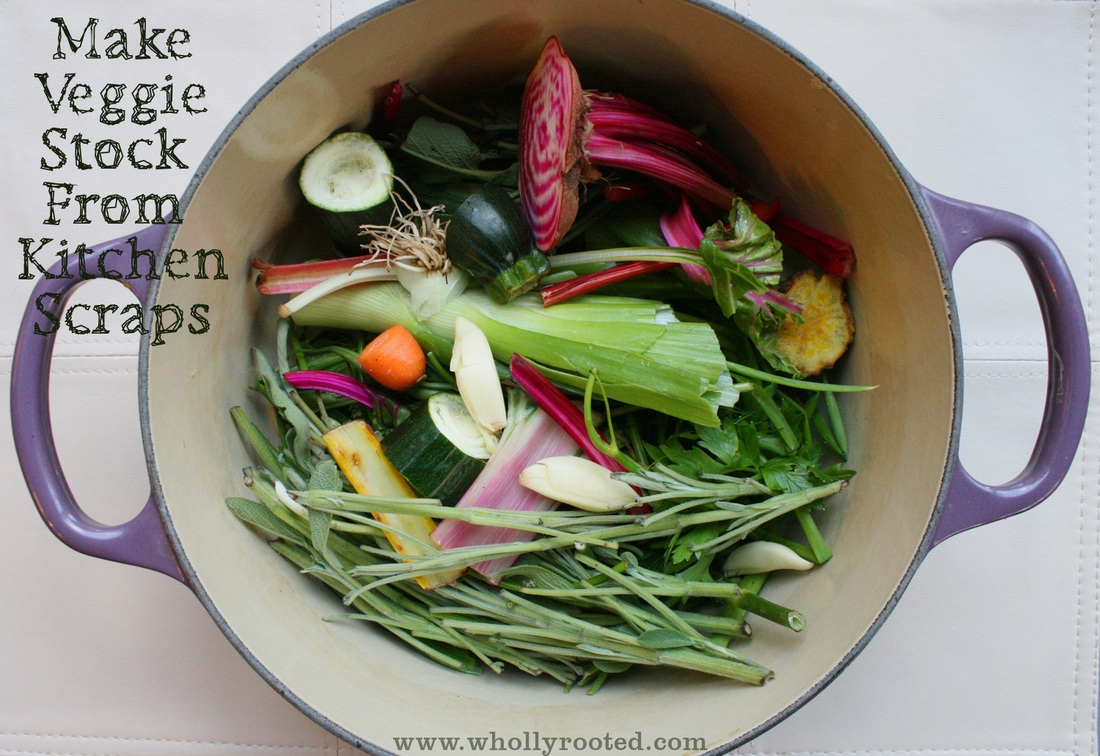 This is the time of year when we all have a lot of veggie scraps. Peels, ends, stems, and stalks. Before you compost those perfectly fresh scraps, think about making fresh veggie stock. It is a great way to use all of the healthy fresh ends and peels and pieces. The stock can then be used for making everything from soups and stews to casseroles or even used as the pasta/rice/grains water. By using scaps, you are saving a lot of usable food from the garbage bin or compost pile and turning it into liquid nutrients for the whole family. The easiest way to make fresh vegetable stock is to save all of your kitchen scraps as you meal prep throughout the week and store them in a jar or bag in the fridge until you are ready to use (or the freezer if not using within a few days). I tend to prep all of our CSA box on Wednesdays along with community garden picks from Tuesday, so that everything is ready to use for the rest of the week. I can easily fill a whole pot with stems, peels, and ends every Wednesday from June to November. Veggies that are good for stock making include onion ends, scallion bits, carrot skins and tops, celery bottoms, beet greens, pea pods, swiss chard stalks, green bean tips, zucchini peels and ends, and all stems from herbs like parsley, thyme, sage, savory, rosemary, or basil. Skip the stronger cruciferous veggies, as they can add an unpleasant aroma to stock (cabbage, broccoli, cauliflower, brussel sprouts). I use kale stems just fine though. The key is to use fresh scraps - nothing bad or moldy - your stock will taste like what you put in it. 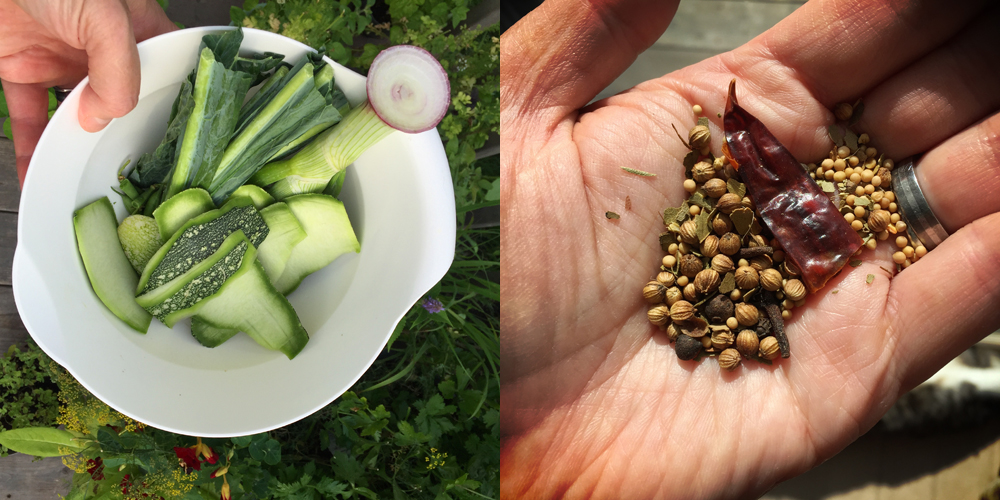 So fill a 3-4 quart stockpot with your leftover veggies and herbs. Add a bay leaf or two, a few peppercorns, a teaspoon or so of pickling spices (coriander, cumin, dill, clove), and 2-3 cloves of garlic. I also like a little dried chili pepper. If you have a lot of only one type of veggie, add a carrot, a stalk or two of celery, and an onion. Fill with enough water to cover the veggies/herbs (don't worry if you have a few stalks sticking out, it will cook down). Bring just to a gentle simmer on medium (not a hard boil), reduce heat, and simmer on low for 1-2 hours. Strain all of the stock to remove vegetables, herbs, and spices. Pour the liquid into sterilized canning jars or freezer jars. Let them cool to room temperature first, and then freeze immediately or store in the fridge if you will be using within a week or two. Makes approximately 2 quarts/2 litres. 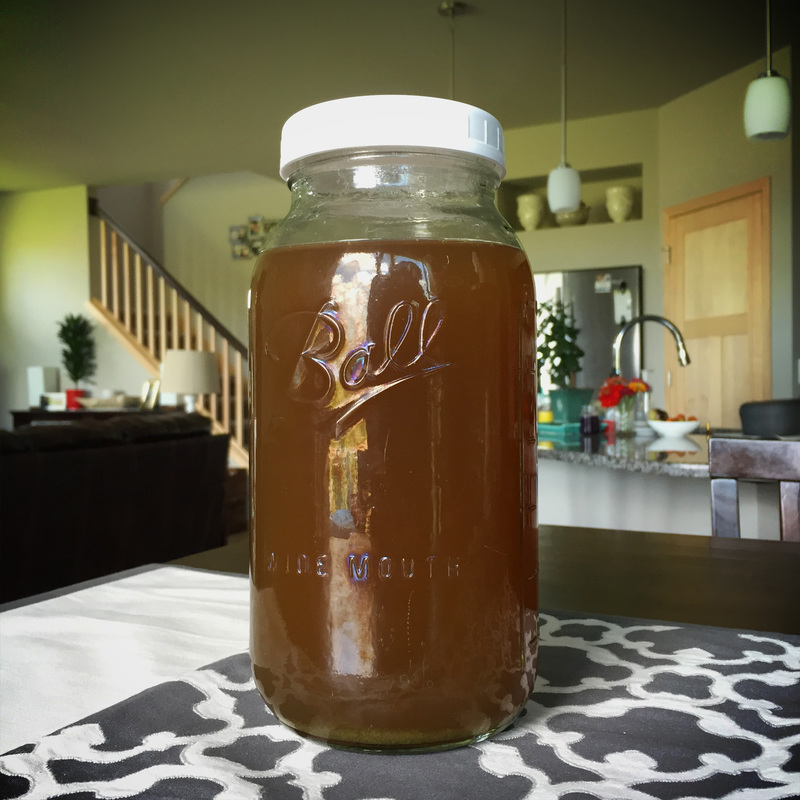 Of course you can save chicken bones and make chicken stock too. I find that with all of the garden and CSA bounty my husband and I eat a lot of vegan meals in the summer. The boys have a lot of poultry since there are mammal meat and dairy allergies in the house, but there is only so much bird a girl can take (and I love summer bounty!). So for me, having fresh vegetable stock which can be used for cooking anything and everything is so convenient and really adds great flavor to everything. This veggie stock + the vegetable bouillon I make is a great base staple for just about any recipe. So don't toss the scraps! Make veggie stock!  In late April, we moved from the far side of our city to a small outlying town on the far opposite side of our metro area. We moved from one green built home to another, but the landscape couldn't be more different for moving only 19 miles. We moved from a 1536 square foot home on a lot that was under 3000 square feet (including driveway, sidewalks, etc.). We moved to a bit larger home (better suits our work at home/homeschooling/kids moving closer to teens) with the total lot size more than three times the size of our last home. Our square footage is still less than "average", but after living in such a small space for so long, it feels huge to us. A big part of the change though really is the landscape. The views are amazing. We are atop a hill and surrounded by fields on 3 sides. The birds swoop and sing. The grasses and wildflowers sway in the breeze. The storms roll through and we can see rain from dozens of miles away. The lightning! At night it is quiet and the moon and stars are so so clear. The sunsets are stunning.      It is a great feeling to move from the bottom of a hill where neighbors walking by would wave at us through the windows to a panorama of rolling hills, swaying grasses and wildflowers, distant silos, and so much quiet. I stand outside every single night looking at that sky. We open windows wide at night and peer through our telescope to see moon, stars, and even birds landing on thistles far across a field. We were waiting for our base landscaping grass to establish before we started working on our new permaculture beds and plantings. I am happy we had time to sit here and feel the winds, see how much sun we get, and observe the wildlife. It will help us create a more balanced garden for this environment. And now I also know that we need a place to lay down and look at the stars. . 
In this house, we love making our own beverages. We make infused water, shrubs, syrups, switchels, and teas. My husband even roasts his own coffee beans. I drink a lot of water, but having a variety of beverages is nice - so many flavors! Every summer I find myself making this blend of juniper, ginger, sage, and lime. This combination is tangy, sweet, and earthy. Very different, and *very* good.
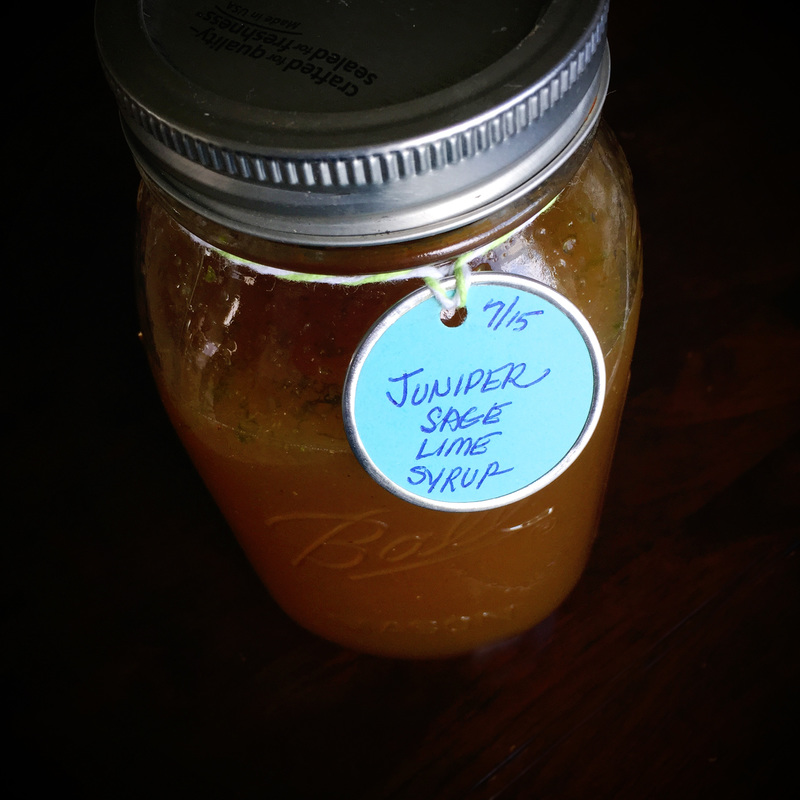
My husband spent some time as a child in Germany, and so grew up on a little bit of syrup or fruit juice in a glass topped with seltzer water. These days we have a soda stream. We make all of our own syrups, but the little machine is a great fast way to fizz our own filtered water and use it to make drinks. This drink syrup is a base. You make the syrup, store it in the fridge, and when you want a drink, you make it right then. It is very easy. You simply add some ice to a glass, add a few tablespoons of the drink base (to taste), and top with seltzer water. It is cold, fizzy, and flavorful. DIY soda! And all homemade. Delicious! {Try making a cocktail version using syrup, gin, and seltzer!} DIY Soda: Juniper-Sage SyrupPrint |
{wholly rooted}Make your own syrup base and then use for homemade sodas. Add a little of the syrup base to a glass with ice, pour in seltzer water or club soda to fill, and enjoy! {ingredients}
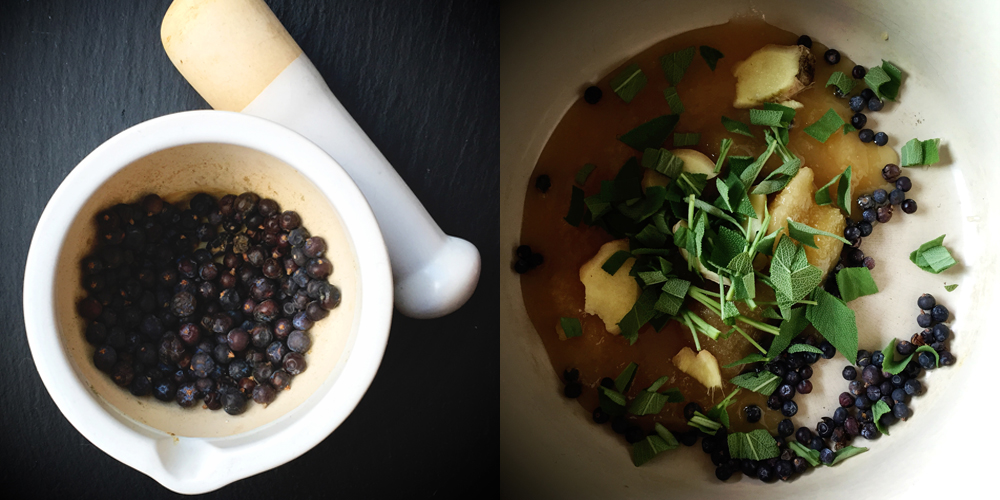
Make sure you crush the juniper berries a little to release their flavor. 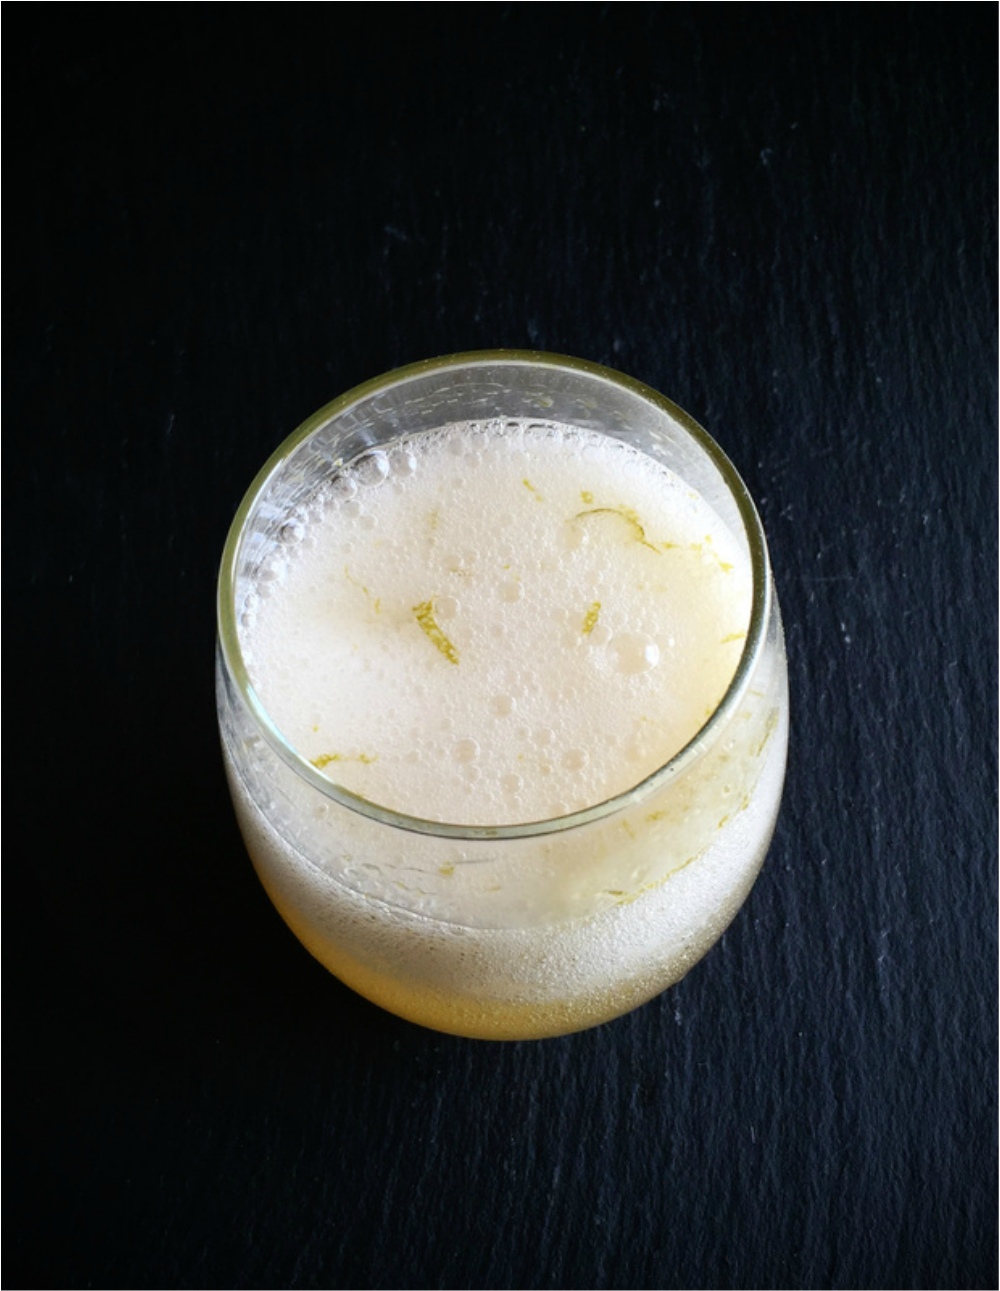
Making your own drink syrup is very quick and easy, and homemade sodas taste fantastic! {{Juniper berries are the seed cone produced by juniper. When dried they have a fresh green piney aroma and flavor. Juniper berries are used a lot in scandinavian and european cuisine to flavor meats and fermented veggies - and juniper berries are the main flavor in gin. You can find dried juniper berries in the spices or dried herb section of most grocery stores. Online they can be found at places like iherb, Williams-Sonoma, Mountain Rose Herbs, Penzeys Spices, etc. }} 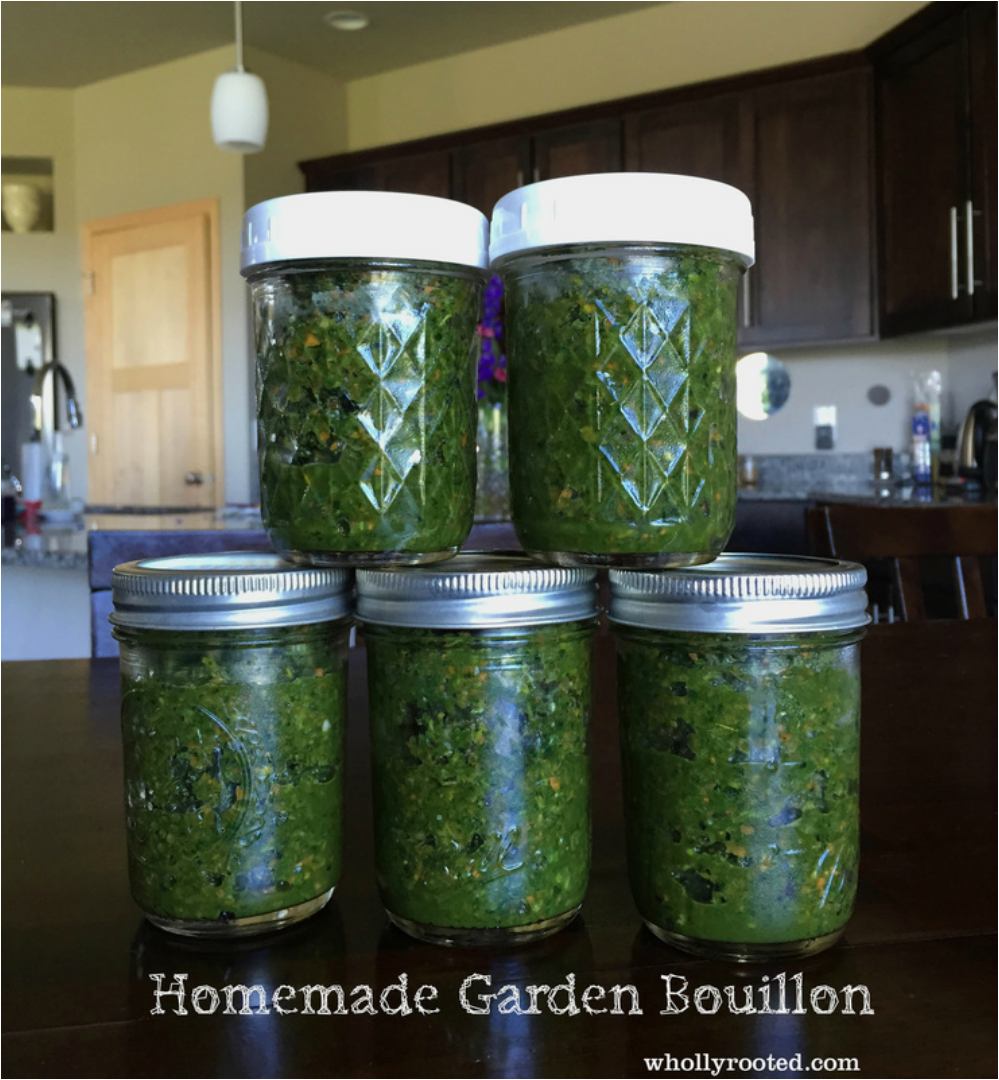
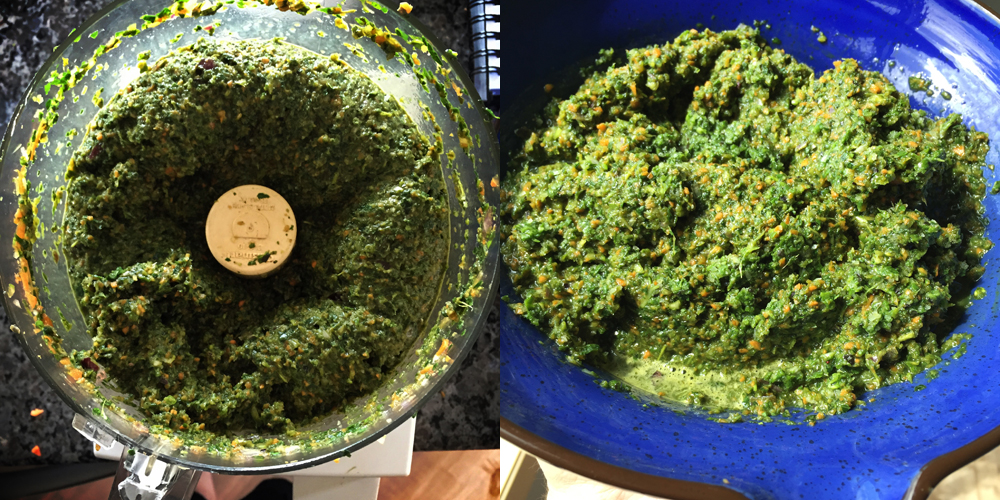
Long ago I found a recipe for bouillon in the River Cottage Preserves Handbook. A lightbulb went off, and I have been making my own version of veggie bouillon ever since. By blending all of the freshest herbs and vegetables in peak summer and preserving them with salt, you save that crisp fresh flavor which is fantastic in winter when making soups and stews. When you think of bouillon you probably imagine a hard dry cube - but this is more of a thick paste. You use it like you use a cube though, by stirring a spoonful into your recipe when making soups, broth, stews, or even pasta. This is very salty as bouillon should be, and the salt is what preserves the green vibrant flavors – a little goes a long way. I call my version garden bouillon because I use many things found in my garden. I like to make several batches over the summer so that I have enough to last all winter. Keep a jar in the fridge for using now, and freeze the rest. This has a high level of salt so it will never freeze quite solid, so you can still spoon out some even fresh from the freezer. I like to freeze in 1 cup jars so that I can pull one out at a time throughout the year. A food processor is the best tool for the job. 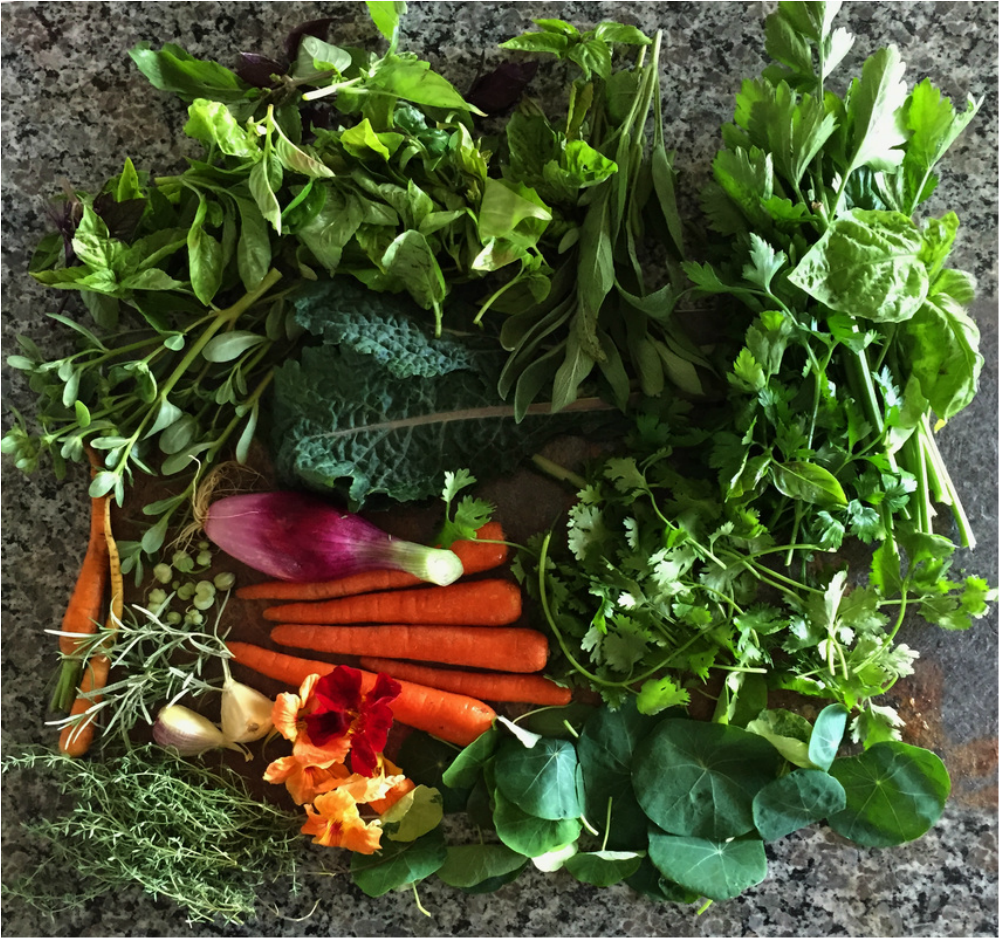
Homemade Garden BouillonPrint |
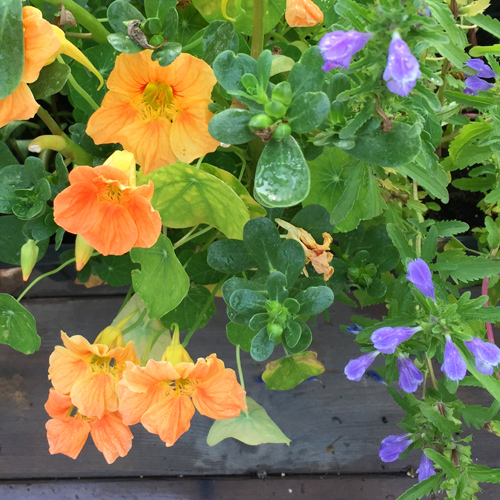
{wholly rooted}The nice thing about homemade bouillon is that you use what YOU have in your garden. Just think about what flavors go well together. I love adding extras like kale, purslane, nasturtiums (leaves, flowers, capers), coriander heads going to seed, celery root, leeks, and anything else in season at the time that adds a nice punch of flavor plus lots of great vitamins and minerals. I always start with the base aromatics of onion, garlic, carrot, and celery, and then add additional flavors from there. So make your own combo - the main thing to remember is to have a 4:1 ratio of herb/veggies to salt. So for every 400 grams of herbs/veggies/flowers, use approximately 100 grams of good quality sea salt. {ingredients}
This is approximately 780+/- grams of veg/herb, so I blended in just under 200 grams of good quality celtic sea salt. I will make a few more batches as the summer goes along, using what I have fresh and in season. This is a great way to preserve the fresh, vibrant summer flavors, to use long into the winter! |

denise cusackI am a certified aromatherapist, clinical herbalist, permaculture designer, organic gardener, plant conservationist, photographer, writer, designer, artist, nature lover, health justice activist, whole foods maker, and mother of two young adults in south central Wisconsin. 


Categories
All
©2007-23 Denise Cusack, all photos and text. Feel free to share my posts on FB or Twitter or online media or pin on Pinterest (thank you!), but please keep the links back to my website intact (meaning please do not take or copy my images off of this website and share them unattributed or without linking back here or use them without permission). Thank you! :)
|


 RSS Feed