
So ---- today is the day for our launch of Kitchen: DIY! This is a FREE 30-page book with some of our favorite kitchen DIY projects. Brice (my husband) and I have written many articles on home projects and this is a compilation of some of our favorites we wrote together. We are always asked about our hydroponics system and we go through how to choose and setup a system that is right for you. Another favorite is how to roast your own coffee - in a roaster or even on your grill or over a campfire (plus...recipes). How to sprout and which seeds are the best to start with. How to get started growing mushrooms - what are the different types of starter setups from tabletop to logs - and what types of mushrooms can you grow (plus...recipes). Brice also has a great article about grilling with hardwood charcoal and not the little chemical bomb briquettes. Of course this is filled with photos and recipes and detailed information with resources! Happy DIY'ing.
>>If you are on a non-Apple device, you can download a PDF version here! 
Be sure to keep an eye out here - I will be launching another ebook The Gluten and Dairy Free Pantry: Recipes and Fresh Ideas for Your Whole Foods Kitchen in the next few weeks!
2 Comments

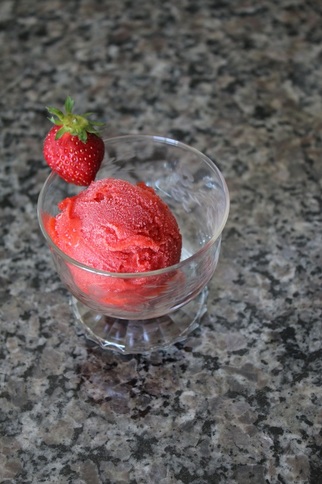
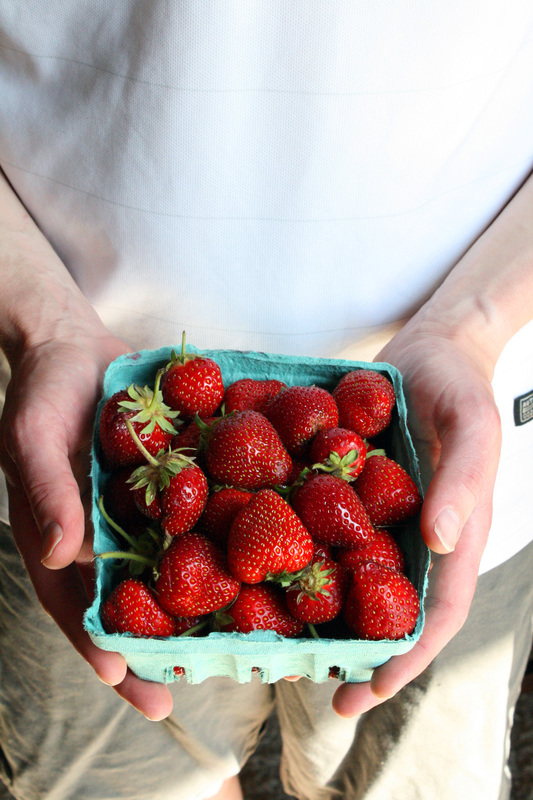
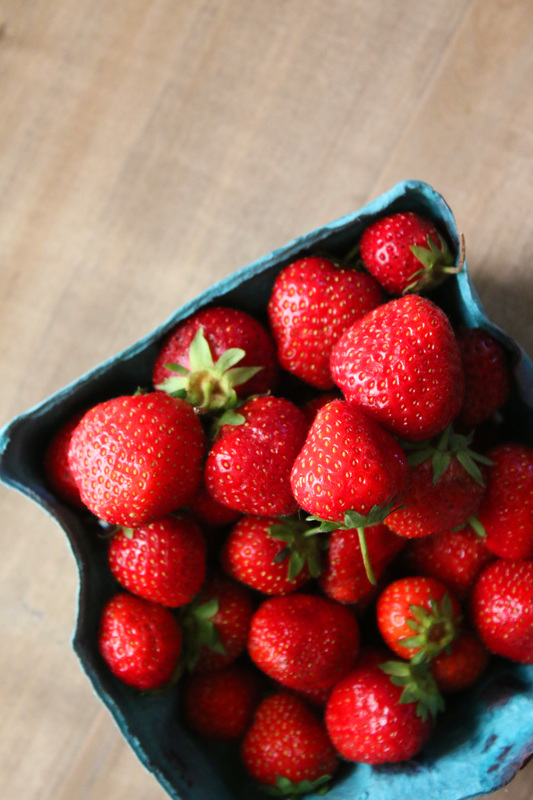
I love strawberry season. It lasts only a few short weeks, but it sure is good while it lasts. We are not growing strawberries this year - well, we are, but they are not big enough to fruit this year - but they can be found all around here. Strawberries are at local farmer's markets, roadside stands, u-picks, and in CSA's. We have picked up strawberries every time we see them, knowing that in a week or two they will be gone. I love making some jam and drying some for granola, but really, sorbet is a must. It is the perfect thing on a hot day.
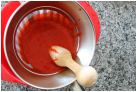
Making an unheated dairy-free sorbet is really the best way to get the full amazing strawberry flavor. I know many recipes call for syrups with water, but really, who wants watered down strawberries. I want it to taste like an explosion of strawberries in my mouth. I don't like using white sugar and my body doesn't like me using white sugar, so I have experimented to get a scoopable sorbet using a natural sugar. This recipe uses raw honey and a wee bit of limoncello to keep it from freezing too solid (I love our homemade limoncello!!!!). This remains scoopable and a vivid red with the full pow of fresh strawberries. This *only* uses 3 Tbsp of limoncello per full quart of sorbet, but if you wish to have no liqueur in this, you can use 2 tsp of vanilla instead of one (vanilla extract also uses alcohol, which is what helps keep the sorbet from freezing into solid ice chunks) - but it WILL still be hard to scoop since you won't have the same recipe ratio and nobody wants several tablespoons of vanilla extract in their sorbet to compensate. Don't add *extra* limoncello though, as too much alcohol will make it more of a slushie. This recipe really is a great balance of flavor and freeze consistency and sweetness.
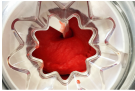
Strawberry SorbetPrint |
{wholly rooted}This is an unheated strawberry sorbet that packs so much intense strawberry flavor you will want more! {ingredients}
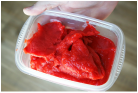
Blend the strawberries & lime juice on high in a blender until smooth.
Strawberry season doesn't last very long, and while we *could* buy strawberries from the grocery store all year 'round, we all know nothing tastes as good as locally grown strawberries in season. This recipe really takes advantage of the natural sweetness and amazing flavor or summertime fruit. I think I have a sorbet recipe for just about every single berry all summer long, but strawberries are the first berries after a long winter and spring, and the taste is just...summer. I sometimes try to tuck a quart of it down at the bottom of the chest freezer so we can find in the fall and get all excited that we still have strawberry sorbet in October - but it never lasts that long. That is partly because I just have horrible secret agent stealth skills, and partly because it is so good and who wants to save some for later when you can have it now, when it is hothothot outside. We had strawberries in our CSA yesterday, and picked up a few extra quarts, so I am going to go make some more sorbet! 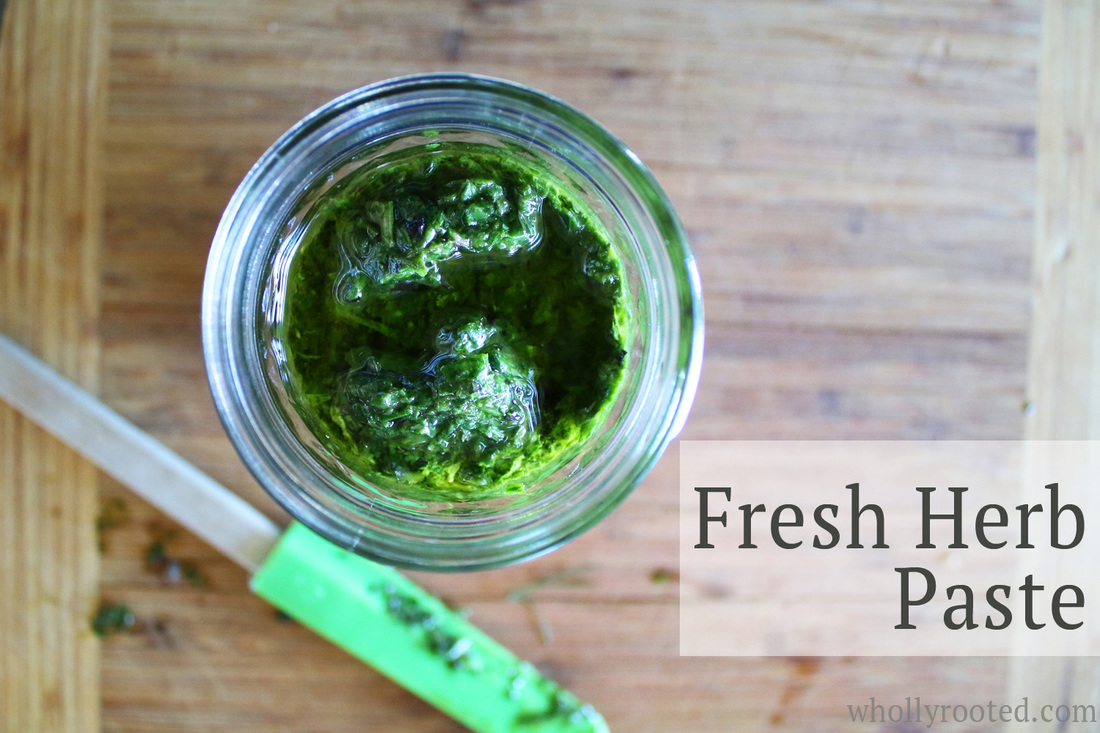
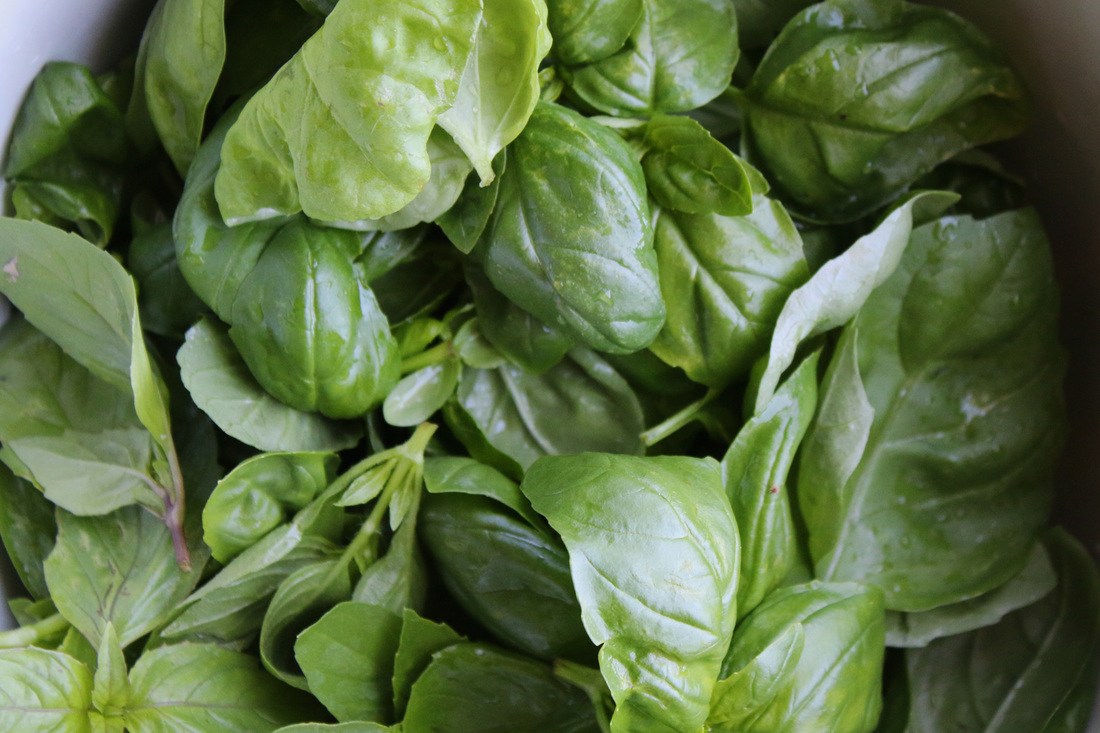
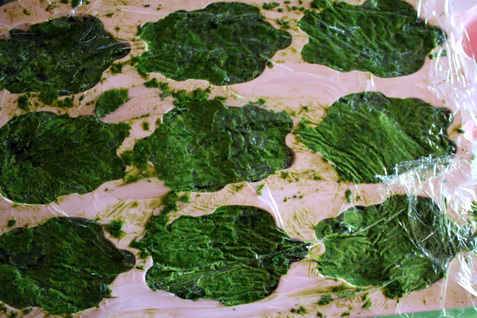
Once the gardens start producing, it can be a challenge to keep up. My dehydrator is going pretty much full-time, drying herbs, flowers, and veggies for use all winter long. Some herbs, such as basil, don't dry very well, so I make plenty of pesto to freeze. While I love pesto, I don't want my basil options to be so fixed all winter, so freezing more simple combinations means that I not only have plenty of pesto, but also have plenty of options for soup, stew, stir fry, rice and more, all fall/winter/spring. Freezing basil to preserve for winter is easy. I like to make herb pastes, which keep their fresh vibrant flavors and aromas and are super quick and easy to prepare. My husband thinks I missed an opportunity to name this recipe "Frozen Basil Bunnies" - but it isn't just basil that this works for, it is great for any fresh herbs. Although I agree that Fresh Herb Paste isn't *quite* as memorable as Frozen Basil Bunnies. Say that fast 10 times.
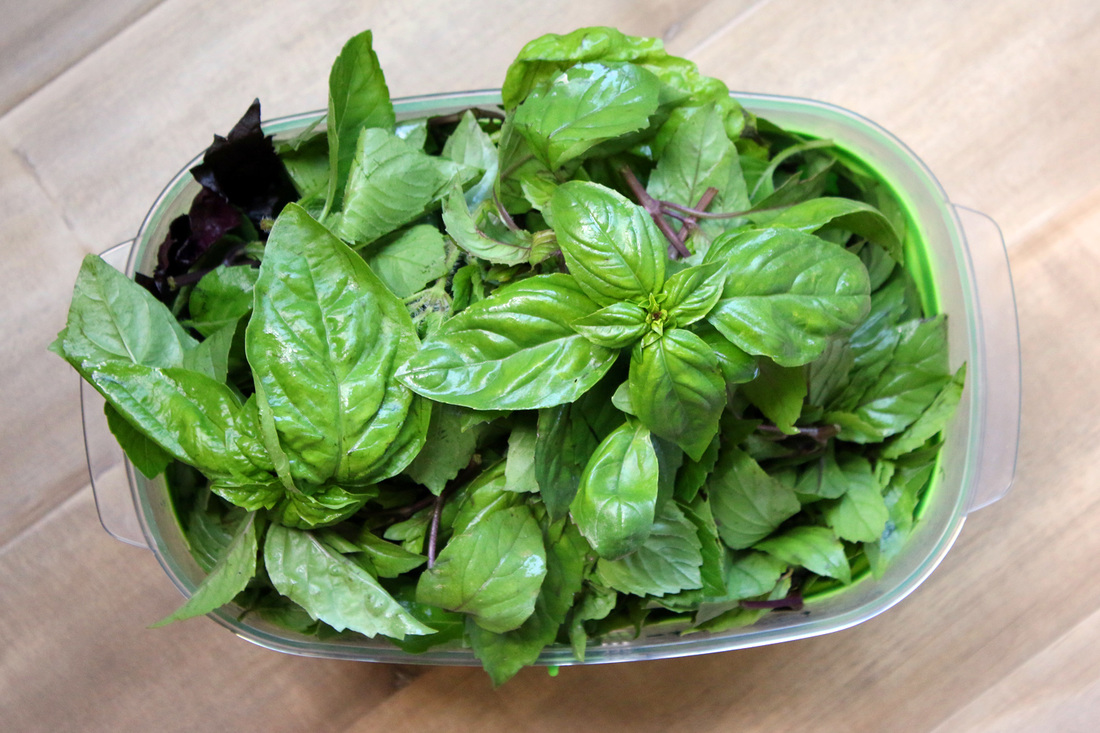
Basil is my first frozen paste because it is the herb that needs freezing the most, and I grow a LOT of it. It is so simple. Take 4 cups of freshly picked, packed basil leaves. Put them in the food processor with about 1/4 - 1/2 cup of extra virgin olive oil and about 1/2 tsp of fresh sea salt. I don't want to add too much salt so I have room for seasoning in recipes, but a little helps keep the vivid color and flavor. Whiz the basil/olive oil/salt in the food processor until fully blended. You may need to scrape the bowl down with a spatula in the middle of it to get all of the leaves. Depending on your type of basil and how packed it is when measuring, it will need as little as 1/4 cup of olive oil. The measurement is flexible just like the recipe. Add just enough oil to get it to fully whiz in the food processor! If you want fresh paste, voila, you are done. Put it into a canning jar in your fridge and use over the next week or so. You can also freeze it for longer storage. The recipe is per 4 cups of herbs because that fits into a food processor, but it whizzes down into a smaller amount, so you can keep going in batches to make as much as you like. I did 5 batches of basil paste and still have more left. Lots. O. Basil.
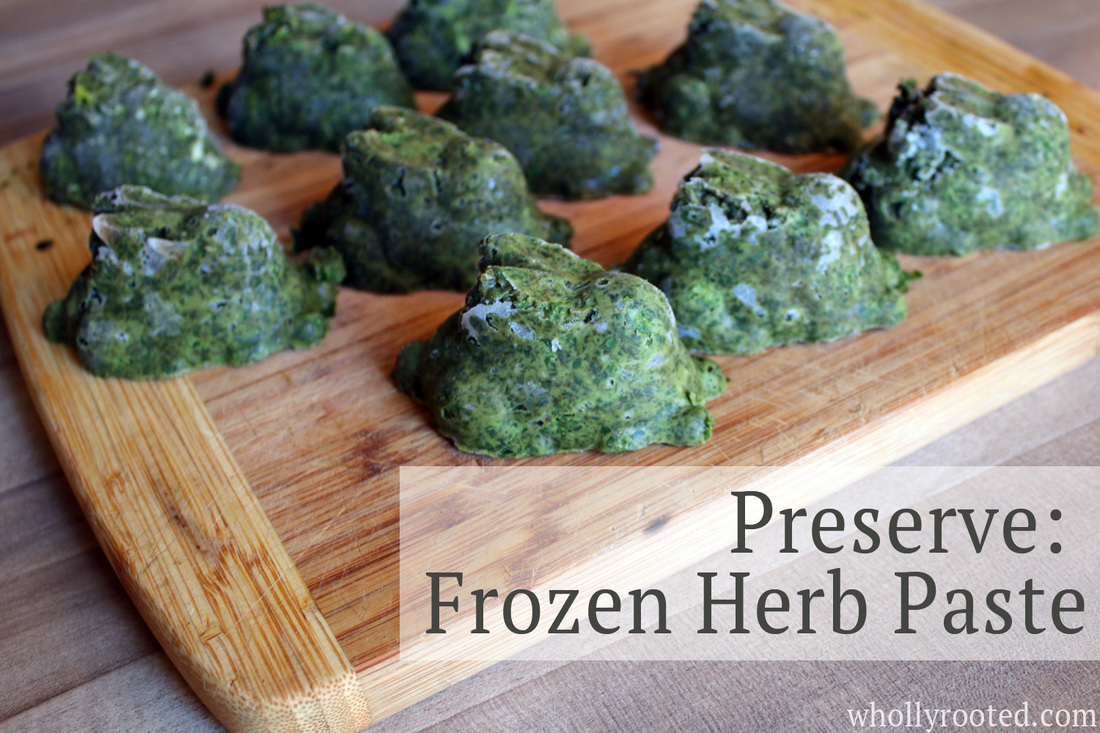
To freeze, take your paste and spoon it into ice cube trays or silicon molds and put into the freezer until frozen solid, and then pop the cubes into a freezer baggie until you need them. I like freezing in about 1/4 cup quantities as that makes it easier to only defrost what you need, rather than thawing out an entire jar. I like silicon molds because I can do bigger than an ice cube amounts. Mine are all in bunny shapes because while I have personally selected all of my herbs-only molds for my lotion bars and body bars, all of our food use silicon molds have been selected by my 11 year old, who only buys cute animal shapes. ;) So we have a whole bunch of basil bunnies in the freezer.
Fresh Herb PastePrint |
{wholly rooted}Freezing is a quick and easy way to preserve herbs for winter! {ingredients}
Measure 4 cups of packed fresh herbs (remove stems). 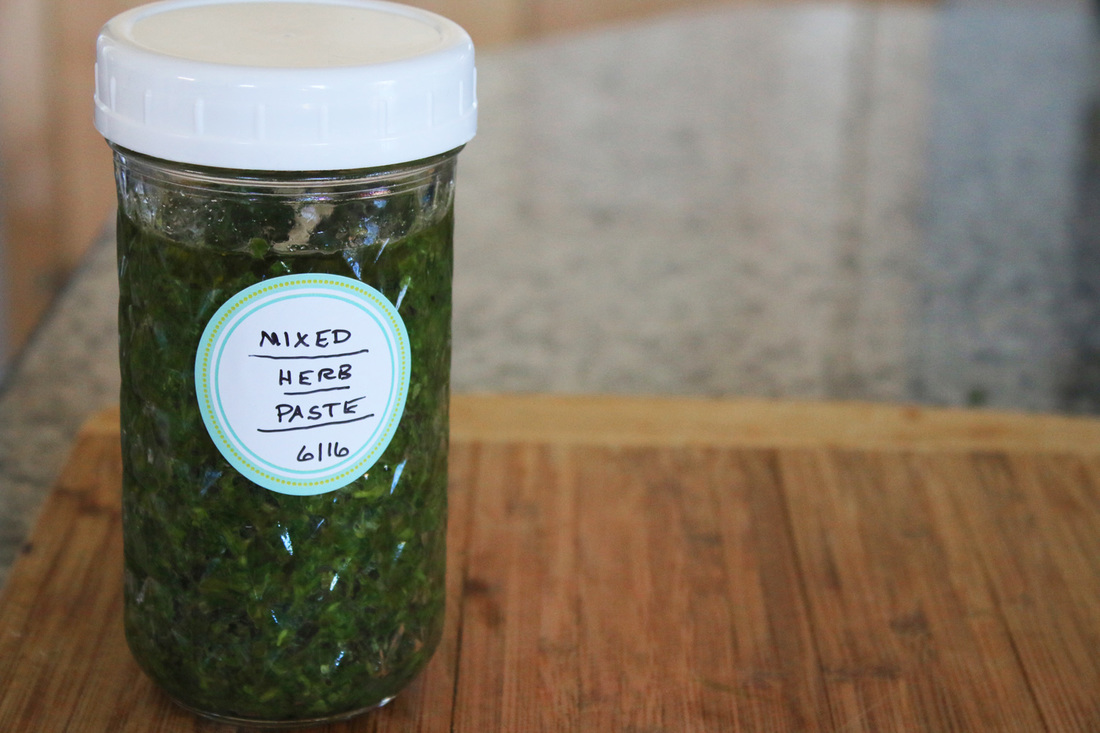
You can do this with mixed herbs as well, of course. I made several batches that included parsley, sage, basil, rosemary, thyme, and cilantro. It is the same recipe, just vary your herbs based on your supply! Try different combos - just be sure to label!
I love growing a lot of herbs, and I love preserving them too. Since our growing season in Wisconsin is fairly short, finding many different ways to preserve things so we feel like we have a wonderful variety the rest of the year is key. Looking for other ways to preserve your herbs? Try my veggie bouillon recipe - I love making a lot of this in the summer to use all winter long. SUCH an amazing flavor! 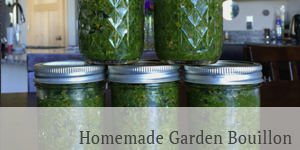
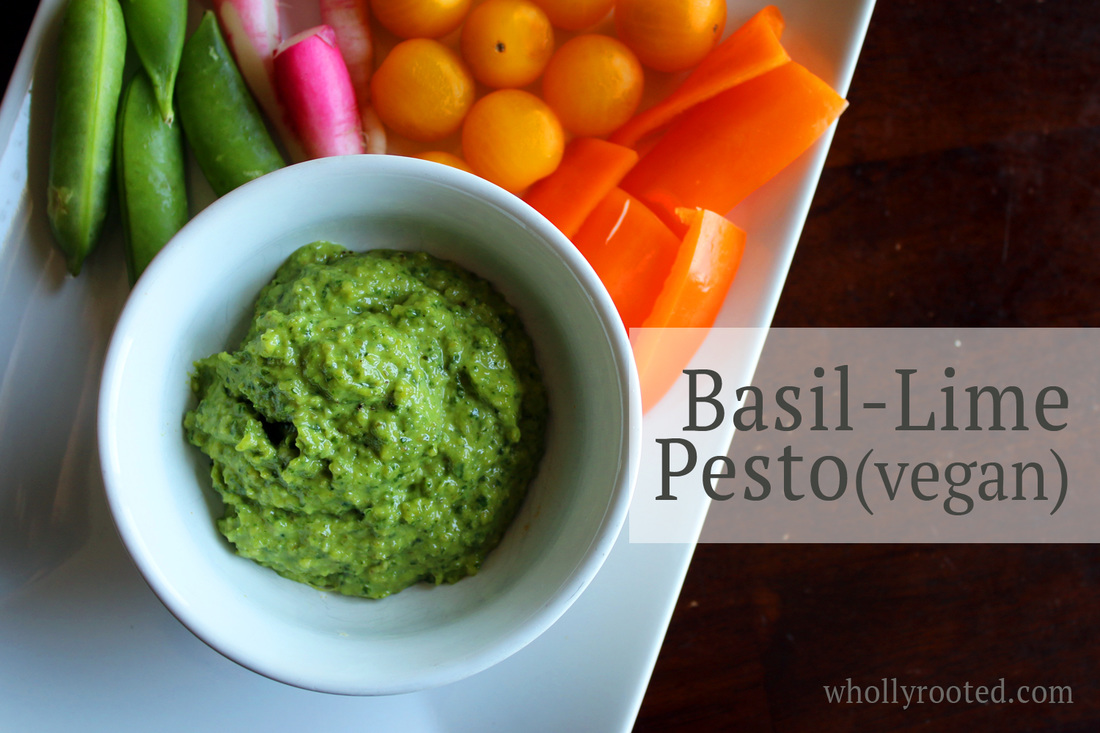
I love the beginning of CSA season. Spring arrives late in Wisconsin and it takes until June for the vegetables to really start rolling in, and it coincides with my burst of rapidly growing herbs which I planted a few weeks ago. Pesto is a favorite way to combine different flavors and use the herbs in abundance with all of the fresh vegetables. The key for me of course is the combining of different flavors. I like pesto, but we have a dairy allergy in the house AND I don't like drowning myself in mono-flavors. I love making different types of pesto so that there is fantastic variety not only for immediate consumption, but also enough to freeze/preserve for winter. This pesto is a favorite. I grow many types of basil, and no matter what type I have on hand, it works. This recipe is dairy free and combines fresh zesty flavors such as lime, ginger and garlic. I am also using cashews instead of pine nuts. Not only are they easier to find, but they are nutritious and I always have some on hand (I'm addicted to date/cashew truffles and cashew cream). You will be amazed at the flavor and want to make extra to freeze for winter! 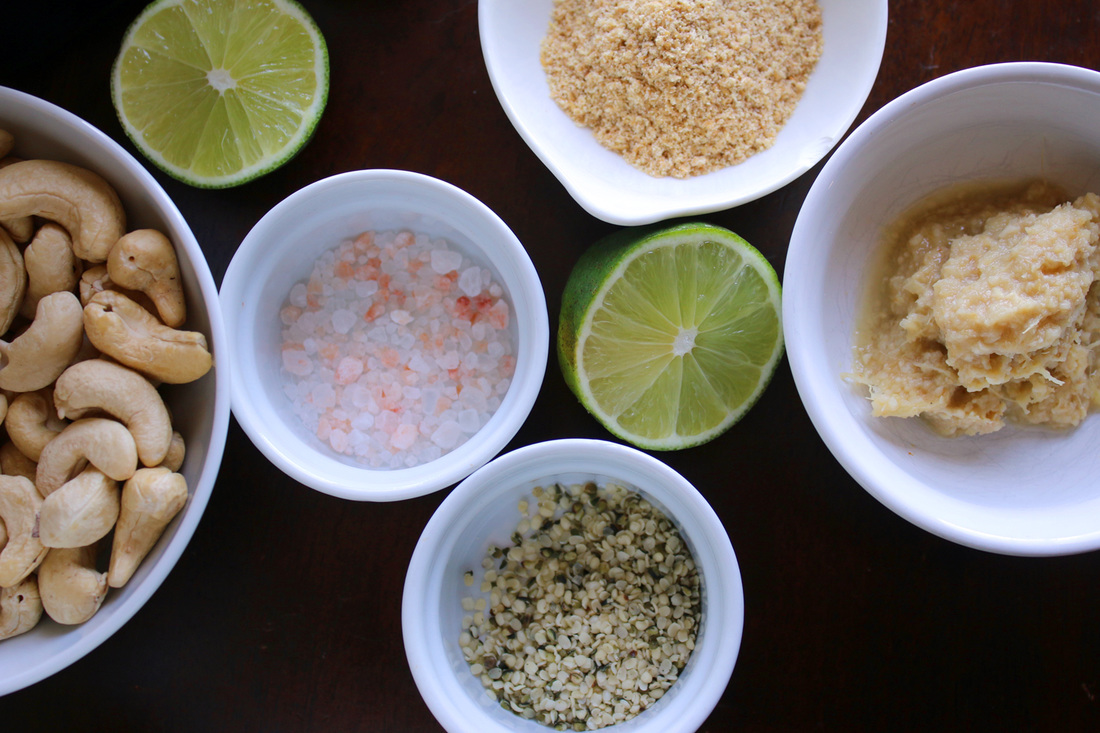
Basil-Lime PestoPrint |
{wholly rooted}There is nothing better than the taste of freshly homemade pesto with crudités, on grilled veggies, or over pasta. This version is vegan, and combines the amazing flavors of basil, lime, garlic, and ginger. The ground flax and hemp seeds make a great texture subsitute for the cheese -it is so good! GF/DF {ingredients}
First, using a food processor, pulse your raw cashews with the flax meal and hemp seeds until finely ground. 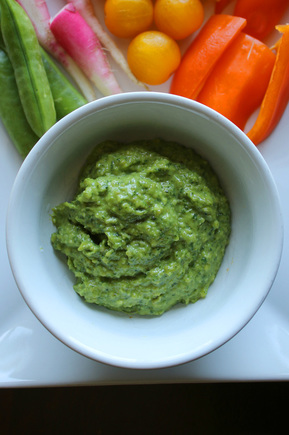
I made a single batch of this today, which will likely only last me a few days. So I am sure I will make some more as my genovese, persian, blue spice, thai, lemon, lime, lettuce leaf, and emily basils grow, grow, grow! bonus: This recipe is delicious and easy to prepare, but also packed full of good vitamins, minerals, healthy fats, fiber, and protein. Yum+. Cashews Garlic & Ginger Basil Lime 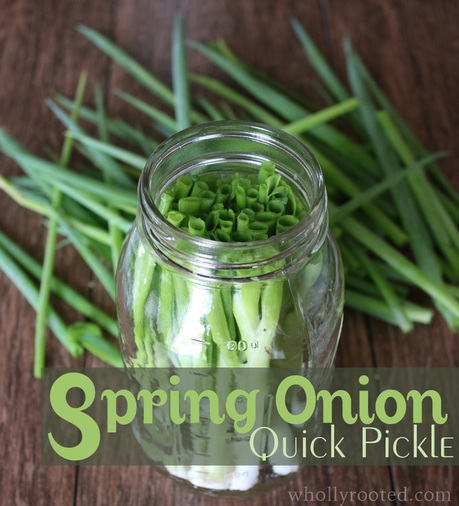
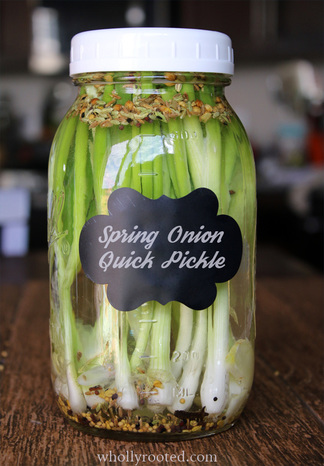
I like quick pickles. I don't have a ton of time to make dozens of jars of the same thing endlessly, and quite honestly I get bored with flavors and really like mixing it up, using what is fresh on hand, and having small batches of a variety of quick pickles to liven up meals, crudités, salads, and of course for snacks. At any given moment year-round I have a few jars of something in my fridge. Right now I have pickled cucumbers and garlic in a slightly sweet brine, and pickled daikon which are amazingly peppery and crunchy. Spring onions are one of the first things in spring that we can find here in Wisconsin, and I like pickling them so that I can spread them out throughout the summer. I like the small green brilliance of their flavor in a pickle and they work on salads, burgers, or with a plate of hummus and tomatoes. 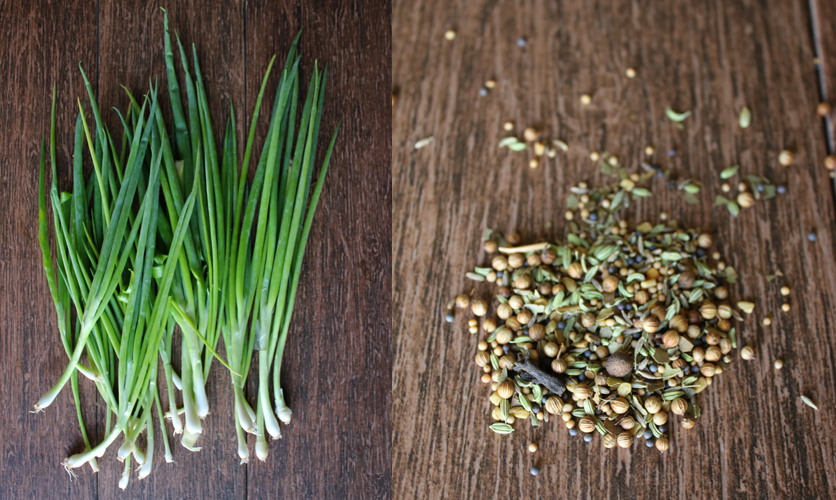
Spring Onion Quick PicklePrint |
{wholly rooted}Quick pickles are a delicious way to use the bounty of the season to create a variety of flavours and textures. This recipe uses one of the gardens earliest arrivals – spring onions, or scallions. {ingredients}
Heat water/vinegar/sugar/salt/garlic in a pot until dissolved. Let cool to room temp.
Or try this: Add some additional zesty flavor by reducing the white vinegar in the recipe above to 1 cup and add 1/2 cup umeboshi plum vinegar.
Another bonus of having a fresh pickling brine is when all of your salad greens start coming in full blast you not only have some pickled scallions to put on your salad, but you have a tasty brine to use for salad dressings. Simply mix a little pickle brine with extra virgin olive oil, s&p, and a tiny bit of grainy mustard. Stir and boom. Delicious dressing.
I know most of us have the image of a farm woman in her hot kitchen with 422 pounds of one kind of cucumber frantically pickling and canning until 3AM. But these days we can get such a wide variety of seeds and can easily grow such a diversity of herbs, fruit, and vegetables, that we don't need to mono-pickle. Small batch pickling is a quick, easy, and delicious way to preserve the extras, the favorites, and the flavors of the season! Spring comes so slowly after a long winter, but jumping back into the garden and kitchen to start preserving again feels good. After a long winter it feels pretty much like a big TA-DAAAAA! 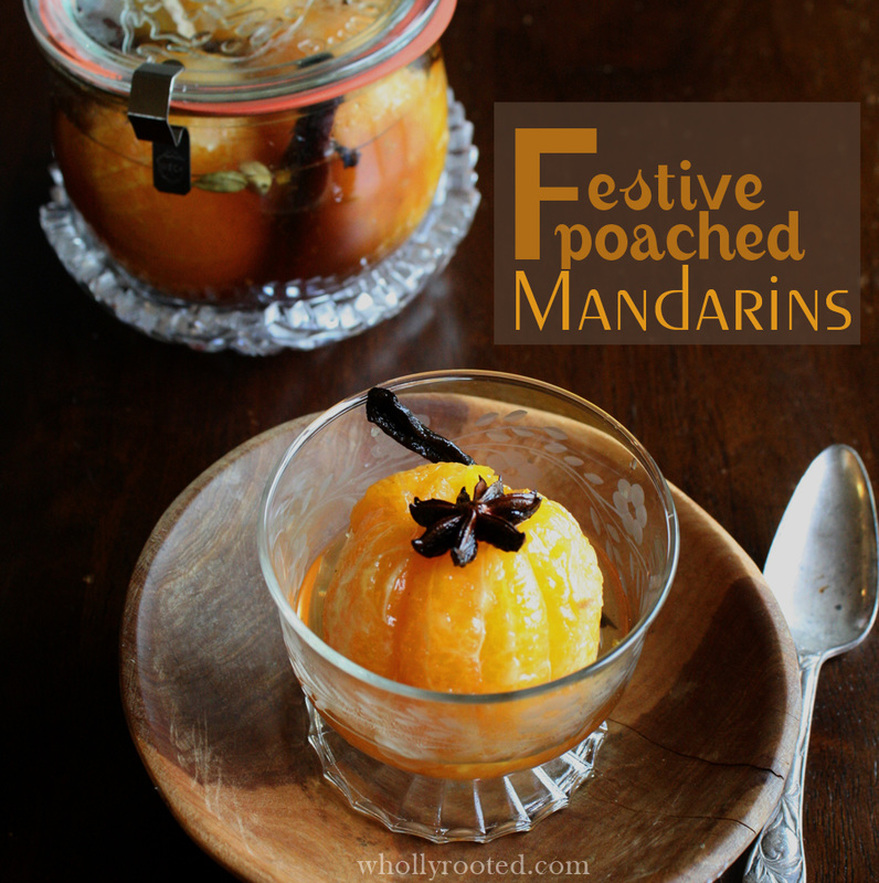
Most of us are not lucky enough to live where citrus grows locally. And while eating close to the source is ideal, in this day and age not everything we consume will be from the corner farm. Salt, pepper, olive oil, coffee, tea…we can make conscious decisions to support fair trade and organic for as much as we can, while still working towards finding local for those things which are available. So for me, citrus is a part of our winter and holiday experience, no matter our climate. I love that sharp blast of citrus as my fingers break the peel on these dark, gloomy days of winter. Citrus in winter is like the sun - fleeting, delicious, and memorable. One way to balance our distance with citrus is to use everything. Waste nothing. When we find it in season in the winter, use it all, enjoy it all. We use the peels and candy them, make garland, and dry for tea blends. This recipe is simple to make, but quite a show stopper dessert. It is made in a spiced, fragrant syrup, but it isn't overly sweet. It is nice because it can be made ahead and stored in the fridge for a day or so before serving, so it is perfect for the holiday table. 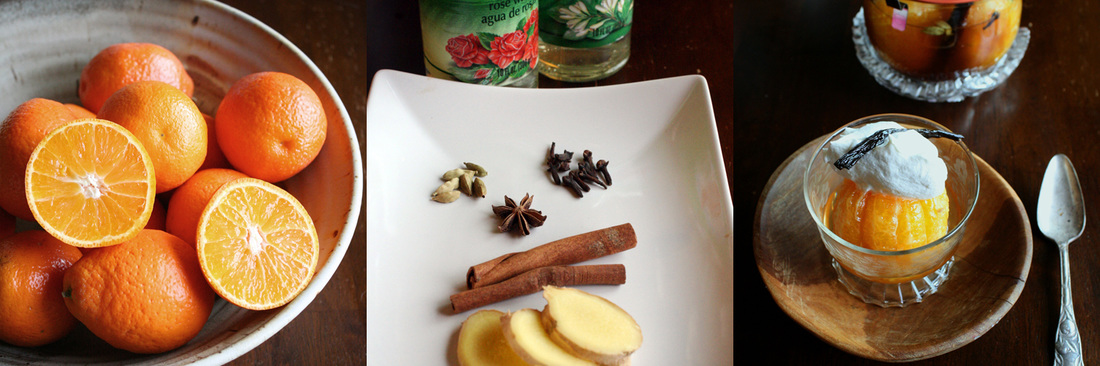
Poached MandarinsPrint |
{wholly rooted}Poached mandarins have a delicate flavour and add a great flair to the end of a holiday meal. This is simple to make, and tastes great. And don't forget to save the rind to make candied or dried citrus peel. {ingredients}
First prep your citrus; gently cut off the ends, peel the citrus whole, and remove any extra pith. Citrus is a winter treat, to be enjoyed on these dark winter days. We boost our mood as well as our vitamins (A, B-6, C, folate), fiber, and minerals (potassium, calcium, iron). By using the whole fruit, we don’t waste a thing, and get the most from these sunny, fragrant orbs. Yum. 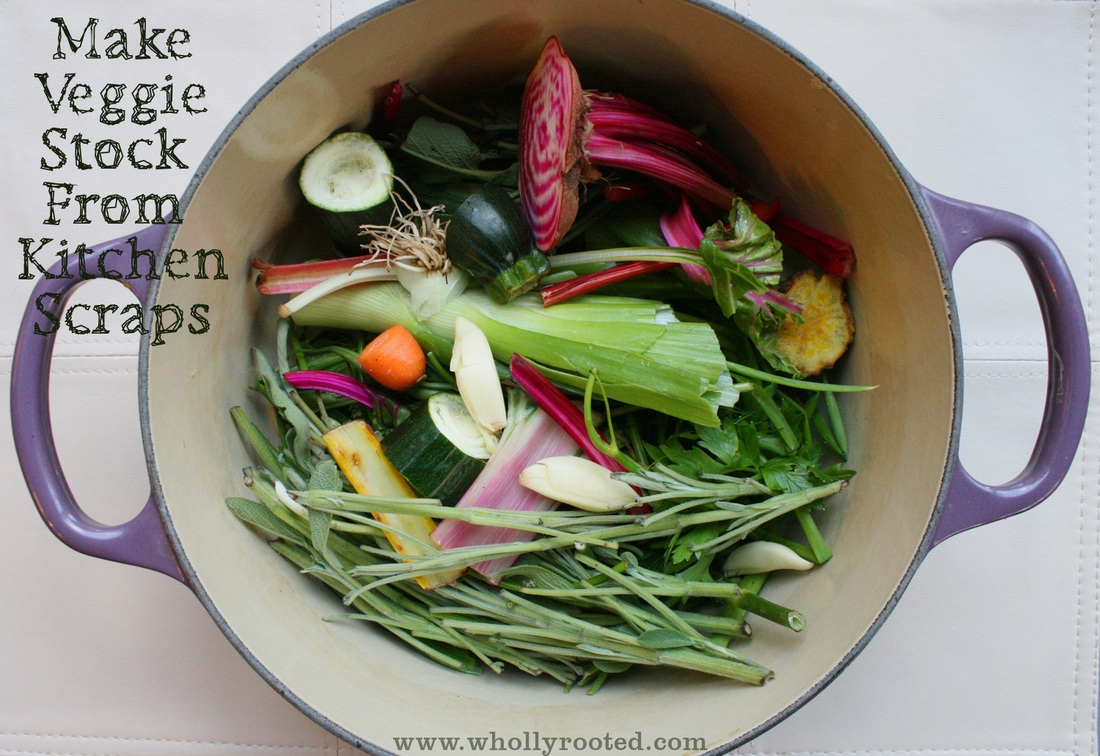 This is the time of year when we all have a lot of veggie scraps. Peels, ends, stems, and stalks. Before you compost those perfectly fresh scraps, think about making fresh veggie stock. It is a great way to use all of the healthy fresh ends and peels and pieces. The stock can then be used for making everything from soups and stews to casseroles or even used as the pasta/rice/grains water. By using scaps, you are saving a lot of usable food from the garbage bin or compost pile and turning it into liquid nutrients for the whole family. The easiest way to make fresh vegetable stock is to save all of your kitchen scraps as you meal prep throughout the week and store them in a jar or bag in the fridge until you are ready to use (or the freezer if not using within a few days). I tend to prep all of our CSA box on Wednesdays along with community garden picks from Tuesday, so that everything is ready to use for the rest of the week. I can easily fill a whole pot with stems, peels, and ends every Wednesday from June to November. Veggies that are good for stock making include onion ends, scallion bits, carrot skins and tops, celery bottoms, beet greens, pea pods, swiss chard stalks, green bean tips, zucchini peels and ends, and all stems from herbs like parsley, thyme, sage, savory, rosemary, or basil. Skip the stronger cruciferous veggies, as they can add an unpleasant aroma to stock (cabbage, broccoli, cauliflower, brussel sprouts). I use kale stems just fine though. The key is to use fresh scraps - nothing bad or moldy - your stock will taste like what you put in it. 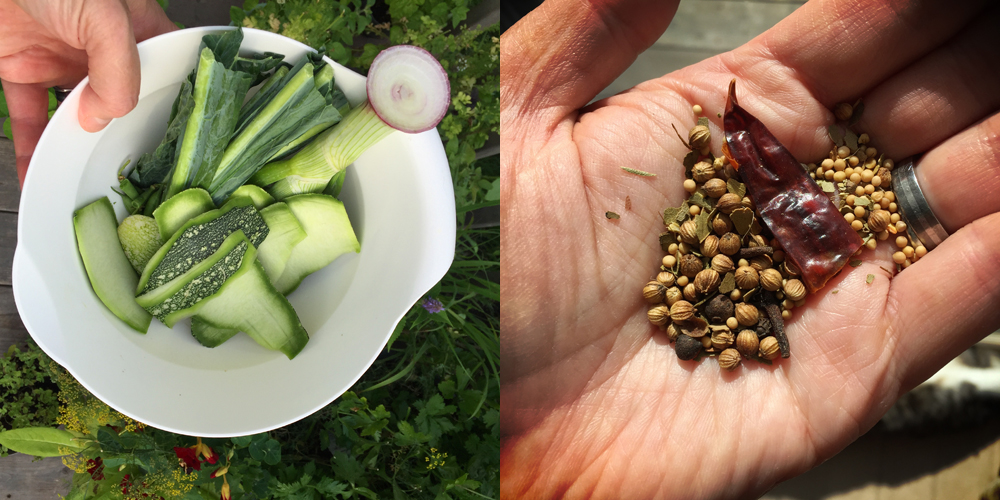 So fill a 3-4 quart stockpot with your leftover veggies and herbs. Add a bay leaf or two, a few peppercorns, a teaspoon or so of pickling spices (coriander, cumin, dill, clove), and 2-3 cloves of garlic. I also like a little dried chili pepper. If you have a lot of only one type of veggie, add a carrot, a stalk or two of celery, and an onion. Fill with enough water to cover the veggies/herbs (don't worry if you have a few stalks sticking out, it will cook down). Bring just to a gentle simmer on medium (not a hard boil), reduce heat, and simmer on low for 1-2 hours. Strain all of the stock to remove vegetables, herbs, and spices. Pour the liquid into sterilized canning jars or freezer jars. Let them cool to room temperature first, and then freeze immediately or store in the fridge if you will be using within a week or two. Makes approximately 2 quarts/2 litres. 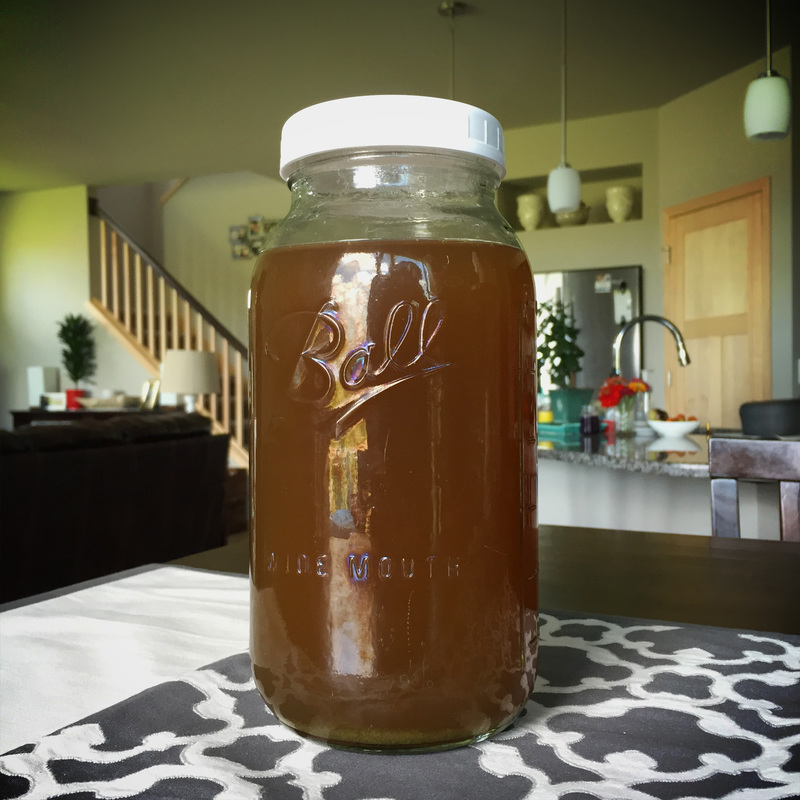 Of course you can save chicken bones and make chicken stock too. I find that with all of the garden and CSA bounty my husband and I eat a lot of vegan meals in the summer. The boys have a lot of poultry since there are mammal meat and dairy allergies in the house, but there is only so much bird a girl can take (and I love summer bounty!). So for me, having fresh vegetable stock which can be used for cooking anything and everything is so convenient and really adds great flavor to everything. This veggie stock + the vegetable bouillon I make is a great base staple for just about any recipe. So don't toss the scraps! Make veggie stock! 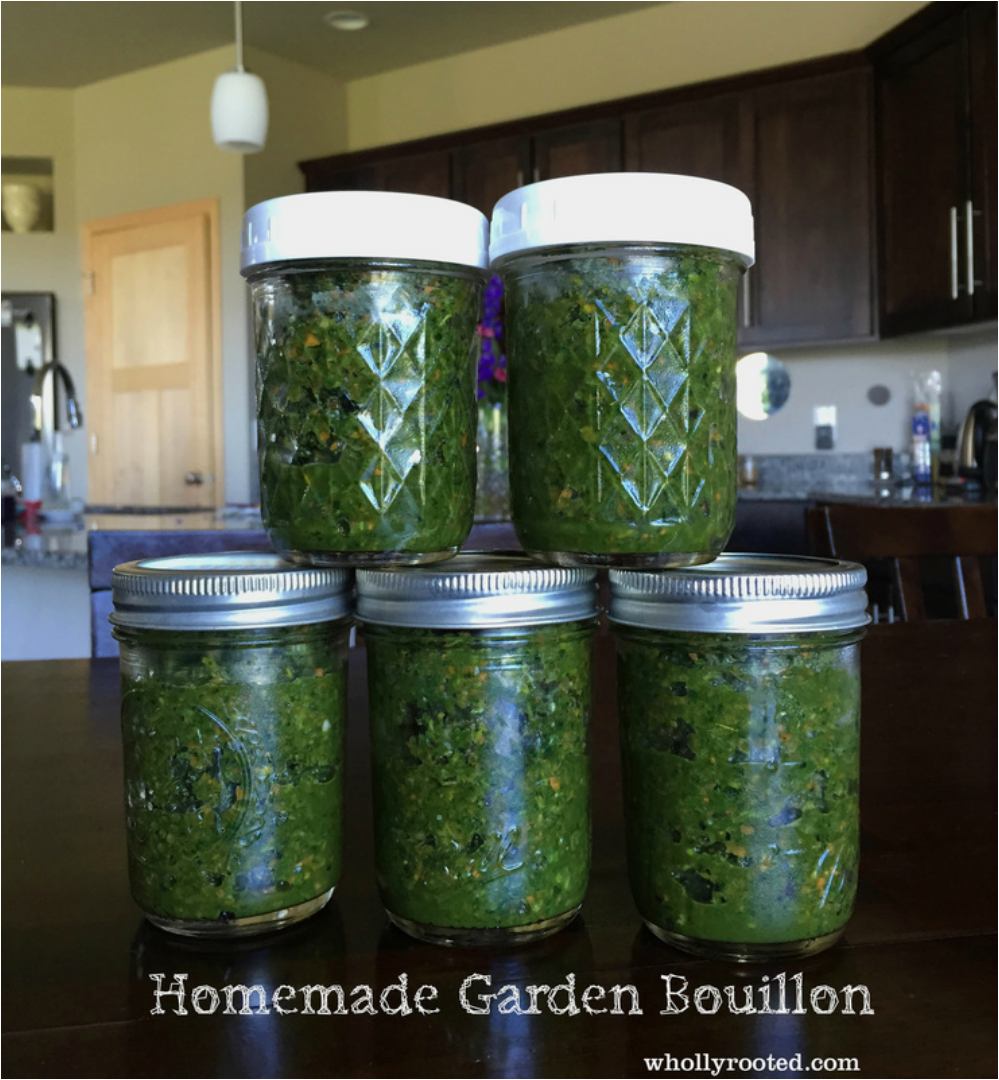
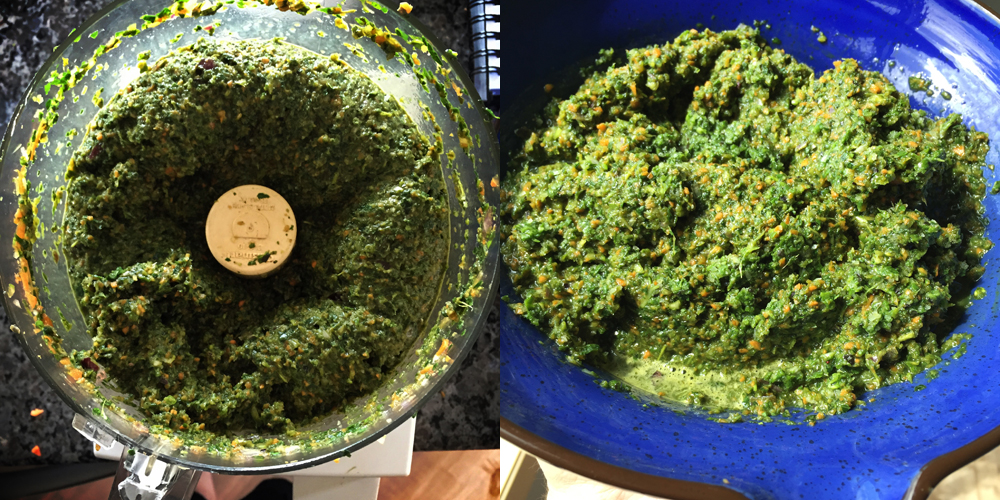
Long ago I found a recipe for bouillon in the River Cottage Preserves Handbook. A lightbulb went off, and I have been making my own version of veggie bouillon ever since. By blending all of the freshest herbs and vegetables in peak summer and preserving them with salt, you save that crisp fresh flavor which is fantastic in winter when making soups and stews. When you think of bouillon you probably imagine a hard dry cube - but this is more of a thick paste. You use it like you use a cube though, by stirring a spoonful into your recipe when making soups, broth, stews, or even pasta. This is very salty as bouillon should be, and the salt is what preserves the green vibrant flavors – a little goes a long way. I call my version garden bouillon because I use many things found in my garden. I like to make several batches over the summer so that I have enough to last all winter. Keep a jar in the fridge for using now, and freeze the rest. This has a high level of salt so it will never freeze quite solid, so you can still spoon out some even fresh from the freezer. I like to freeze in 1 cup jars so that I can pull one out at a time throughout the year. A food processor is the best tool for the job. 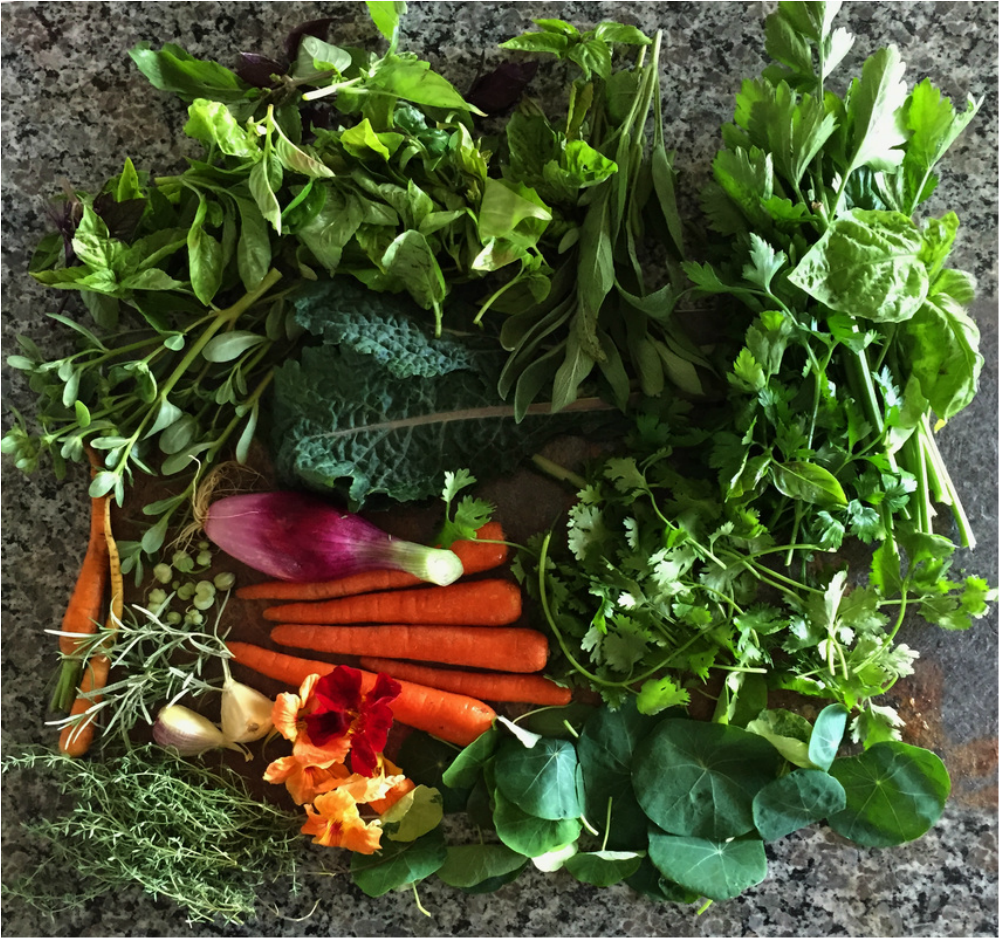
Homemade Garden BouillonPrint |
{wholly rooted}The nice thing about homemade bouillon is that you use what YOU have in your garden. Just think about what flavors go well together. I love adding extras like kale, purslane, nasturtiums (leaves, flowers, capers), coriander heads going to seed, celery root, leeks, and anything else in season at the time that adds a nice punch of flavor plus lots of great vitamins and minerals. I always start with the base aromatics of onion, garlic, carrot, and celery, and then add additional flavors from there. So make your own combo - the main thing to remember is to have a 4:1 ratio of herb/veggies to salt. So for every 400 grams of herbs/veggies/flowers, use approximately 100 grams of good quality sea salt. {ingredients}
This is approximately 780+/- grams of veg/herb, so I blended in just under 200 grams of good quality celtic sea salt. I will make a few more batches as the summer goes along, using what I have fresh and in season. This is a great way to preserve the fresh, vibrant summer flavors, to use long into the winter! |

denise cusackI am a certified aromatherapist, clinical herbalist, permaculture designer, organic gardener, plant conservationist, photographer, writer, designer, artist, nature lover, health justice activist, whole foods maker, and mother of two young adults in south central Wisconsin. 


Categories
All
©2007-23 Denise Cusack, all photos and text. Feel free to share my posts on FB or Twitter or online media or pin on Pinterest (thank you!), but please keep the links back to my website intact (meaning please do not take or copy my images off of this website and share them unattributed or without linking back here or use them without permission). Thank you! :)
|

 RSS Feed